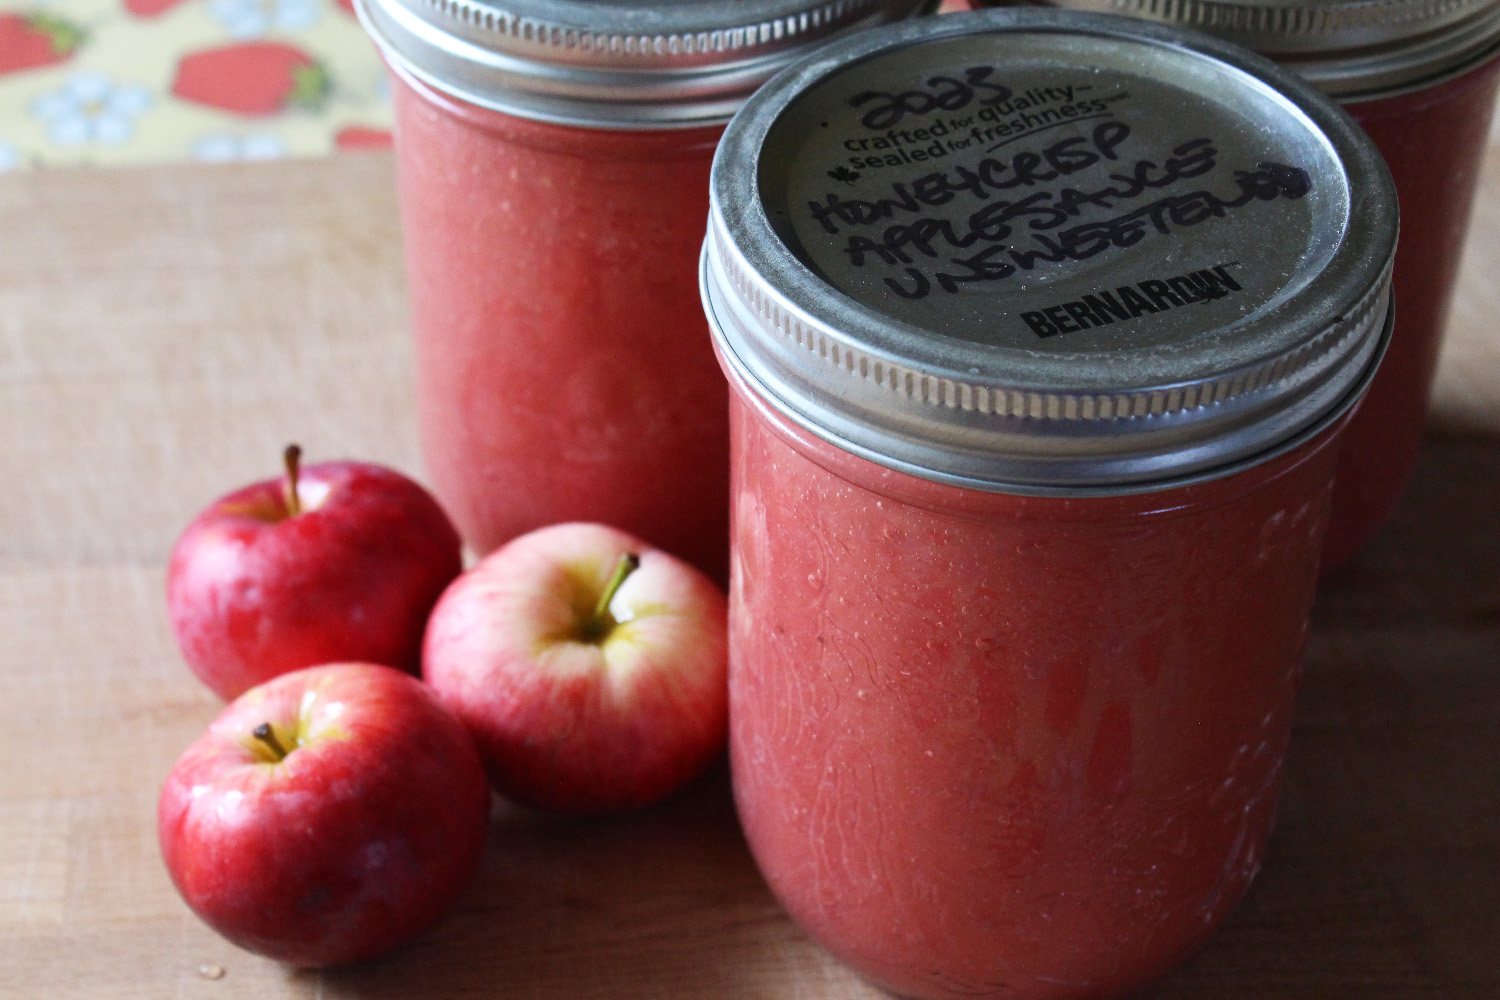

This weekend, I started experimenting with canning with glass lids on my Gem jars.
In Canada, especially Western Canada, we have a unique size of canning jar, with a 78mm mouth. They were produced up until the late 1990’s or early 2000’s, and were sold under a variety of brand names, including Gem, Jewel, and Crown. Originally, these jars used a glass lid, with a rubber gasket underneath to allow a seal to form; however, when the metal lids became available, most home canners switched over to those. This blog has an interesting article on the history of 78mm mouth jars and lids in Canada.
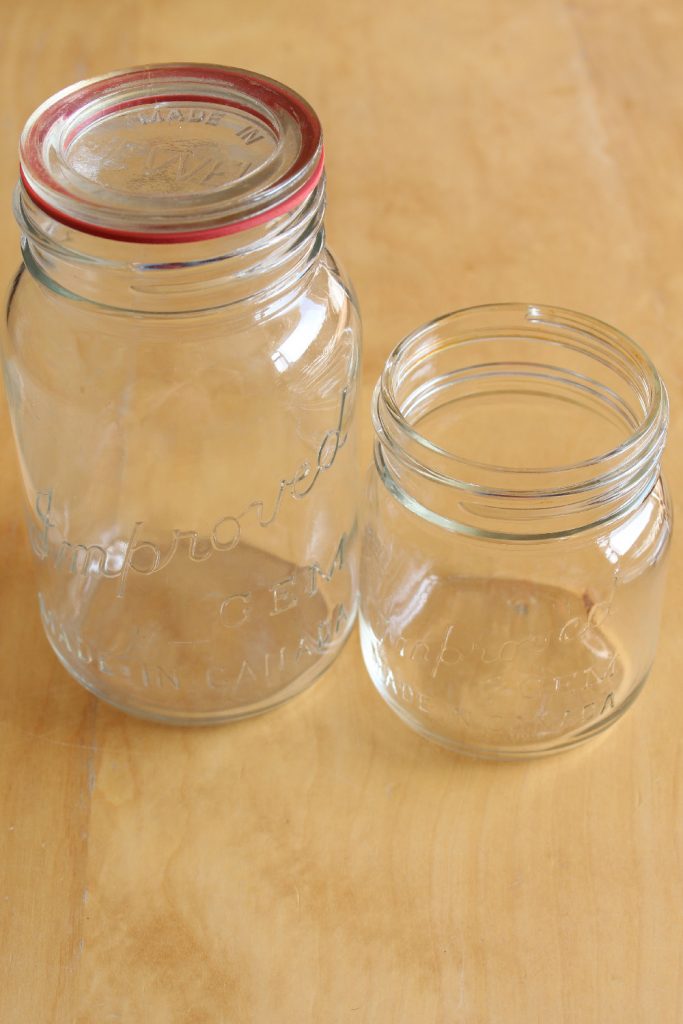
I have a sizeable collection of Gem and Jewel jars. Some were inherited from family members, and others I acquired from yard sales. Even though the jars were discontinued before I ever started canning, I preferred them, because the 78mm mouth is a nice size for peach and pear halves, and the jars themselves have a bit of a shoulder that helps to keep canned fruit under the liquid. Plus, I could get them for a couple dollars a dozen at the yard sales, and I’m cheap. Up until this spring, you could still get new lids and bands for the 78mm mouth size in a variety of local stores, so I was happy to keep using them.
Unfortunately, Bernardin, the last lid manufacturer in Canada, discontinued the lids in the spring of 2022. They tried to discontinue these lids once before, in the early 2000’s, but there was such an outcry that they relented, and continued making them for another 20 years! However, it doesn’t look like they are going to change their minds this time. I got more than a little panicky about this, and asked my friends across the country to scour stores for the last remaining lids. I have a few years’ worth of lids, now, and plenty of bands, so I’m good for a little while, but with the price of canning jars right now, I was dreading the cost of trying to replace my dozens (hundreds?) of Gem jars with modern wide-mouth jars between now and when my lid stash runs out.
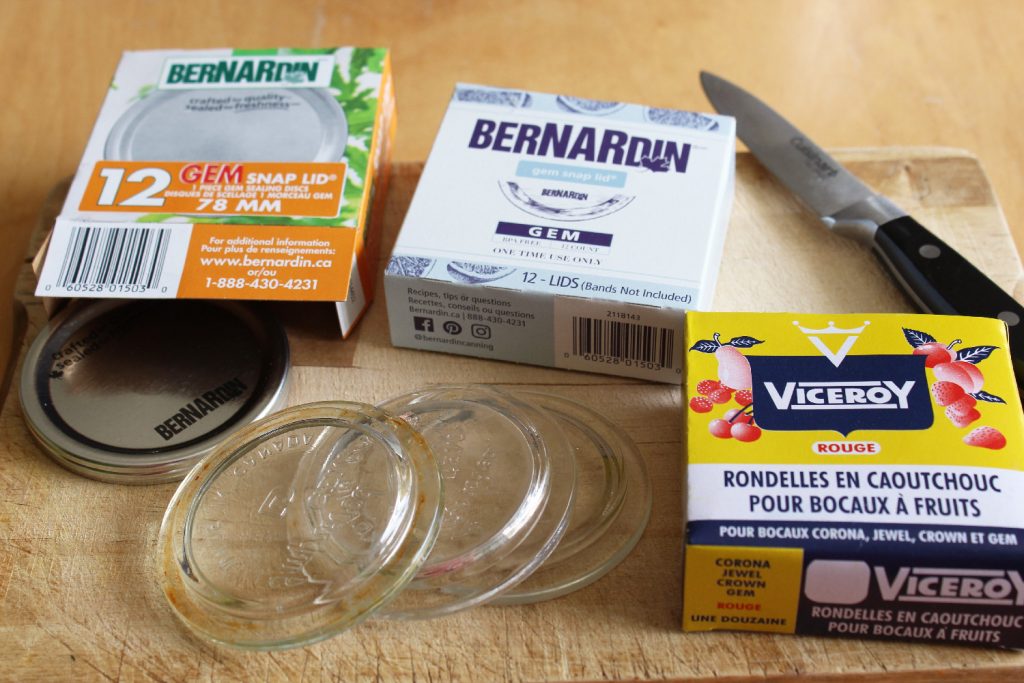
I was cleaning in my basement late this summer, and came across a box that had been shoved in a dark corner since we moved here. In the box…surprise! A huge collection of the old glass Gem lids, with a big stack of the old deep zinc bands that were made to accommodate them! My mother-in-law had saved her glass lids when she switched over to metal ones, and must have given me her collection just before we moved.
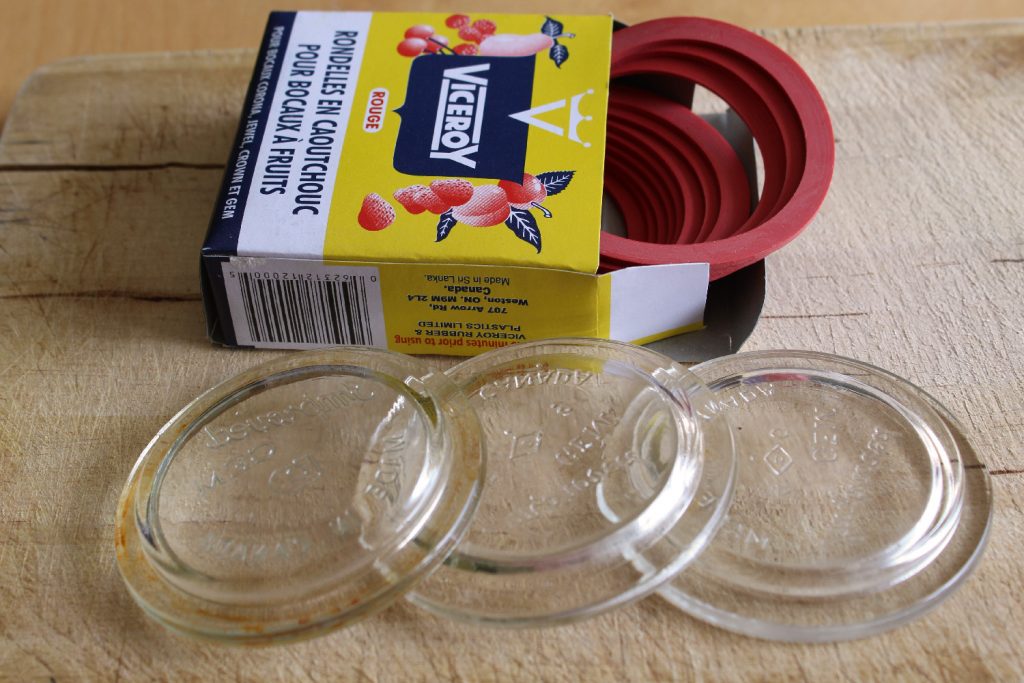
This prompted me to do a little googling, to see if I could still get the rubber gaskets for these lids, and wouldn’t you know it, but Canadian Tire still carries them! I have also seen them at our local Co-op Grocery store and at Peavey Mart. They are sold under the brand name Viceroy, and are not at all expensive, so I’m planning on buying a bunch. From my internet research and from speaking with my mother-in-law, the gaskets can be re-used for years, until they get stretched or until they start cracking, which is also handy. Financially, using a $2 box of gaskets for several years is way better than replacing a $6 box of metal lids annually, so that’s another bonus to the glass lids.
Having gotten my hands on all the necessary parts, I decided to try canning with glass lids this weekend. Anecdotally, a number of my friends have reported that they have more seal failures with their Tattler reusable lids, so I thought I might run into that with the glass ones, too. I was doing a second batch of pickled plums yesterday, mostly because I needed to use up the plums, so a few seal failures wouldn’t be a disaster. Worst-case scenario, we could throw the jars in the fridge and turn the kids loose on them. Plus, with pickles, if I have a seal failure later, I’m less likely to end up with a fizzy, fuzzy mess in the pantry.
I found a couple of resources for using the glass lids – this youtube video shows you the process, and this blogger also goes through it, step-by-step, an a three-part series. Interestingly, the blog post noted that the modern bands can be used with the glass lids, which I did not know. I was a little dubious, since there is a substantial difference in the depths of the two styles of ring, but what the heck – I decided to experiment with that, too.
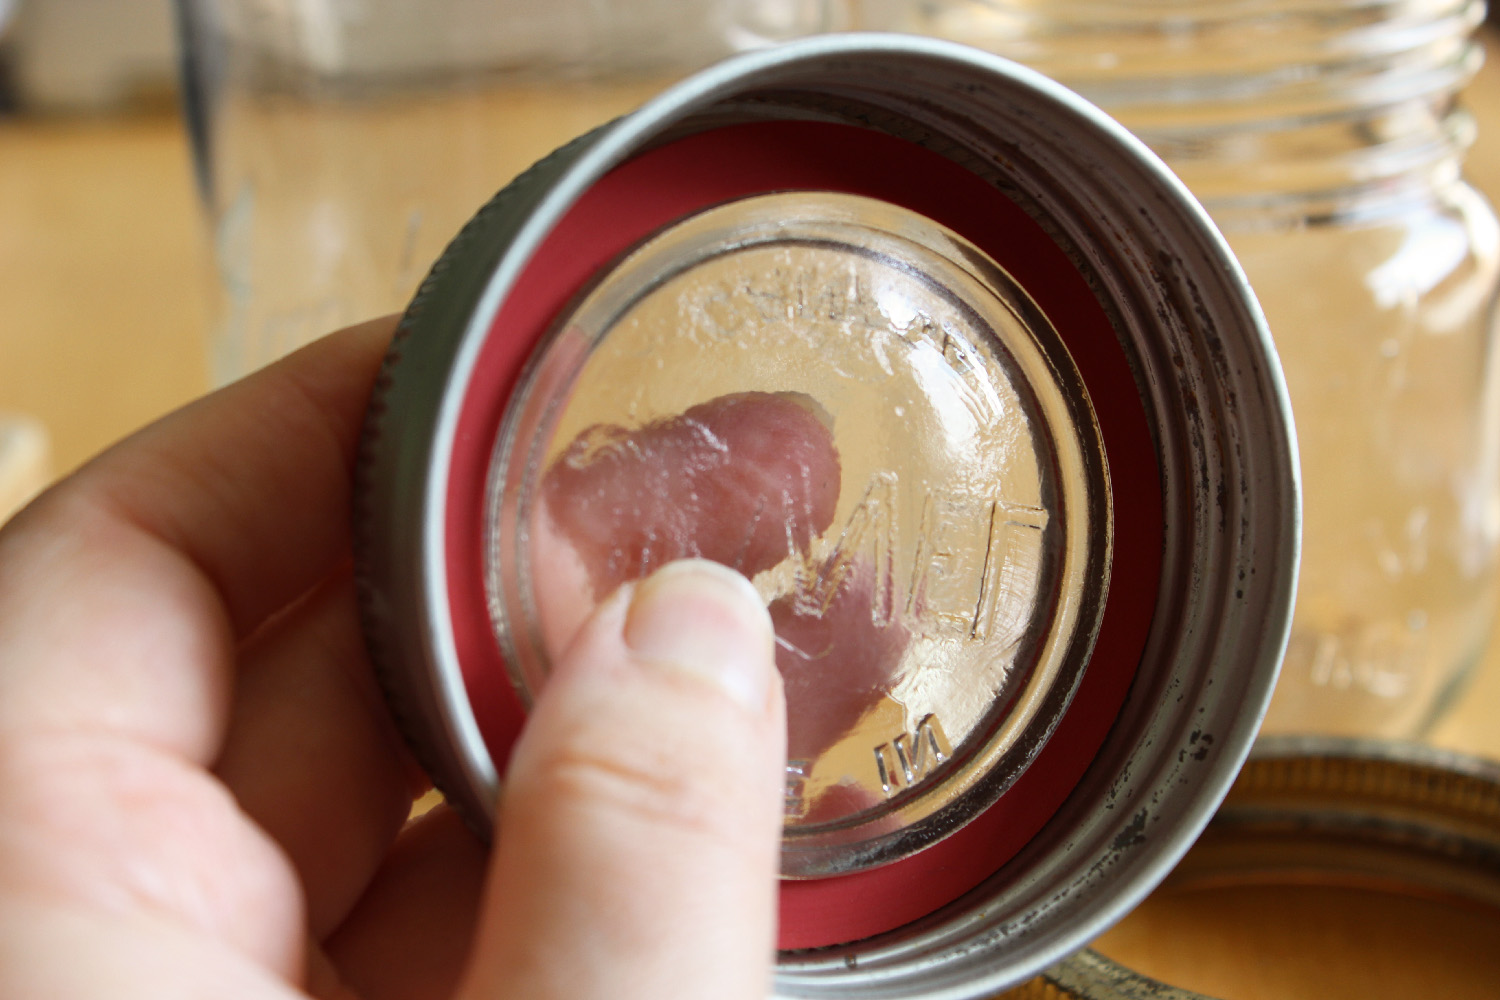
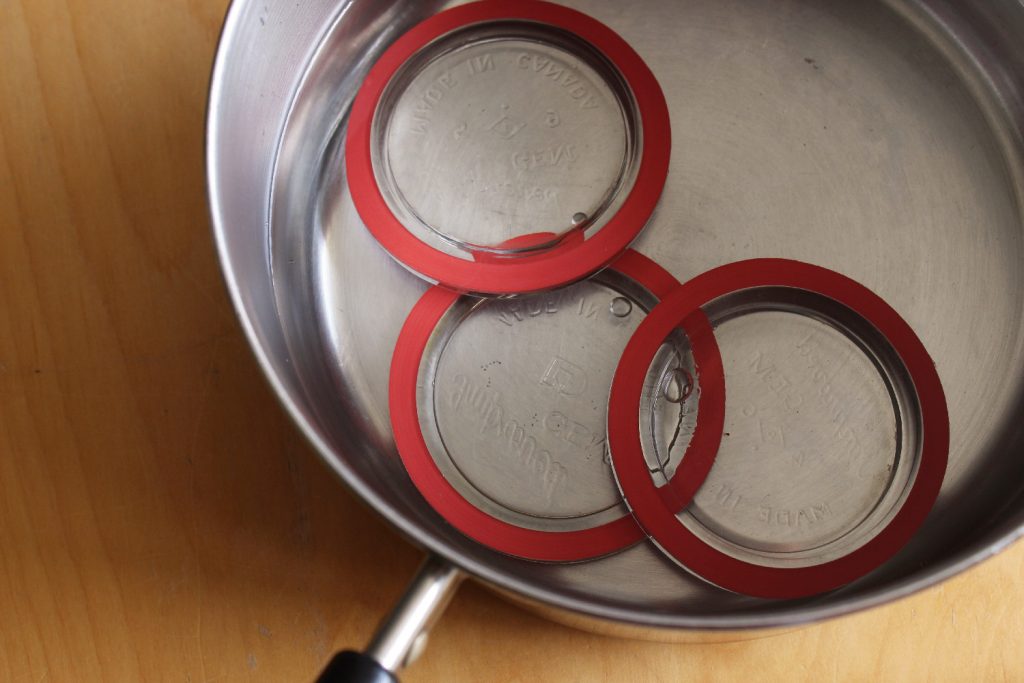
What I did was scrub the glass lids very thoroughly with a toothbrush to get off any dust or goo, then put a rubber ring on each lid. I found that the rubber rings seem to have a ‘right way’; if one was fighting and not staying on well, flipping it over seemed to solve the problem. Then I put the lids, with the gaskets, into a pot, which I simmered on the stove while I made the brine for the pickles. It seems that the recommendation is to boil them for at least ten minutes; mine probably simmered for closer to half an hour, and that did not seem to cause any issues. I used kitchen tongs to grab the lid/gasket sets out of the boiling water and put them on the jars, which worked great.
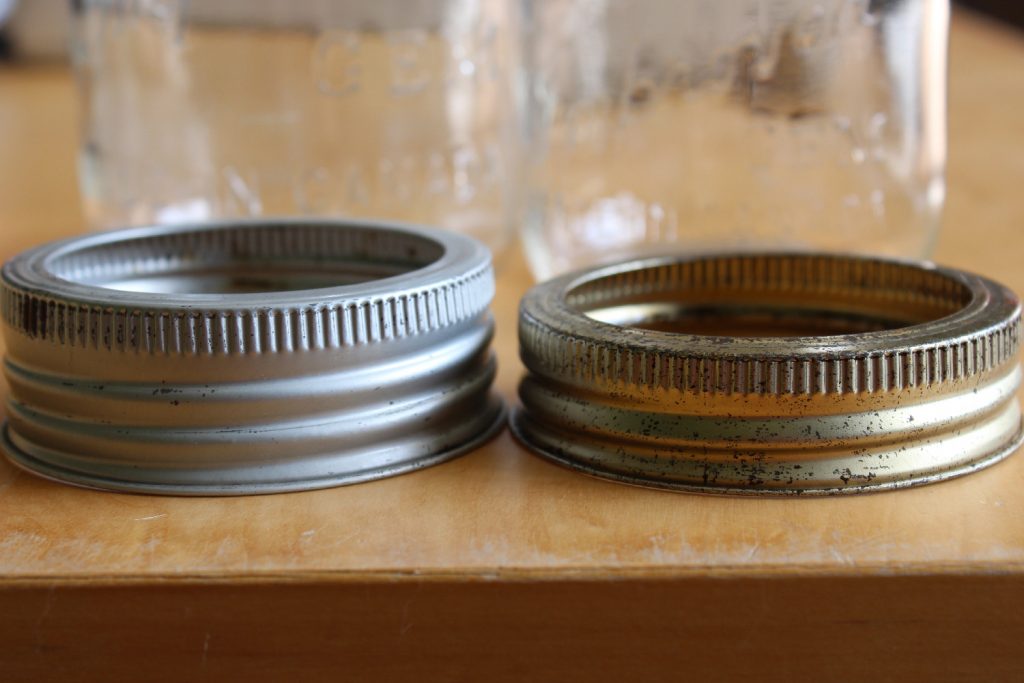
I filled my jars a bit less than I otherwise might; with raw pack fruit, I usually do that anyhow. When I put on the rings, I didn’t crank them down tight; I put them on snugly, then backed them off just a tiny bit. I got that from the recommendations for how to use Tattler reusable lids, and it seemed like a good idea. For my canner load of 7 pints, I used the old deep bands for 4 of my jars, and the modern shallow bands for the other 3. When the processing time was done, I turned off the burner and let the jars rest for 5 minutes in the canner. I haven’t seen this recommended anywhere, but I find it reduces siphoning, and it doesn’t seem to affect how the jars seal. Then, I took the jars out and tightened the bands down as much as I could. The shallow rings actually felt easier to tighten than the deep rings, which is interesting.
I was so excited to check my jars that it was hard to leave them on the counter and go to bed without fiddling with them. This morning, though, I went and took off those bands first thing, before I even had coffee! I took off each band, poked each lid a bit to see if it would move, then picked up each jar by the lid. I didn’t lift them far off the counter, less than an inch, but enough that the lid was taking the full weight of the jar. If it didn’t seal, or formed a weak seal, the lid would pop off, so don’t lift too far, or you could have a mess on your hands! My mother-in-law mentioned that her mom would also flip the jars over and watch for bubbles sucking into the jar, which would also suggest a seal failure, so I tried that, too, but I kept a couple of fingers over the lid so that the contents wouldn’t pour out if the seal was bad.
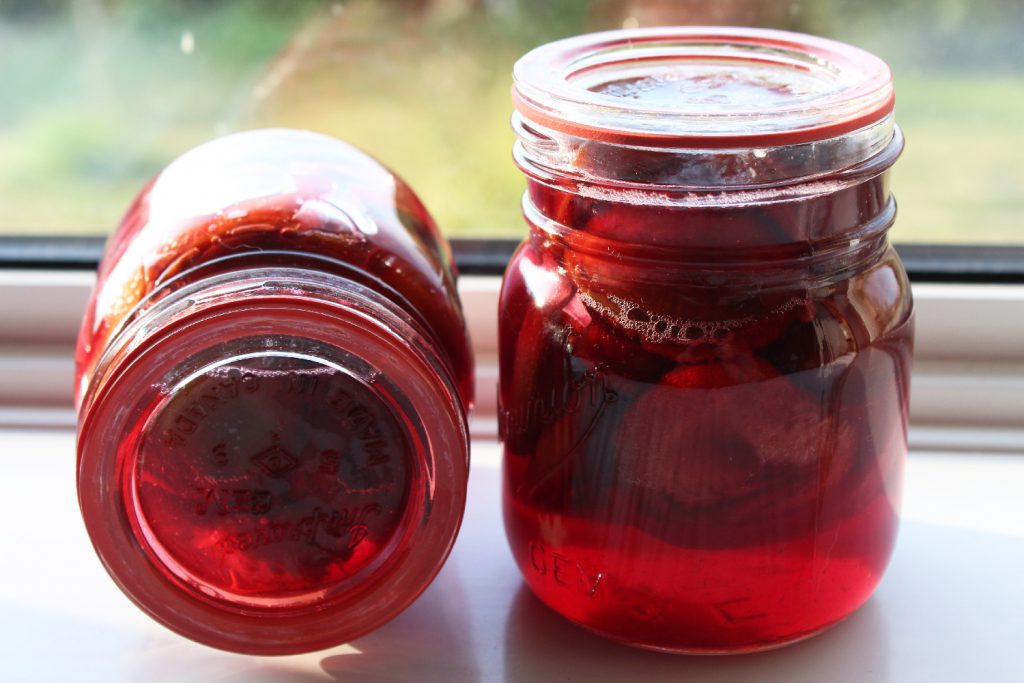
Success! All seven jars sealed!
Seven jars is too small a sample size to tell if I will have the same failure rate with glass lids that I do with metal ones, which is usually about 1 jar failing to seal out of every 2-3 canner loads. I’d even be okay with a seal failure in every 1-2 canner loads, as I usually want to sample things anyhow, and we have plenty of fridge space. I also don’t know if the seals will hold as well or as long as they do with the metal lids, so I guess I will have to report back in a year or so, but for now, I’m happy to have a way to keep using my Gem jars.
28 Comments
Emily
How do you open the jars?? I tried canning In glass bail-top jars and cant get them open!
Jess
That’s a darn good question – I have not tried to open any of these jars yet! The recommendation is to carefully ease the edge of a butter knife between the top of the gasket and the bottom of the glass lit, then lever them apart; that’s what I plan to do with it, but I can’t say how safe/easy/effective that will be, since I have not tried it yet.
Sheryl
The bail type should have a tab on the rubber to just pull like the WECK I got new ones off AMAZON.
Using a knife cracks the lid. I saw a YouTube video of someone using the American glass lids with weck seals and using needle nose pliers to pull the seal out. Otherwise I saw where someone in a canning group makes a tool for the metal ones I think they should make another for the glass lids
lesley
i pop my lids with the table knife all the time, .. works fine, just take your time
Sheryl
The bail type should have a tab on the rubber to just pull like the WECK I got new ones off Amazon
SHELLY
If you slide a table knife between the ruber ring and the glass seal, tilt or twist it down just a bit (against the rubber ring) it will make that whoosh sound (that we all love) and the glass lid will pop right offf.
Leanne
Break the seal with a butter knife inserted carefully and pry gently.
CATHY
Thanks for the really good description & PHOTOs. As a home economist trained ‘years ago’, you have made a couple of minor comments that we were cautioned not to do (ie” reuse of rubber bands, but perhaps that was more an imaginary fear than actual, and also, to watch that sealer bands do not stretch over time – which can happen. Those bands should be destroyed as one cannot be assured of a good seal if the ring does not cover as firmly as it was initially designed.) We were taught to let containers remain untouched for 24 hours before testing (esp. an overnight-only cooling period may not be enough to ensure an adequate seal time esp. if the kitchen and temp. are warm. I like(d) using metal rings as they were simple and a good seal was assured, but also, much easier to open (esp. thanks to a Lee valley jar opener.) My biggest concern and caution regarding glass tops is how to open the seal safely…. several methods, but many seem a bit hazardous…. new ideas appreciated.
Jess
Thanks so much for your comments, Cathy! I will pay close attention to those gaskets for any sign of stretching or failure, and will keep in mind that re-use was not recommended. It hadn’t occurred to me that overnight might not be enough cooling time, though with quarts, I could see it being an issue, and without being easily able to ‘see’ whether or not you have a seal (like you can with the metal lids), it is absolutely worth keeping in mind! As for opening the jars…well, that might have to be it’s own blog post later!
CATHY
My post just above was written before the previous comments had appeared. 2 of The ‘best’ ways I know of are
1) turning the jar upside down and placing it is a dish with hot water – with the aim that the ring will expand jsut enough, that when righted, a tug and the seal can be broken. 2) I had more success by using a dinner knife with a major change in shape where the handle and blade sections join – and levering it into the seal ring and twisting slightly… not esp. safe, but better than using the tip of a blade – which can result in injury as well as bending the top of the knife blade —– So, neither really recommended, but work – usually
CATHY
The only other comment I should have added above was that when removing the lid from the jar by whatever method, be certain not to chip the glass lid. Chipped lids should be destroyed as it is uncertain whether the lid has the built-in integrity to survive a future processing and can weaken a future ‘seal’.
susan Peterson
I have a little device my husband found in an auction lot, which is made to insert between jar and lid to break the seal. I think it would work for glass lids too.
Sorry about all caps! No matter what way I type them they are all coming out capitals!
i wish i had those jars and lids! I have a lot of the bail type jars with glass lids, which I use for water bath canning, but I think flat glass lids would be better.
Jess
That little tool sounds handy! What does it look like?
lesley
forjars.ca and .com both sell rings and metal lids for gem 78 mm jars and they are well made!
Cathy Currey
Being that I sort of brought up the topic of (jar) safety, and the most recent comments, here’s something for you to check out on the WEB (knowing that most of you are at least as capable as me with computers & likely far more savvy) so I’m only going to give you web info rather than adding a picture…… Regarding the jar-opening tool. Check out Lee Valley’s item #50K4101. Altho’ it would not work for glass lids, that’s about the only thing it would not open, and is Really safe. In fact, I suspect that it is much easier for anyone with arthritis to manage than the other specialized ones indicated for arthritis. The tool is deceptively simple as all it requires is to have pressure applied to the ‘lever’ side not tucked under a jar lid. Highly recommended for anyone’s kitchen.
Grace Walters
FYI There’s a company called Forjars. Sorry for the caps. It won’t let me change it. Anyhoo, Forjars is going to be coming out with gem lids and bands. Contact them by phone and they will let you know when the rollout will be. Great news for Canadians!
Jess
Oh, that is fantastic news! I will definitely keep an eye open!
Trish w
Excellent information. I’m fairly new at using GEM jars so this article is very useful. Thank you!
Jess
Glad it’s helpful!
Cathy Currey
To all who preserve…………. I saw many boxes of the self-sealing lids at a dollarama………… well worth investigating in your area as you could get a multi-year supply for a very low cost………………….
Lela
You can purchase Gem lids from Berlin Packaging online.
Trish W
Berlin, Germany? Do you know The name Of the company? And do you know if they make deep bands? Thank you!
Shelley
My mum used all her creown and gem jars UNTIL she stopped canning about 5 years ago. We always used the flat Blade of a knife between the jar and the rIng.
When we packed up her pantry, I found all The jars, and some that were my grandmas.
Annelies
here is instructions on how to use the vintage jars and a mistake done by the youtuber of not having a towl under the jars for the sudden change of temperature. still a informatvie video.
Annelies
how to put on glass lids properly on vintage canning jars
Trish W
*NOTE/CREDIT: THESE INSTRUCTIONS WERE PROVIDED TO ME BY MY CANNING MENTOR: CAROLINE NIELSEN DILLABOUGH. I’ve copied them here with permission. I hope that they help others as much as they’ve helped me. 🙂
Canning with Antique Glass Lidded Jars
The steps for canning with antique glass lidded jars is a little different than canning with metal lids and rings, because the glass lids cannot flex to allow air and steam to escape the jars. Check all jars and lids for nicks in the rim or underside of the lid. These can prevent a good seal.
The process for filling the jars is the same, regardless of what lid you are using. The difference happens when you are applying the lid. Wipe the rim of the jar, as usual. Place a rubber ring on the underside of the lid, in the groove made for it and place the lid with ring side down on top of the jar. You must use the deep rings with glass lids, as regular rings are not deep enough to accommodate the lid and rubber ring and still catch securely on the screw lines of the jars. Screw the ring down snug, then back off ¼ turn.
For water bath canning, you must use a pot with a lid. It can be a canner or any deep pot, but it must have a lid. Place the jars on the rack in the canner or deep pot and fill the canner with water the same temperature as the jars, just to the bottom of the screw bands. Do not cover the jars with water. Slowly bring the canner to a boil and when boiling, cover with the lid and start timing for the correct processing time. NO PEEKING until the time is up. When the time is up, turn the canner off and remove the lid. Wait a few minutes for the water to stop boiling.
For pressure canning, the process for filling the jars is the same as above. You should follow your PC’s instructions for pressure canning, as with any type of jar. When the time is up, complete the slow natural depressurizing steps. Do not leave the jars in the canner overnight. These jars will not seal properly, if you do that.
For steam canning, fill the jars as above. Place the jars on the rack in the steam canner or PC and add the required amount of water. In a PC it’s the amount of water required for pressure canning + 1 quart. When the time is up, turn the canner off and wait for it to stop boiling before opening the lid.
For all methods, remove the jars to a towel on the counter, tightening the rings as you go. When all the jars are removed, pick each one up and invert it to check for bubbles rising. This indicates that the ring isn’t tight enough to create a good seal. As long as there are no bubbles, place the jar right side up on the towel and allow it to cool and seal. If there are bubbles, tighten the ring a bit more and check again. Leave the jars undisturbed for 24 hours. Remove the rings and lift the jars by the lid. If you can do that, then you have a good seal. Jars can be stored with or without the rings – I prefer to let the rings dry completely, then put them back on the jars, loosely, for storage.
Annelies
Thank you Trish
I just learned 2 new little tidbits for canning my old jars. my mistake was covering the whole jar an inch above with water just like a modern jar. the second trick I did not try was turning the jar upside down to watch for bubbles.
Awesome! thanks again
Trish W
You are most welcome Annelies! I too did’t know about *not* covering the jars when I first started using Gems. It explains why canning water was unpleasantly leaking into my jars. Glad this was helpful.