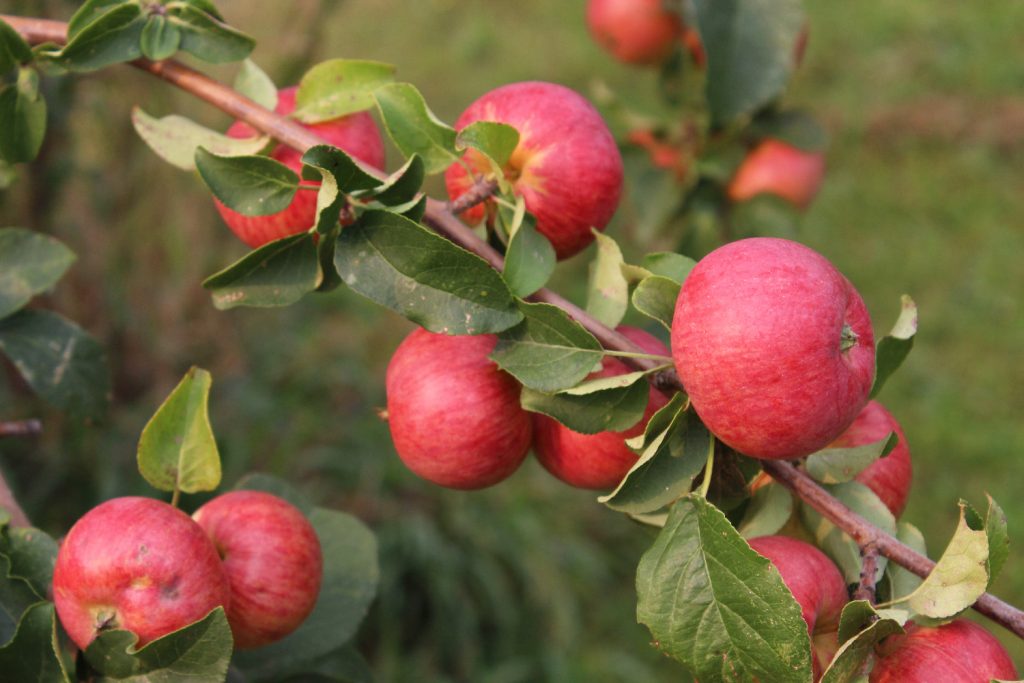
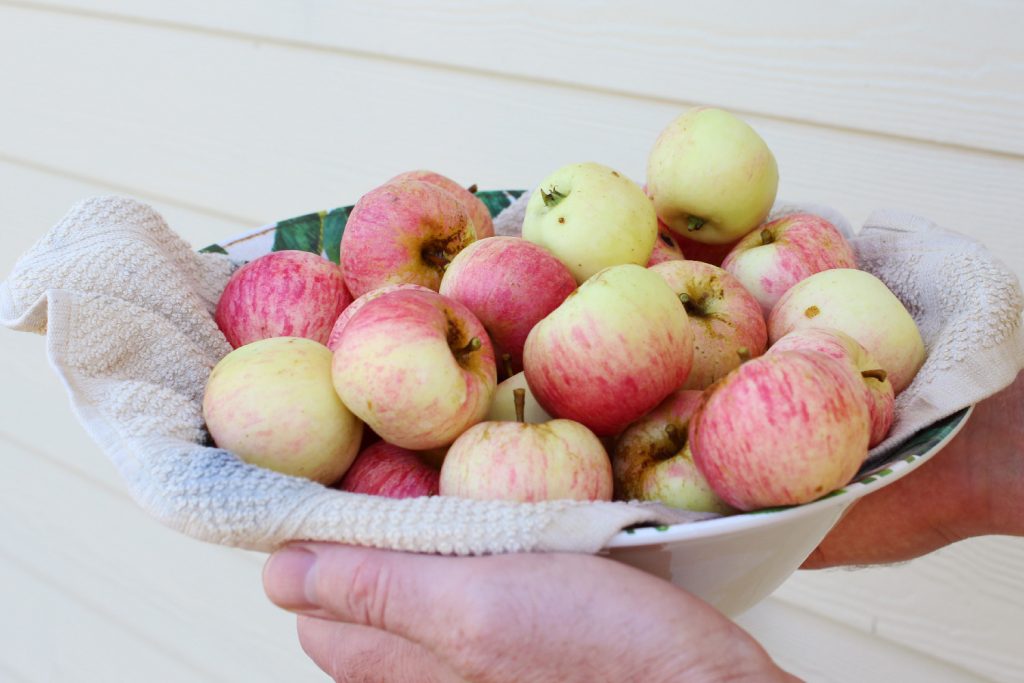
My little Honeycrisp apple tree outdid itself this year, producing so many apples its branches were drooping from the weight. The early heat and warm fall meant that all of my apples ripened early, by a couple of weeks or more! Normally, I would pick the apples and put them in the root cellar to eat or deal with later, but this year it hasn’t been an option, since it has been unseasonably warm – my root cellar is not cold at all! So I had to find other ways to deal with all those apples.
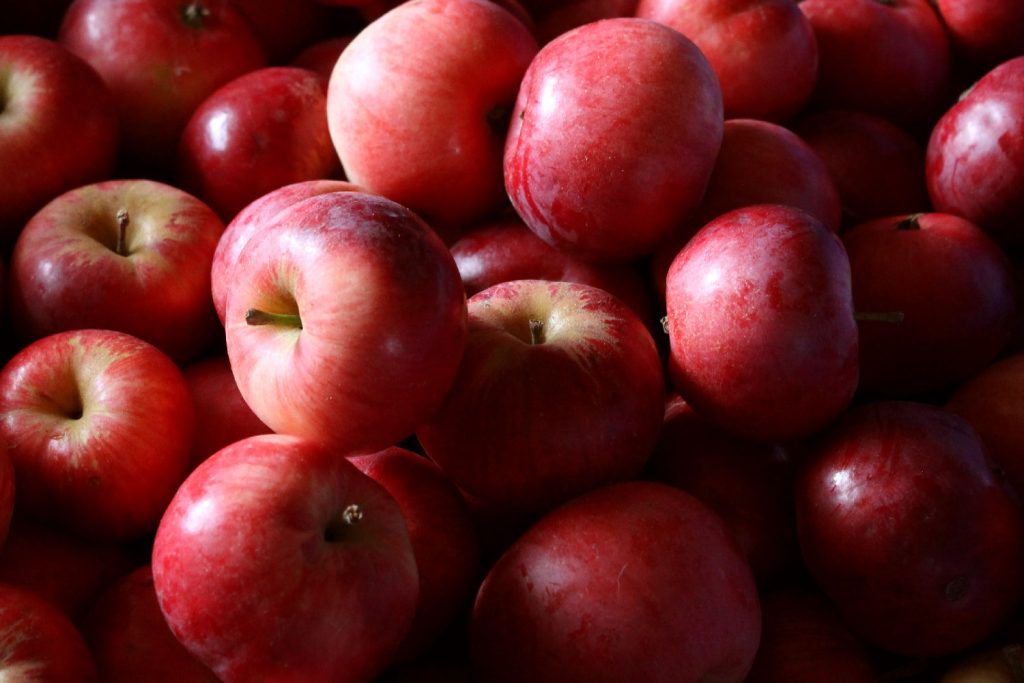
We picked three very (!) heaping grocery baskets of nice apples, plus a bunch of pecked, hail-damaged, and windfallen apples that went to the chickens. We were able to give away part of one basket to neighbors and friends, and I put most of another basket into gallon ziploc bags (8 of them!) in the fridge to eat later. That left me about one level basket plus two thirds of another to ‘do something’ with.
We use a fair bit of applesauce, here. Mostly on porridge (my favorite winter breakfast!), but also as a side for pork, and to just eat with a spoon. Because they’d had plenty of late-summer warmth to ripen with, the apples were fairly sweet this year. With my freezer being too full to fit much more in, canned applesauce seemed like the best option.
We haven’t canned applesauce in several years, here. It’s a bit of a fiddly process, and I seemed to remember it sucking up entire weekends. But Friday night after work, I cut up enough apples to fill my big stock pot, boiled them to mush, ran them through my sauce-making device, and canned them up. I timed myself, and it was three hours, start to finish, and I ended up with 7 pints – exactly a canner load – which was perfect. It was also a lot faster than I remembered, and I’m not sure why, but it was certainly encouraging!
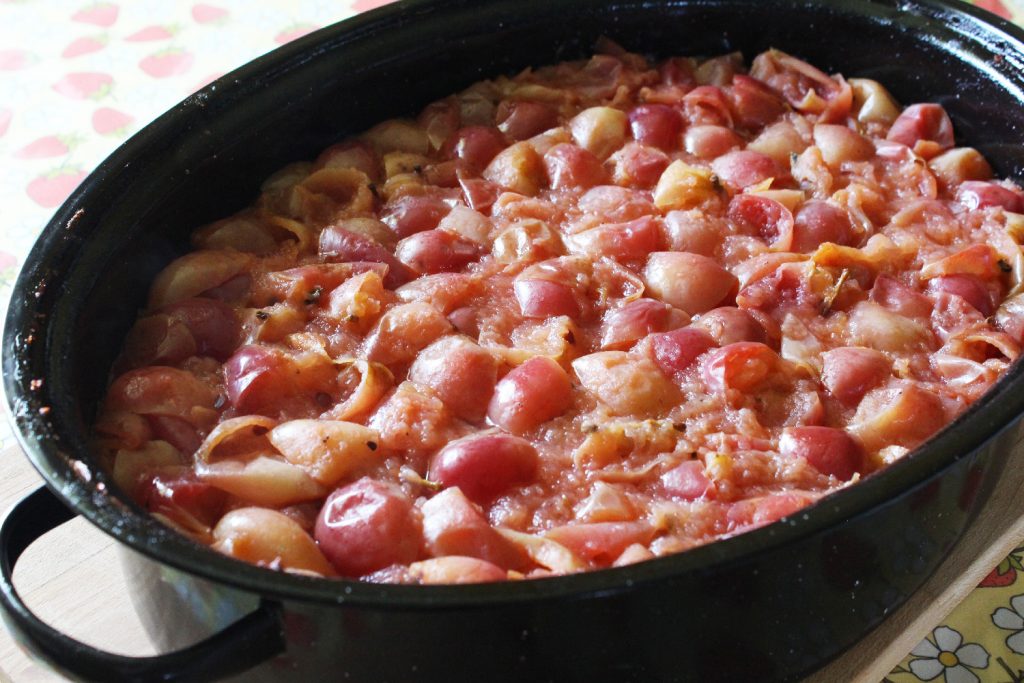
Yesterday, I tackled the rest of the apples. I only have one big stock pot suitable for this project, but I have several large roasting pans, so I decided to cook the apples down in the oven, rather than on the stove top. Interestingly, my one roaster has a tighter-fitting lid than the other, and those apples cooked waaaayyy faster than the ones in the roaster with the loose lid.
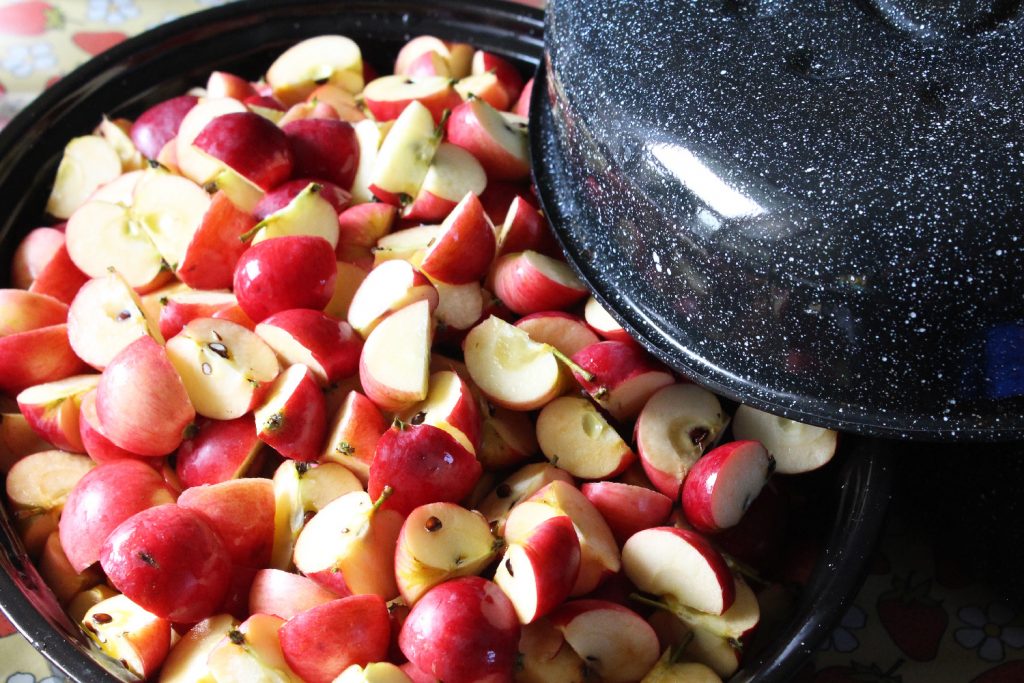
If you have large apples, you can peel and core them, which makes saucing them easier at the end, especially if you have an immersion blender – just whiz them up and you’re done! I didn’t thin my Honeycrisps, though, and the apples are small, so I just quartered them without peeling, and threw them in the roasters, cores and all. Leaving the peels on red apples gives you a pretty pink applesauce, which my daughter thinks is absolutely fantastic, since pink is her favorite color!
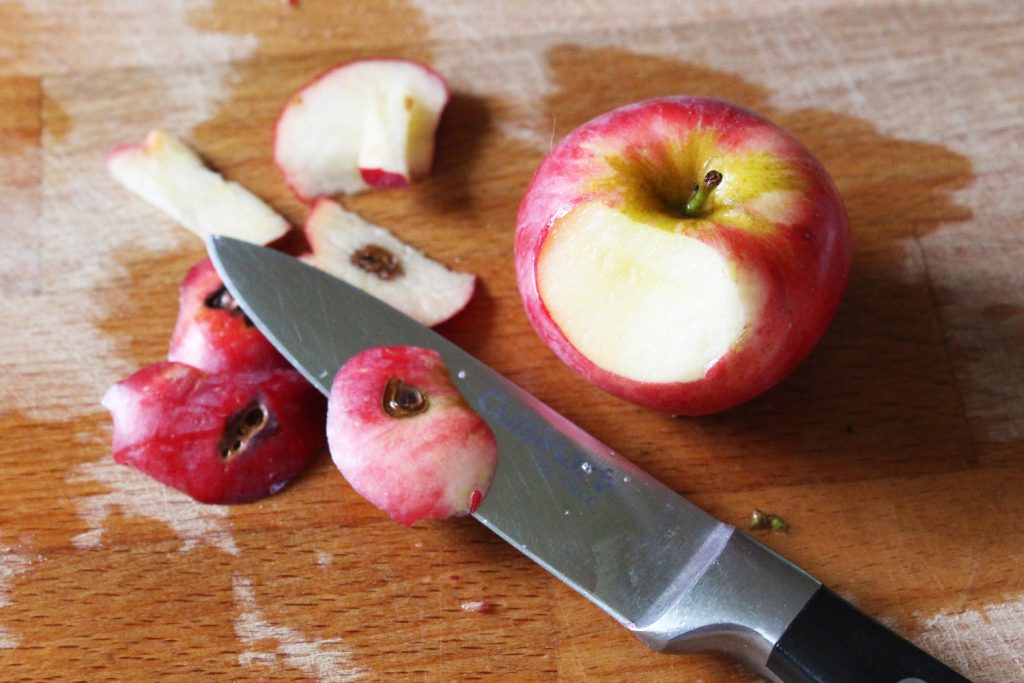
The process is really quite basic. First, I wash the apples, then cut off any blemishes and quarter them.
I threw them into the roasters with just a bit of water on the bottom to keep them from sticking. I baked them, covered, in the oven at 350 F until they were very soft. The first pan, with the tighter fitting lid, took around 45 minutes. The second pan I left in for about an hour and 15 minutes.
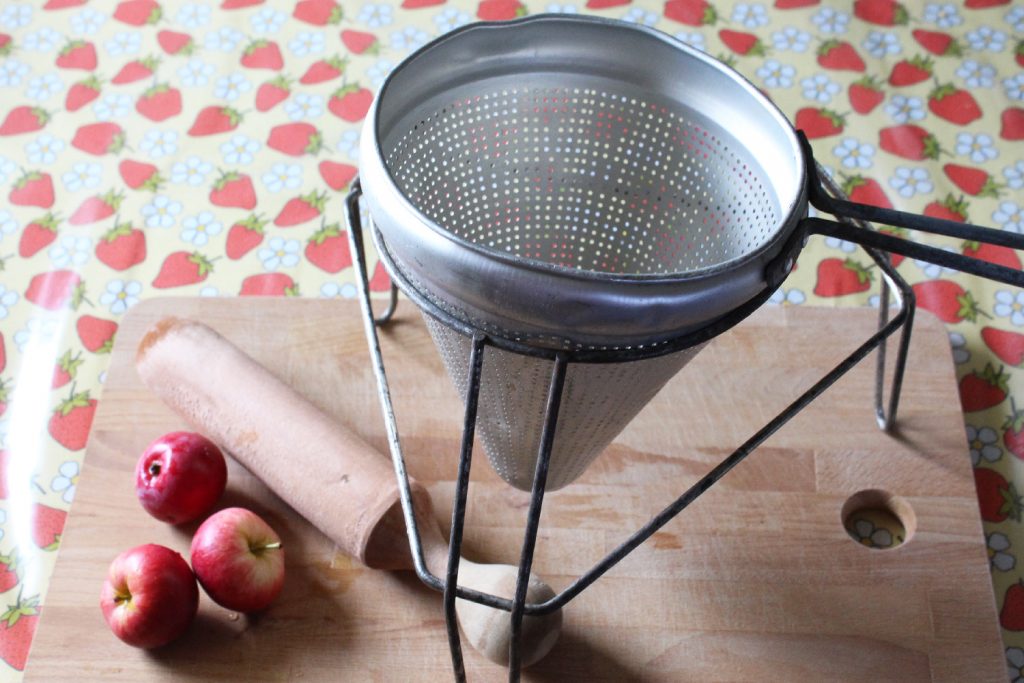
I have this handy device that I use to make apple and tomato sauce. It’s called a chinois or China cap, but I don’t think I’ve every heard anyone actually use either word. It’s a metal cone, with a wooden masher that you use to press cooked apples (or tomatoes) through the holes, which makes a nice, smooth sauce. I got mine at a garage sale ages ago, but I’m sure you can still buy them new. If you plan to make a lot of sauce, it’s a great time-saver. If you don’t have a food mill or chinois, you can push the sauce through a mesh strainer with a wooden spoon, though that is a much fiddlier process.
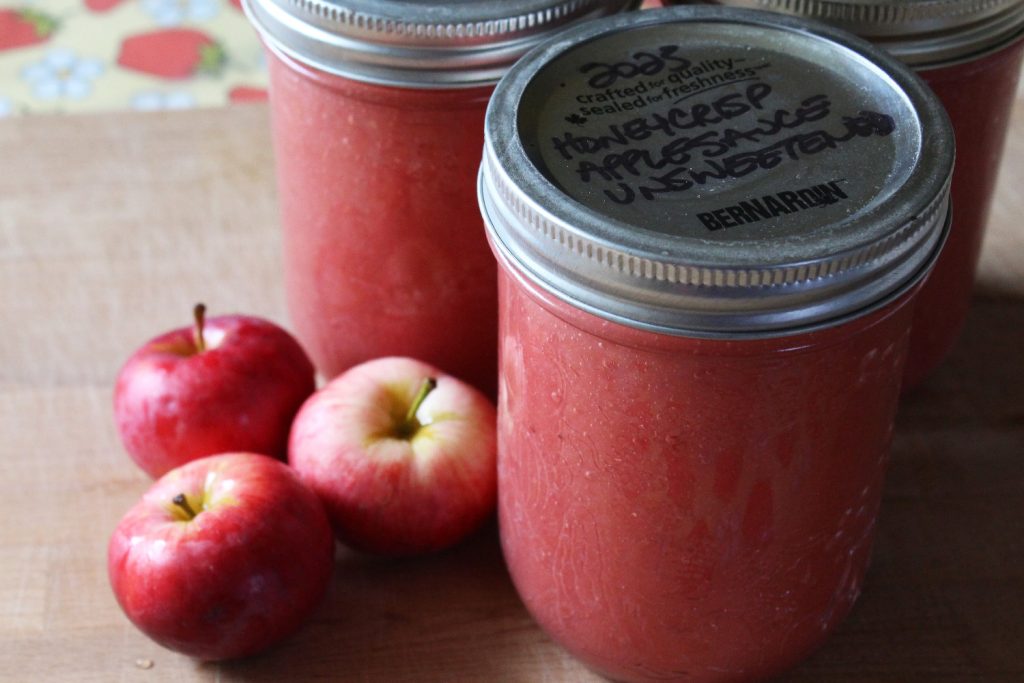
Taste the sauce, and if it’s too tart, you can add some sugar. You can also add spices, like cinnamon or apple pie spice, but be conservative with it – many spices get stronger over time, and can become overwhelming. In my own case, I’ll add the spices when I use the sauce – I find it more versatile this way, and adding spices takes no time at all. Once you’re happy with the flavor, ladle the sauce into jars, wipe the jar rims with a damp cloth, put on a lid, and tighten it gently.
The National Centre for Home Food Preservation is a reliable site that gives safe canning information. They indicate that applesauce should be processed for 20 minutes in a water bath for my elevation. That’s exactly what I did. If you don’t have a designated canning pot, you can put a tea towel on the bottom of a stock pot to set your jars on, but make sure the pot is deep enough to allow at least one inch (2.5 cm) of water over your jars of sauce.
…and voila! Pretty pink applesauce, ready for the pantry. We’ve already done a taste-test using some of the sweetened applesauce on pumpkin pancakes, and that was a real treat! Unfortunately, those disappeared way too fast for me to get a picture…
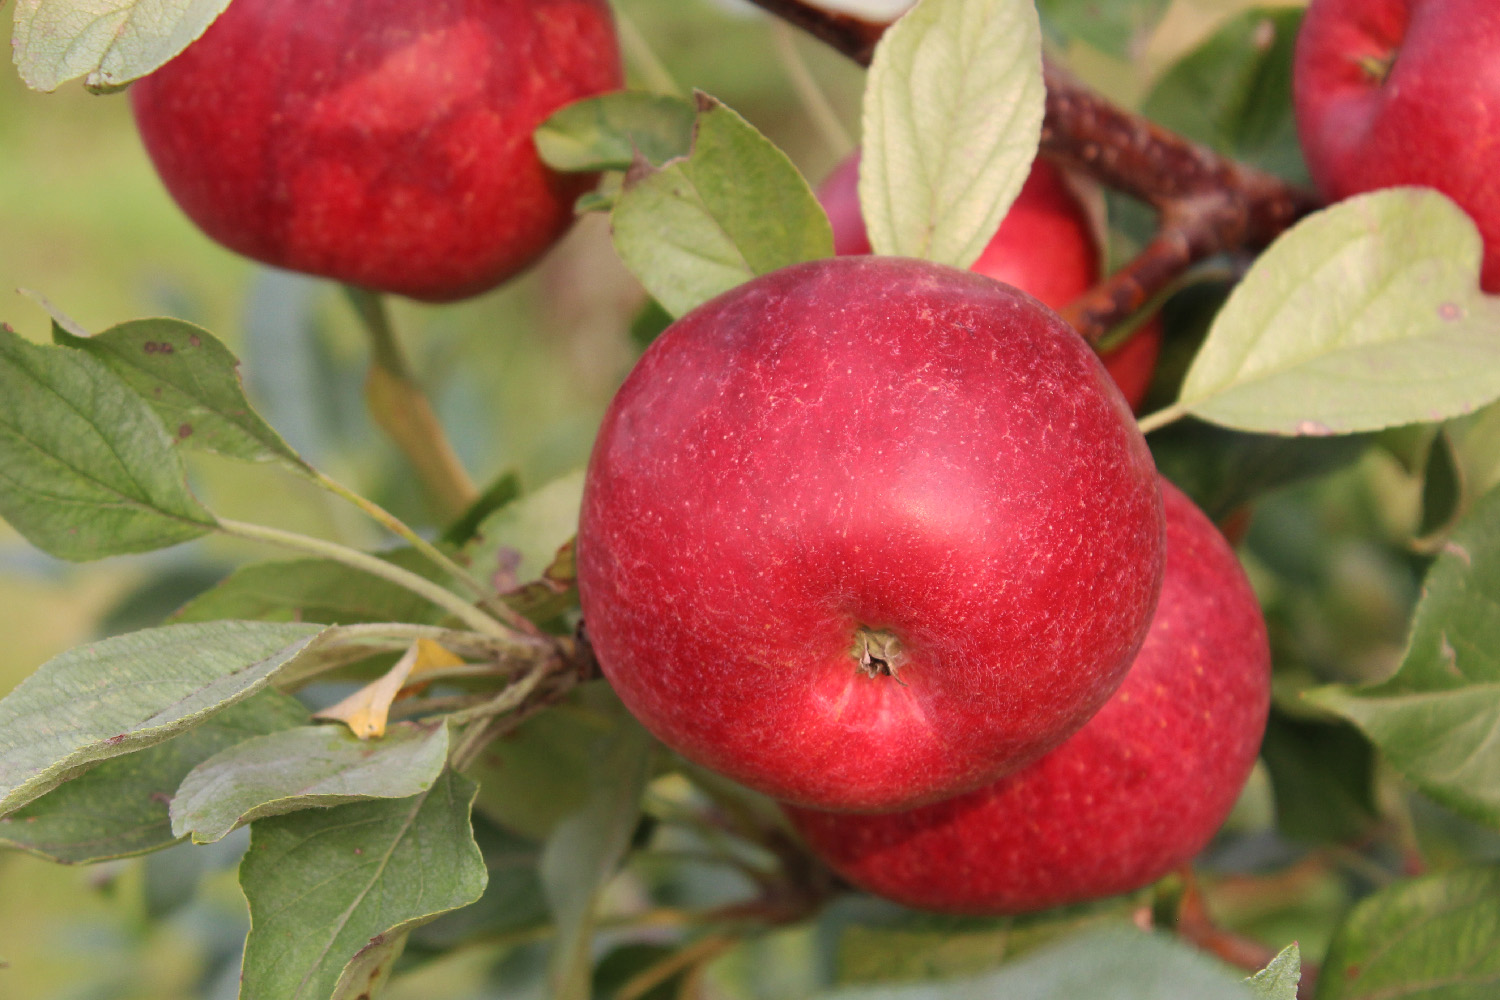
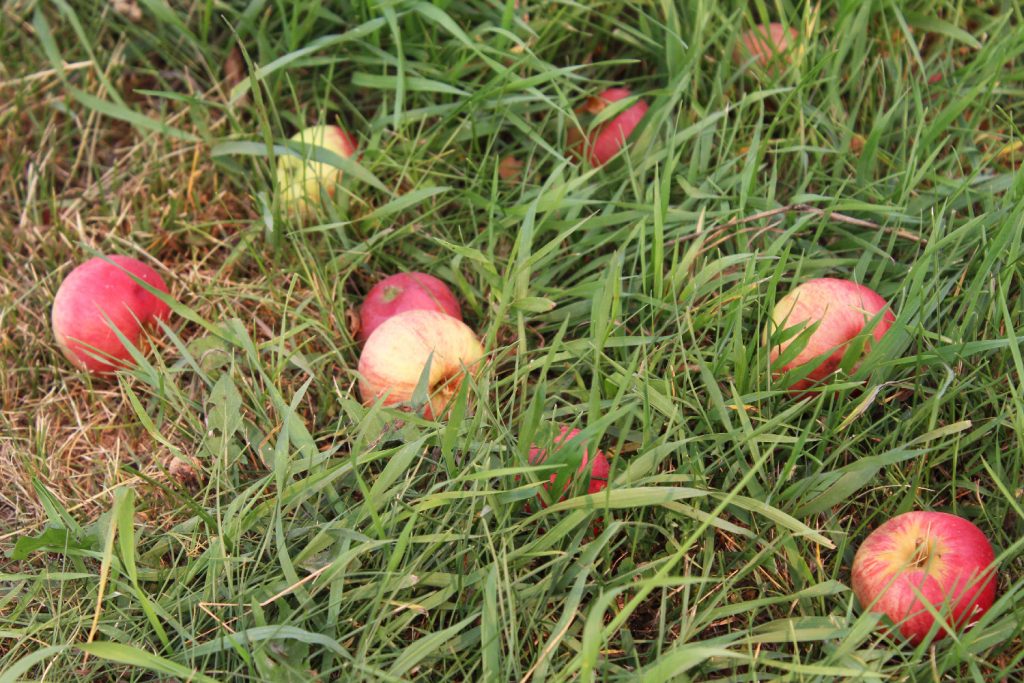
We have a number of apple trees here are our acreage, and several of them are producing apples each year. Unfortunately, we don’t know what all of the varieties are, and even if we did, the hot weather is messing with our apples’ usual ripening times. Given that different apple varieties can ripen anywhere from late July right into November (in climates that allow it), it can be a real challenge to figure out when to harvest your tree. While apples will ripen a bit once they are picked, it is much better to wait until they are ripe or just about ripe, in order to get the best flavor. So how do you know when your apples are ripe?
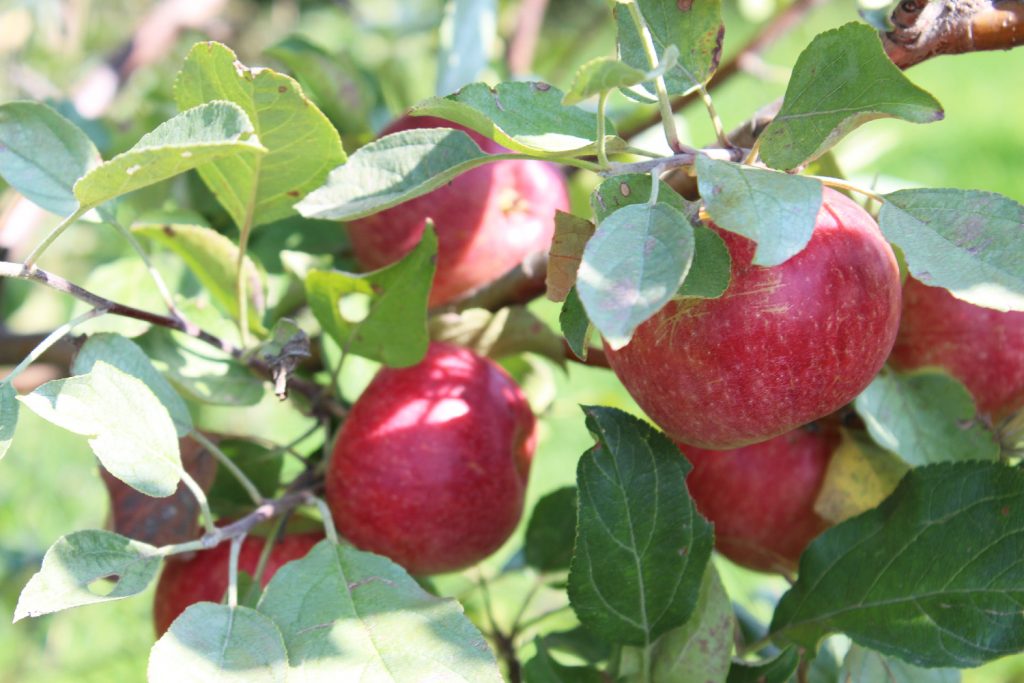
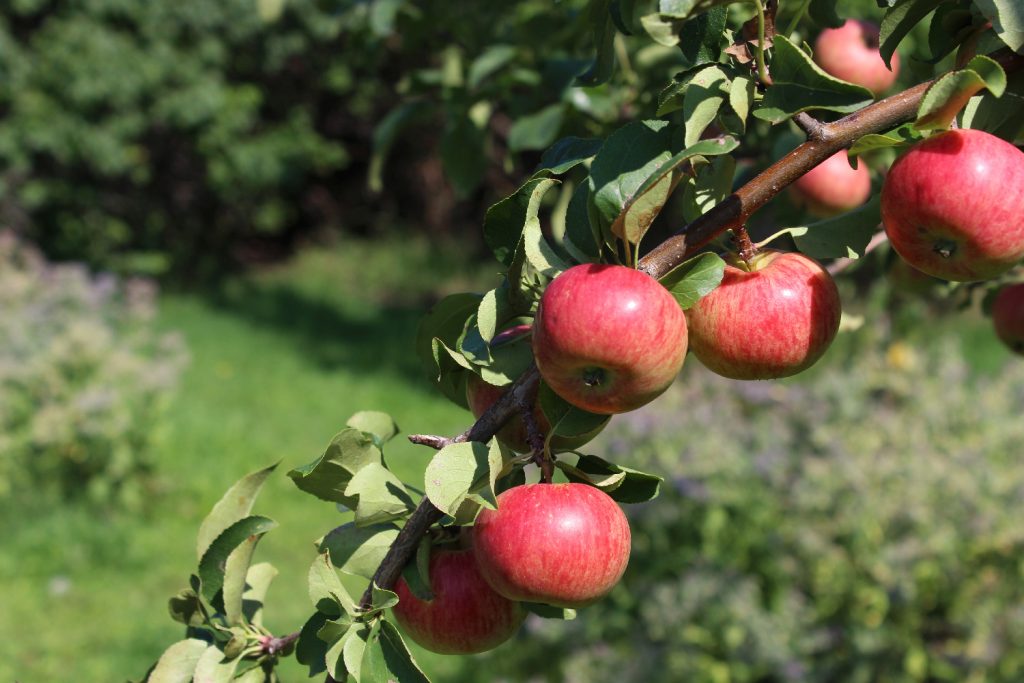
Our first clue is when the apples start to turn color. On one tree, the apples go from greenish to yellowish, with red flecks or stripes over top. On another, the apples turn mostly a lovely, dark red, with greenish skin where the sun didn’t hit them. That’s a useful clue if your trees have been producing for a while, but it’s not so helpful if this is the first or second year that tree has borne apples, as you may not know what color they are supposed to be. Having said that, most apples will at least go from ‘green-green’ to a more faded, yellowish base color, even if they don’t ripen completely red (or red at all).
Another hint is if the apples start to fall off the tree of their own accord, in a light wind, or if you brush them passing by. Sometimes, though, this means you’re too late, and the apples will have become mealy. It really depends on your tree, and experience will be the best guide, with that. We have one tree where the apples are really mealy by the time they are dropping off the tree, while another starts dropping apples before most of them are even really ripe. So again, this is a more useful clue if the tree has been bearing for a few years, and if you have been paying attention.
I often check for ripeness by giving a couple of apples a gentle tug, or a bit of a lift (toward the branch) and twist. Ripe apples tend to be quite easy to pick, and if you lift/tug with the same force each time, one day the apples will come off nicely, and at that point, they are probably ripe. Of course, there’s an exception that proves every rule, and I have a crabapple where the apples are never, ever easy to pick – they hang on the tree halfway through the winter – so this trick won’t work for every tree. It’s useful a lot of the time, though.
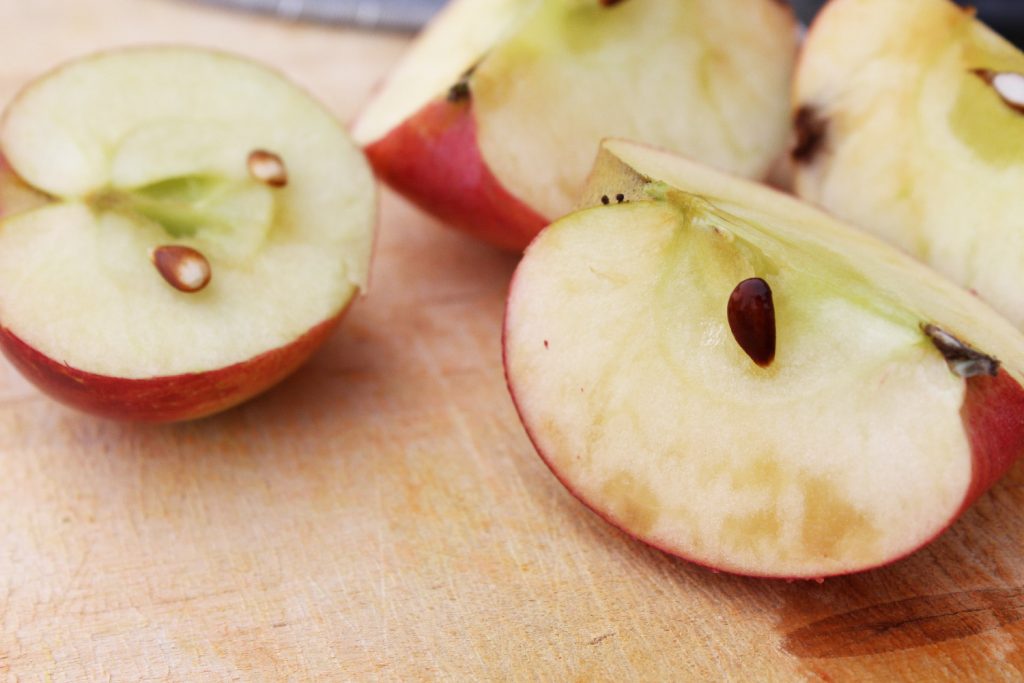
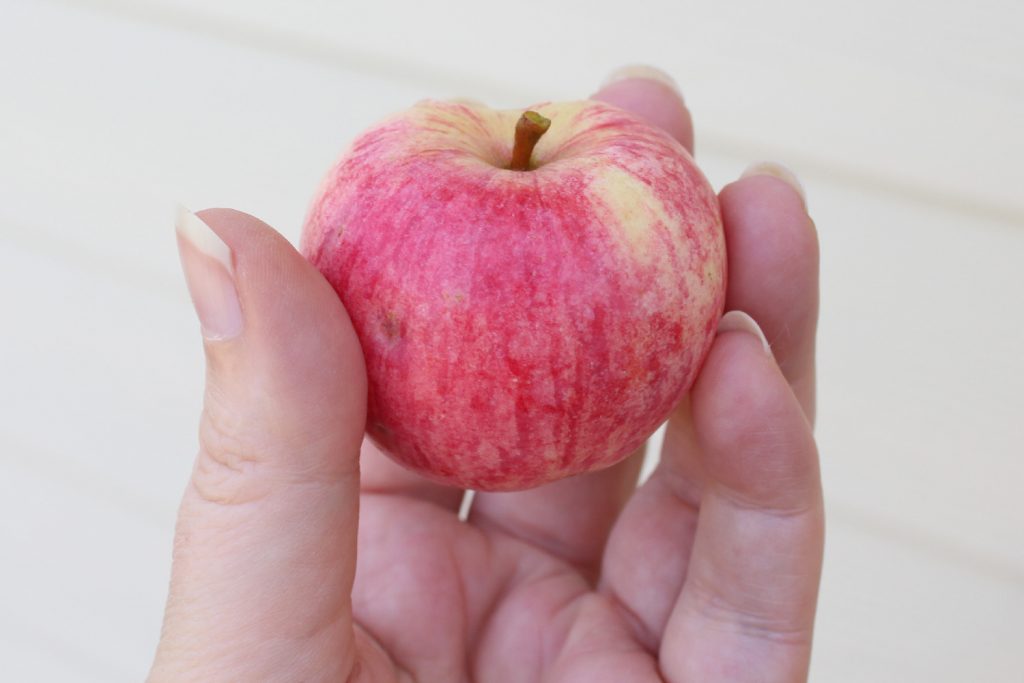
The two most accurate ways to tell if your apples are ripe are to cut them and look at the seeds, and to actually taste them. Tasting them will let you know for sure if they are ripe, but unripe apples can be quite an unpleasant surprise, especially if they’ve turned color and look like they should be sweet. Cutting the apple open, on the other hand, will tell you if it is ripe, and if it is, you can taste it without fear. A ripe apple will have very dark brown seeds (the inside of the seeds will still be white if you cut them in half, though), while an unripe apple will have white or light tan seed coats. You can see in the picture below that the apple on the right has dark seeds, indicating ripeness, while the one on the left has lighter tan and white seeds, and is not quite ripe.
We’re right in the middle of our apple harvest, here, as most of our trees are earlier apples, given our short season and early frosts. Hopefully, yours are ripe, soon, too!
I really love sweet potatoes. Before we ever moved to the country, I had a lot of favorite recipes that called for sweet potatoes, and ate them a lot. They were cheap, filling, and delicious. Even when my oldest was a baby, we still ate sweet potatoes a lot, and he loved them, too. It stood to reason that we should try to grow our own.
The problem is, sweet potatoes really don’t like our climate. The season is too short, and too cool. You can grow them here, if you are determined, but it means starting slips super-early, then planting them out under warming plastic row covers, or in a greenhouse of some type. Some folks recommend planting them in a raised bed made out of old black tires, which help trap heat and warm the soil. Even with all of that, I’ve never seen a local harvest that amounted to a handful of sweet potatoes, maybe an inch or inch and a half in diameter, and maybe 5 inches long, tops. You’d have to devote a lot of time, energy, and garden real estate to get enough for a good meal, let alone enough for a winter’s worth. Sweet potatoes, for us, are really hard.
If you’re interested in enhancing the visual appeal of your garden while optimizing productivity, consider incorporating ornamental elements that also serve practical purposes. For example, at Sugar Green Gardens, combining functional raised beds with beautiful, decorative fencing or trellises can create a visually pleasing yet productive garden space. Integrating plants that provide both aesthetic value and practical yield can transform your garden into a delightful and functional landscape, balancing both beauty and utility.
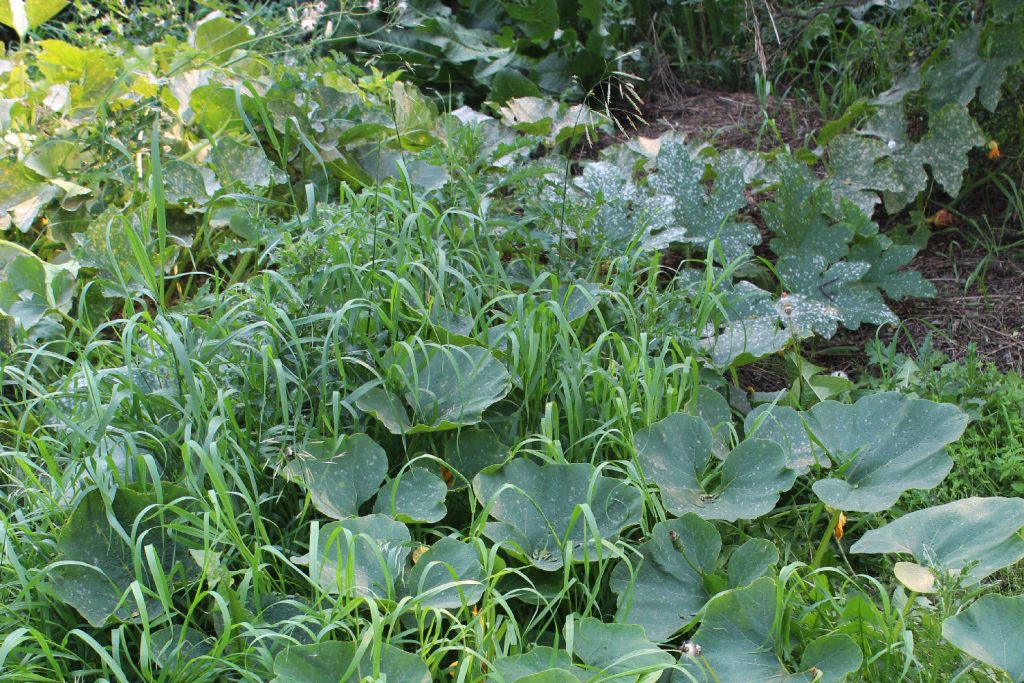
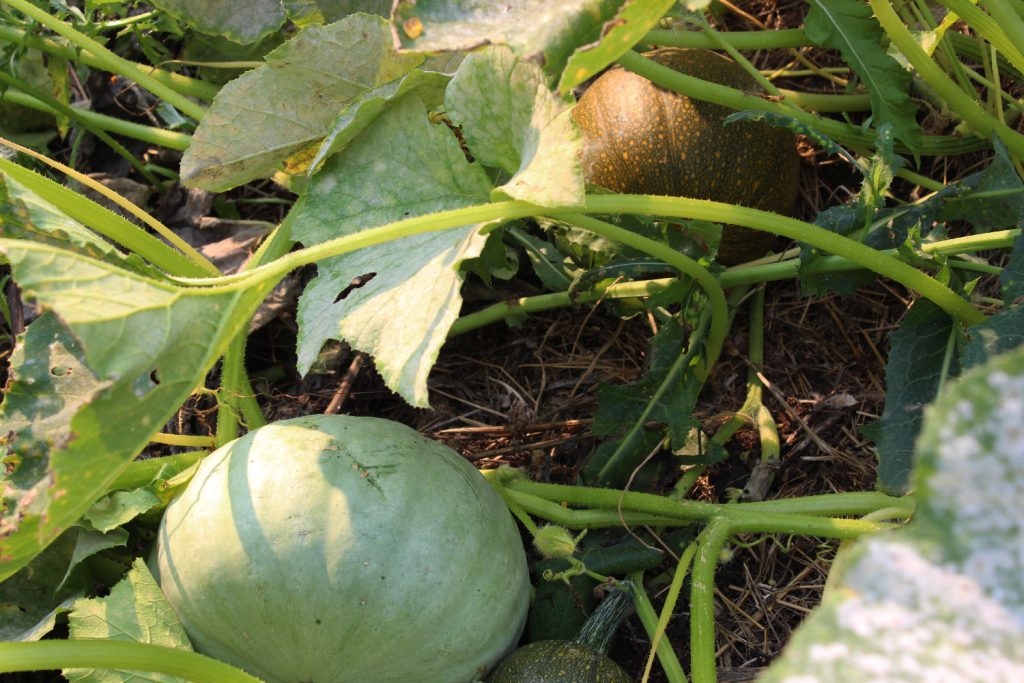
Squash, on the other hand, I can grow. Once I hit on a few short-season varieties that will make decent-sized fruit in our short season, we were off to the races. They take a ton of space, but not much attention – once they get going, we don’t even weed them, since they tend to choke out the weeds if they are planted closely together. We don’t have many (any?) squash pests, the pollenators seem to love them, and the one significant disease we see here, powdery mildew, doesn’t set in early enough to really affect our production. We plant our squash into an old manure pile, and let it run out into the grass around it. Harvest is like a big Easter egg hunt, and tends to be pretty rewarding. Squash, for us, is easy.
It took me a long time to figure out that I needed to quit trying to grow the difficult crops, the crops that needed tending and fussing and babying, and focus on the stuff that was easy. Since we’ve done that, our garden has gotten a lot more productive, and a lot less frustrating. Switching from the difficult vegetables that we wanted to grow, to the easy vegetables that wanted to grow here saves us so much work. Difficult plants meant middle-of-winter seed starting, where damp and cold led to half my seedlings (or even seeds) rotting before there was even a whiff of spring. We mostly direct-seed the easy vegetables right into the garden, or start them a few weeks before planting out, which is far less hassle.
Planting the easy vegetables means we get a lot more production for a given space in our garden, and it also often means a lot less weeding, and often also watering. Easy vegetables are quicker to get established, which means they are quicker to shade out the competition, and quicker to put down deep roots. While we still grow a few fussy things, like tomatoes, we grow a few plants for immediate use, rather than large quantities for processing or storage. We’ve given their garden space to the stuff that likes it here, and really produces.
In focusing on the easy stuff, we started to learn to incorporate those vegetables into our diet, and really appreciate them. I have a bunch of good recipes for squash, now, for instance, and we keep them in regular rotation. Some of them were recipes that called for sweet potato, but which we adapted; sweet orange squash is actually really similar in cooking properties and flavor, which has worked out great. Others were gems I found on the internet and tweaked, or made up all by myself, and highlight the squash itself. A lot of recipes are pretty flexible in what vegetables you use, if you’re willing to get creative with them – we’ve used green beans as the main vegetable in a recipe that called for cauliflower, for example – and while the flavor may be a bit different, the result is usually tasty.
Squash is just one example – beans and peas and parsnips and potatoes seem to like it here, while tomatoes and peppers and eggplant do not. What is easy for me probably isn’t what’s easy for you – climate and rainfall and pests and infrastructure and soil type vary so much – but I really encourage everyone to consider what vegetables are easiest for them, and find ways to use more of that, rather than investing tons of energy into something that will always be a struggle. It was a garden game-changer for us!
“I’ll totally remember what variety of apple this is”
So I have this apple tree. We call it the FrankenApple now, because after seven years of nothing at all, followed by three years of it flowering but not setting fruit, I decided it wasn’t a good apple for our location, and used it to experiment with grafting techniques. I grafted over somewhere between a third and half of the branches, all with different things. Of course, this year, the original tree decided to make apples.
The apples themselves are really quite nice. They are fairly large, and juicy, and reasonably sweet, for a Prairie apple. Unfortunately, I can’t tell you what kind they are, because I was * certain * that I would be able to remember what I planted, and where. I’m pretty sure it’s on Bud 118 rootstock, because the tree is maybe 12 feet tall, at 13 (or so) years of age. Could be Bud 9, though. It’s not like I’ve ever pruned it heavily.
I have this other apple tree. We call it “The Mac”. It is absolutely not a Macintosh apple – those are not hardy here, and I am certain I have never ordered or planted one. But one of our kids took it to school for an apple tasting day, and when the teacher asked what kind of apple it was, the kid said, honestly, ‘We don’t know’. The teacher (without asking any further questions or trying to clarify) assumed the kid forgot, and confidently labeled it a Macintosh. Kiddo was quite offended that the teacher did not believe them. It’s a running joke now.
And then there’s the “Honeycrisp”. I put that in quotations, because I’m not actually sure it’s a Honeycrisp at all. That one is not my fault, though. It came to me labeled as a Honeycrisp, and I actually wrote that one down – yay me! But the tree itself doesn’t act like a Honeycrisp. They are not actually supposed to be quite hardy here, but this tree has survived to the tips, even in very cold winters, on my acreage. The apples are not very sweet, even if we have a late fall and we harvest at the end of September. And even when I thin them, the apples are not very big, though they do seem to keep fairly well. We call the tree “The Honeycrisp” anyhow, because I don’t really know what else to call it. It’s great for making applesauce, at least, especially since the apples aren’t ripe until after the weather is nice and cool, and I’m okay with spending the day heating up the house with canning.
Those trees were all planted between 10 and 13 years ago. I’m wiser now. I try to keep the tree tags, because it’s nice to know both the rootstock and the scion name. I draw maps of what I planted where, and sometimes even update them when we dig out a dead tree and plant something else in its spot. Knowing what kind of tree you have tells you when to start thinking about harvest, what the best uses for the fruit are (canning? pies? cider? long keeping?), and what diseases to watch out for.
I really recommend making yourself a map, even if you tag the trees in some way. I’ve tried to label trees (and grafts) in a variety of ways, from leaving the original plastic tags (loosely) on, to labeled stakes, to adding tags of my own, held on by wire. But between kids, dogs, and weather, almost all of my markers have gone missing eventually. Maybe I have especially bad luck. But anyways, draw a map.
I fully expect that a hundred years from now, some nursery will be selling an apple labeled “Jessie’s Franken” or some such. It’s quite a nice hardy apple. Too bad I can’t recommend it to anyone else!
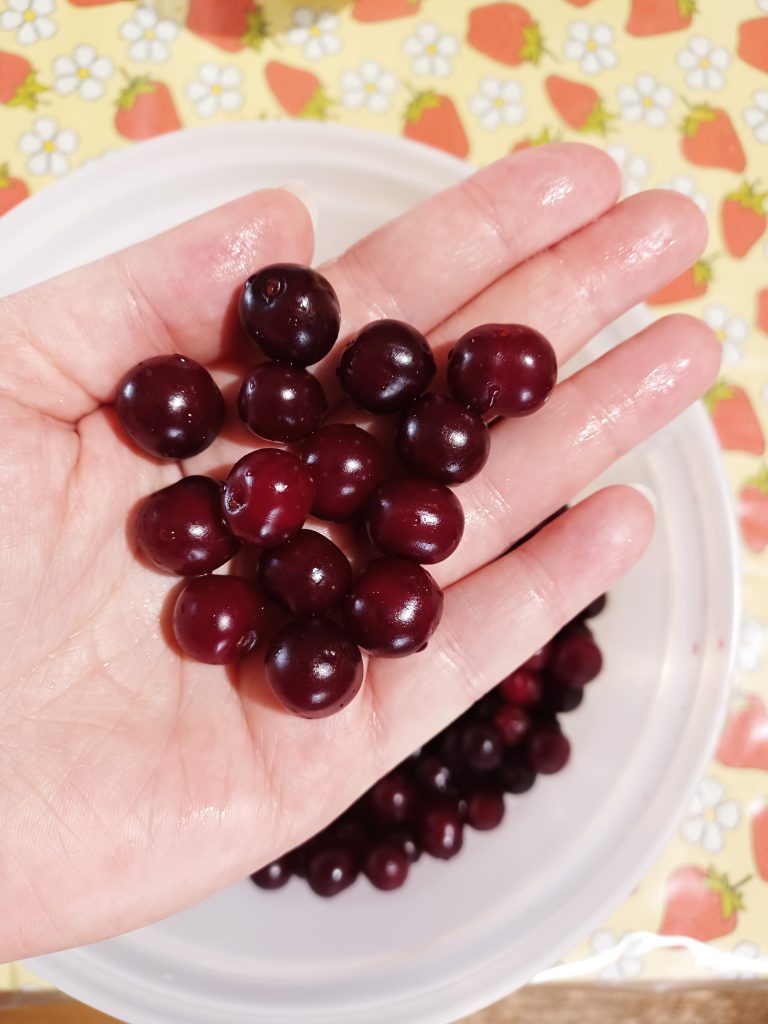
I love my sour cherry trees, and am happy to eat some of the cherries out of hand, but I like to preserve most of them for later use. Pitting sour cherries is a nuisance, though. I’ve purchased a number of cherry pitters over the years, but they seem to be designed for the much larger sweet cherries, and are ineffective and slow. My cherry ‘trees’ are all dwarf sour cherries from the University of Saskatchewan introductions, and both the cherries and the pits are considerably smaller than something like a Bing or Ranier.
With homestead-level volumes of cherries to deal with, a pitter that does one or four cherries at a time isn’t terribly helpful, even if they do manage to pit sour cherries effectively. So I’ve mostly preserved my sour cherry harvests by steam juicing them and making them into jelly, or by fermenting them into wine. While these are fine ways to preserve them, I wanted to be able to make pies, maybe a few jars of jam, and to freeze some cherries for smoothies.
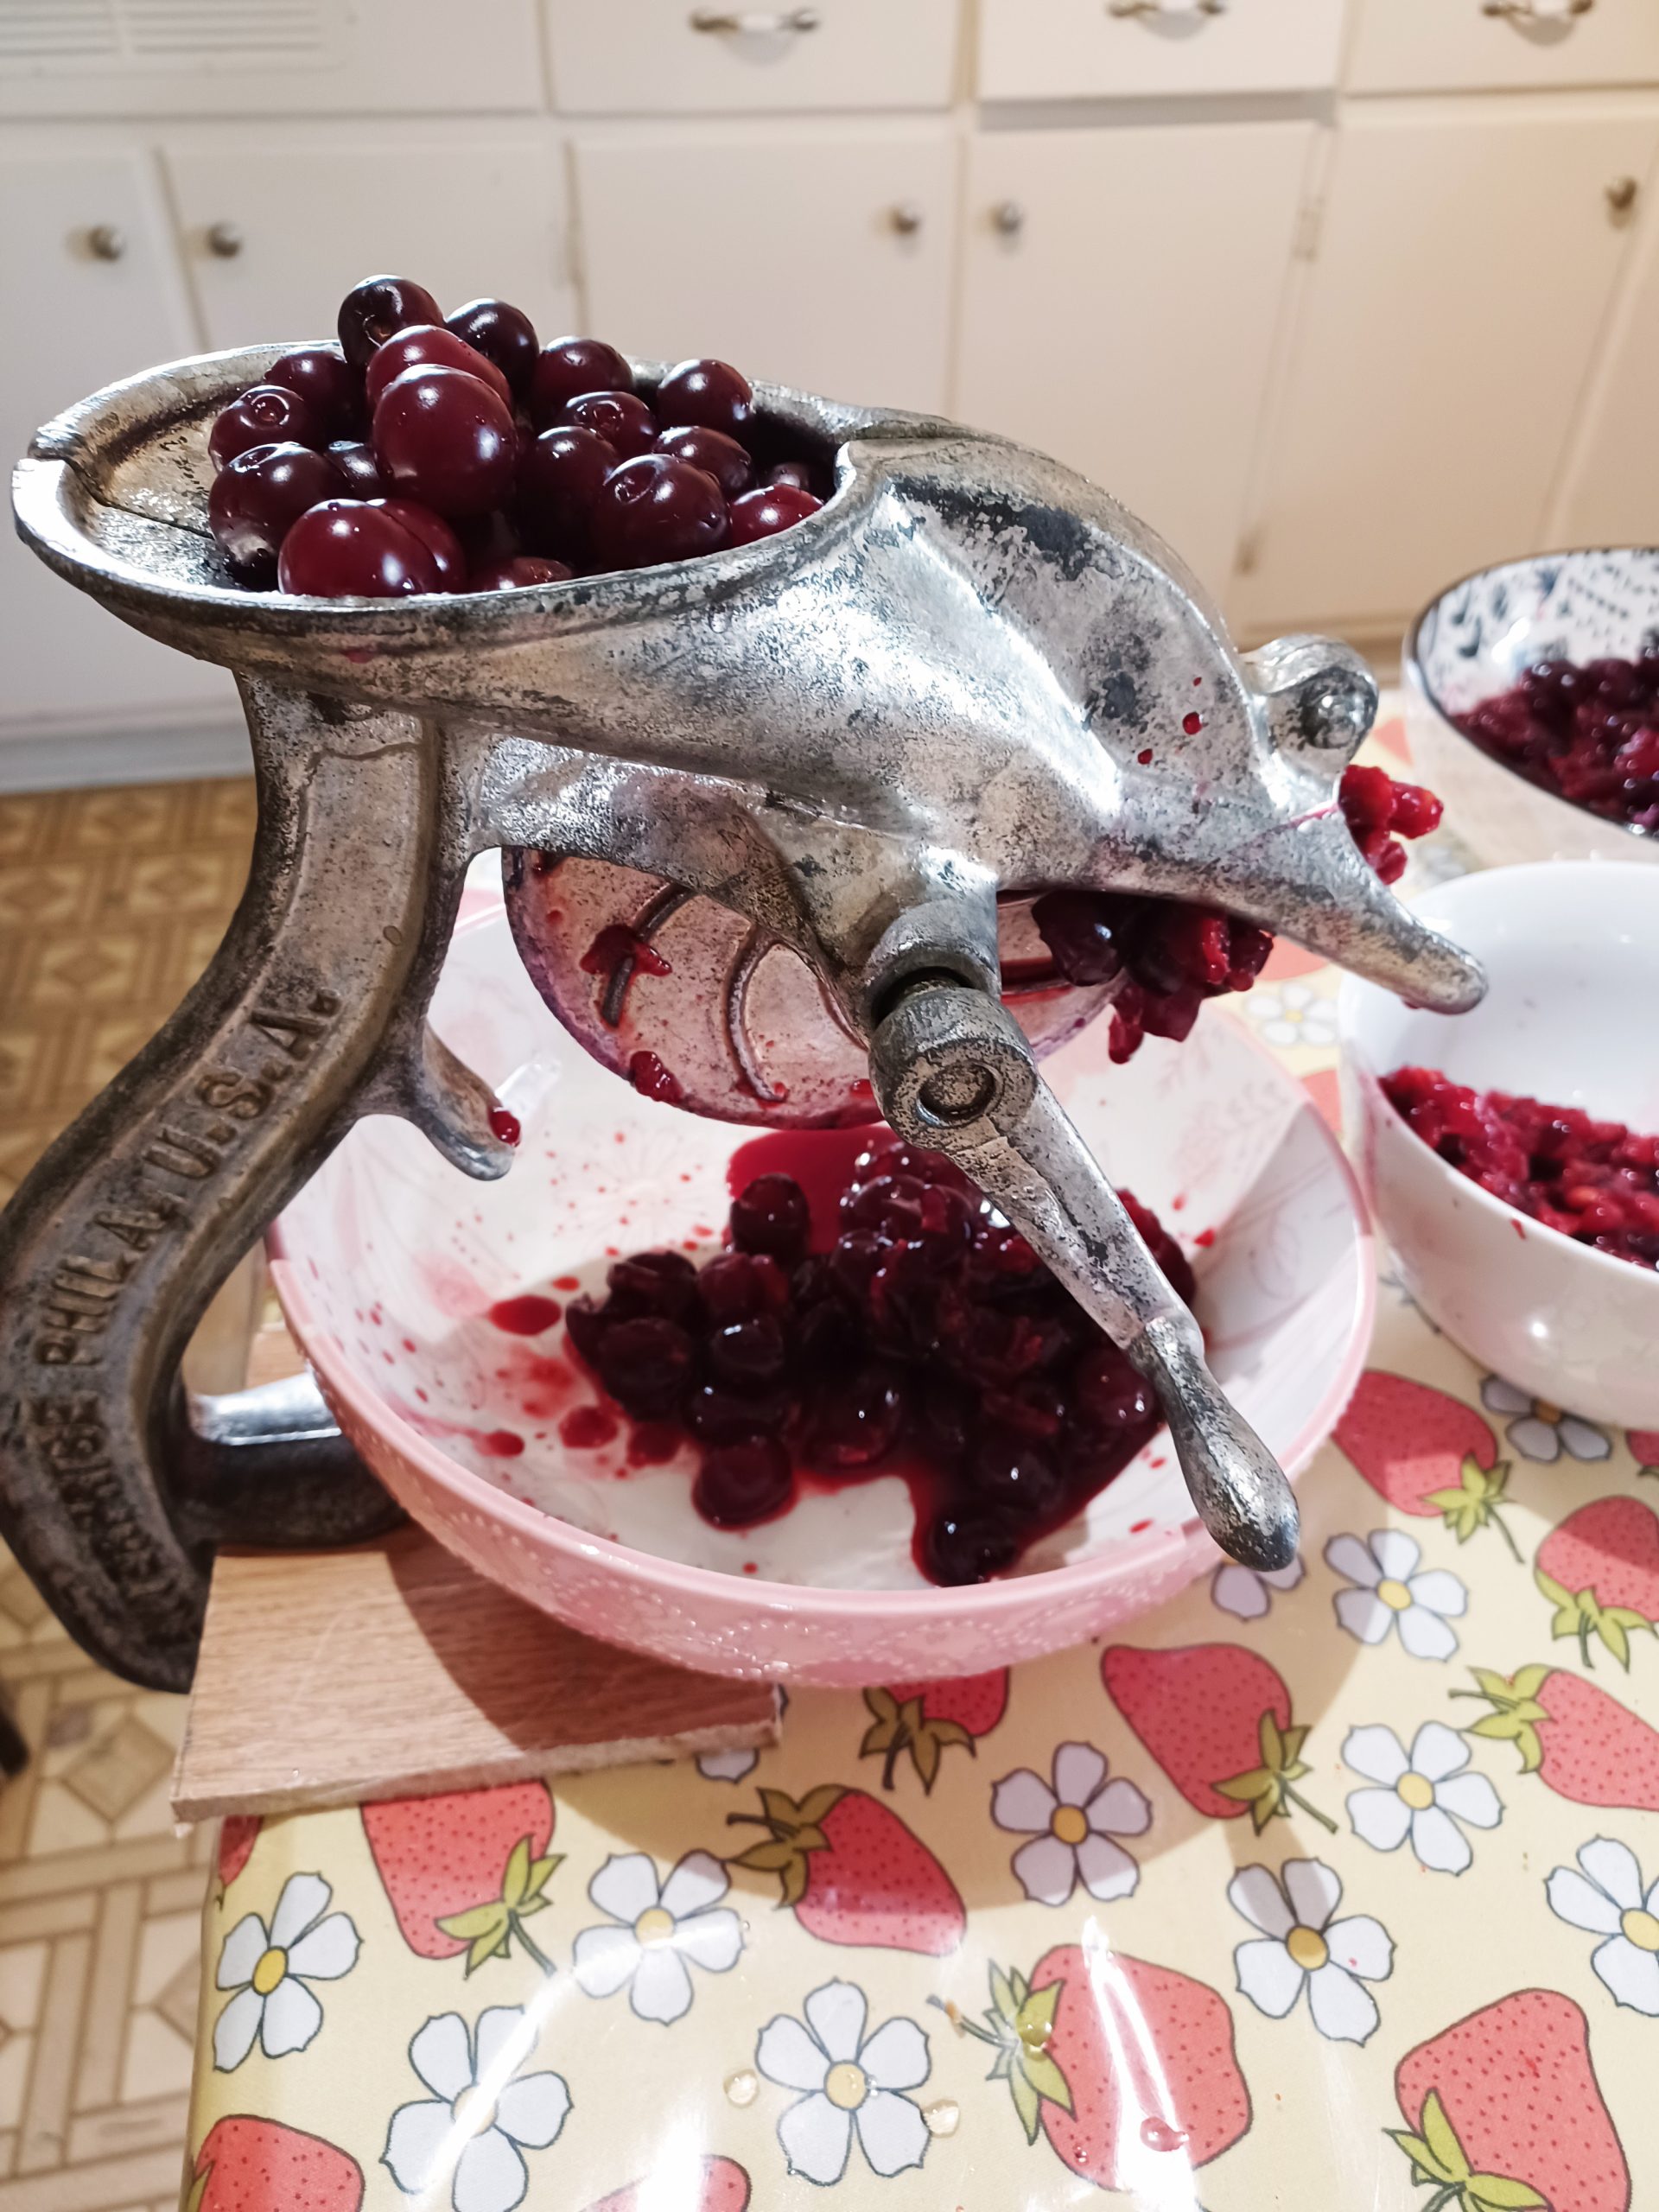
This spring, I ordered an antique hand-crank cherry pitter. The particular one I bought was an Enterprise No. 16 Cherry Stoner, but there were several similar ones. Home scale modern pitters all seem to use a plunger to push the pit out through the side of the cherry; these vintage crank pitters use a plate to push the cherry flesh through an opening that is smaller than the cherry pit. The theory looked sound, at least. I found a video of someone from Washington using a crank pitter, and again, it was very encouraging. I wasn’t sure it would work with my non-irrigated, prairie-grown dwarf sour cherries, though.
It’s been a very dry year, here, with plenty of heat, but very little rain. My cherries were ready a bit earlier than usual, and were on the small side. The harvest was also very small; my one mature tree only yielded four pounds, a little under a gallon of fruit. I harvested this week, and decided to try pitting my sour cherries using my new-to-me cherry stoner.
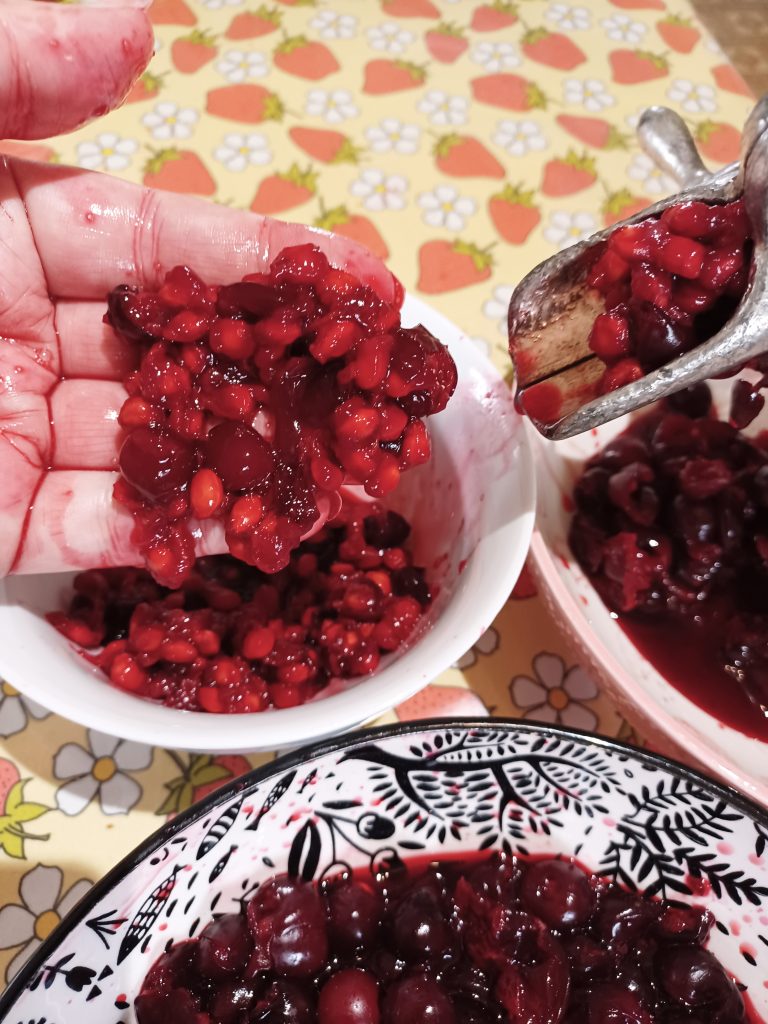
This thing is game-changing, folks! In under an hour, I had the stoner set up, pitted a gallon of cherries, packaged the fruit up for the freezer, and cleaned up the kitchen. Most of that time was set-up and clean-up; the actual pitting only took a few minutes. I was amazed!
I did notice that the stoner jammed from time to time, but backing the crank up a bit, or just fiddling for a moment was enough to set it right. With a hand crank and no blades or sharp parts, I wasn’t worried about sticking a finger down the chute to move a stuck cherry or pit. It also didn’t always feed very effectively, but again, a quick poke with a finger, and things got moving again very easily. For a piece of equipment that was over 100 years old, I was pretty impressed.
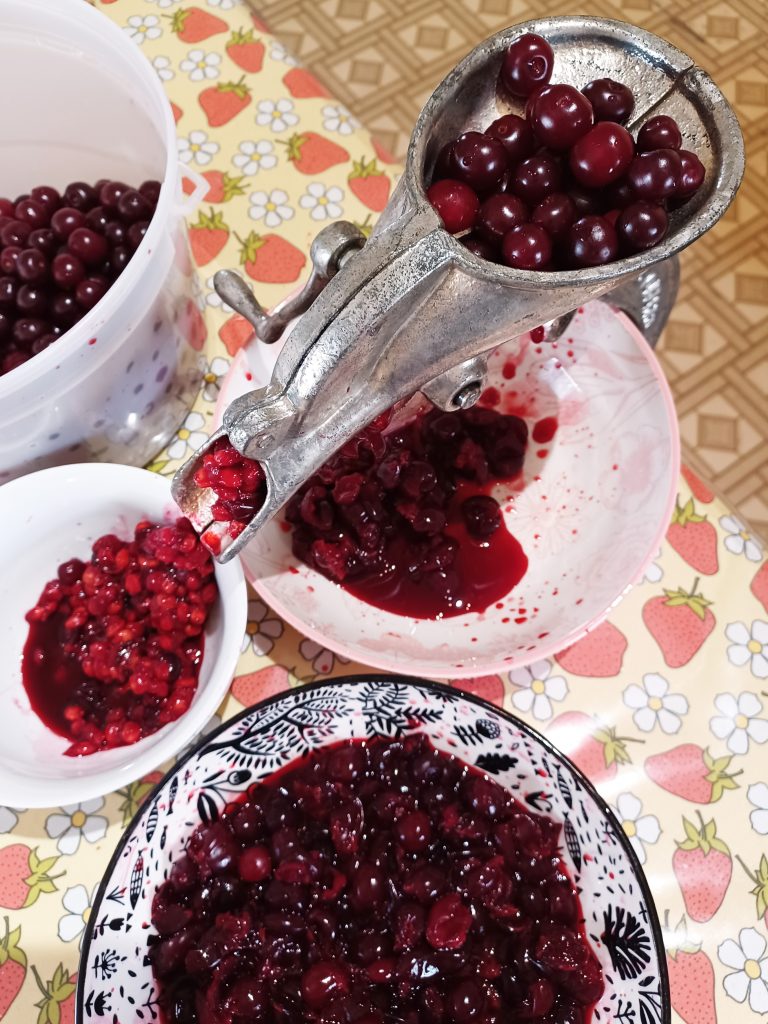
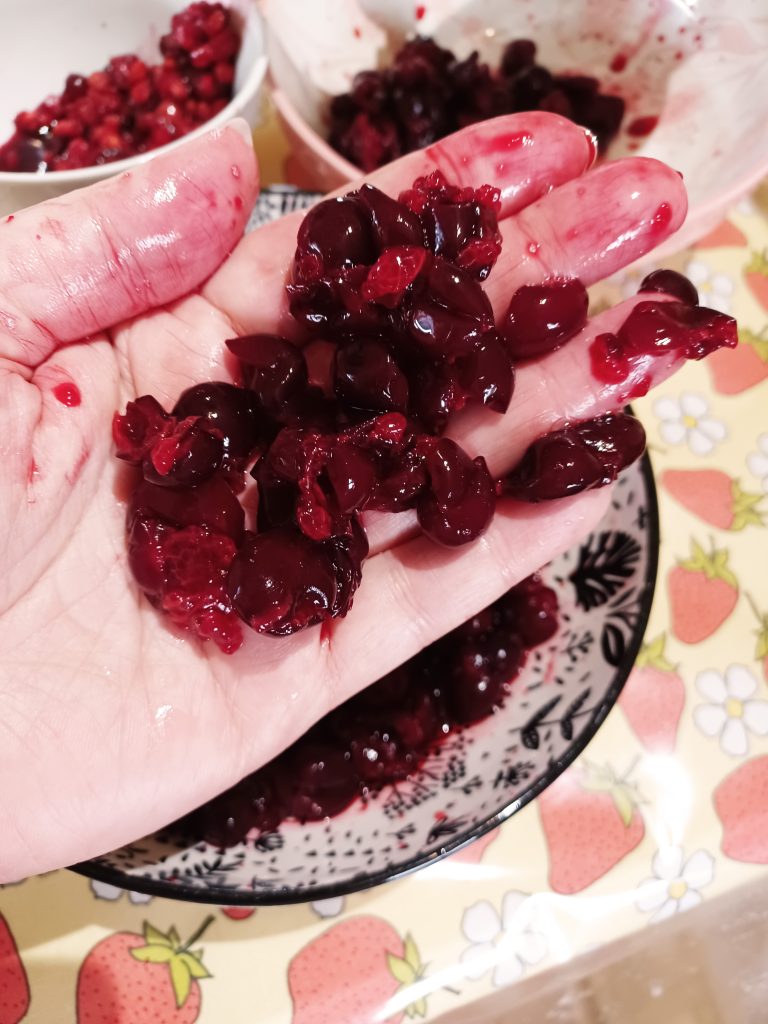
A fair number of the smallest cherries went right through, and did not get pitted at all, leading to a certain amount of waste, and there were also a fair number of pits in the pile of pitted cherries. I suspect at least some of this is because the drought-affected cherries (and their pits) are just so small this year. I figure it was about 5 to 10 percent of cherries that did not get effectively pitted. Having said that, it was easy to go through the pitted cherries and remove the ones that were missed, as the pits were exposed and easy to get at. Even with me going through the pile of pitted cherries twice to look for missed pits, the process was very quick. I couldn’t have run a full batch through the steam juicer in that amount of time!
There’s some waste – a few of the smallest cherries went right through and ended up with the pits.
The only real downside to this pitter, besides the bit of waste in the pit pile, is that the cherries are pretty thoroughly mashed by the time they make it through the machine. To be honest, for my own uses, this is not an issue at all – nobody here cares what the cherries in their pie or jam look like. If you want pretty cherries for decorative uses, though, this won’t be a good solution for you.
The pitted cherries are pretty mashed
For anyone else who has a few (or more than a few) sour cherry bushes, and wants to can larger volumes of pitted cherries or cherry jam, I really encourage you to find yourself one of these slick little tools. The drawbacks of a bit of waste and some fairly mashed up cherries are easily outweighed by the sheer speed of processing, even counting the time I spent going through the pitted cherries to check for missed pits. I can’t wait for a big harvest of sour cherries, now, and I’ll be canning up a ton of pie filling!
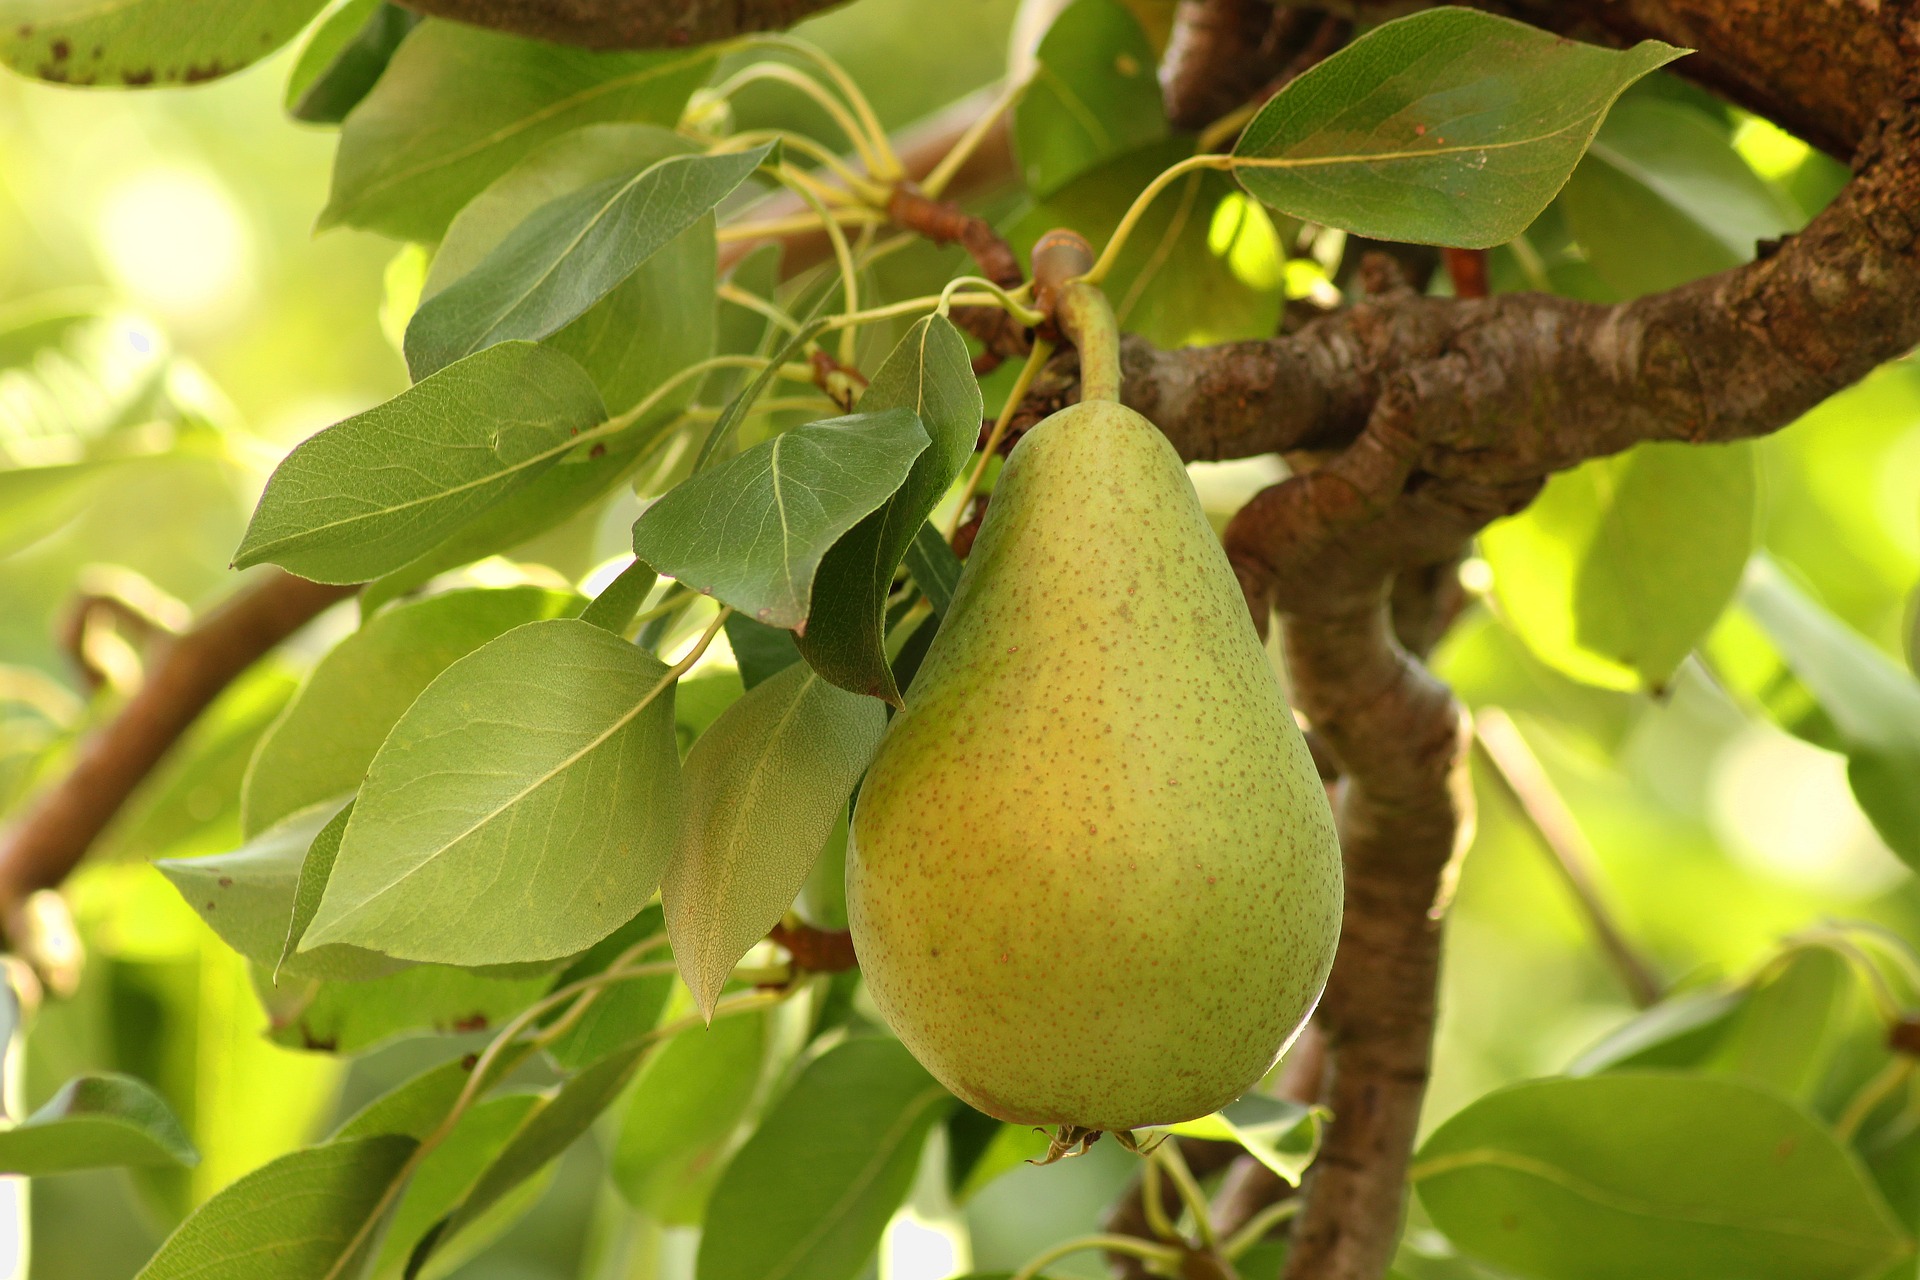
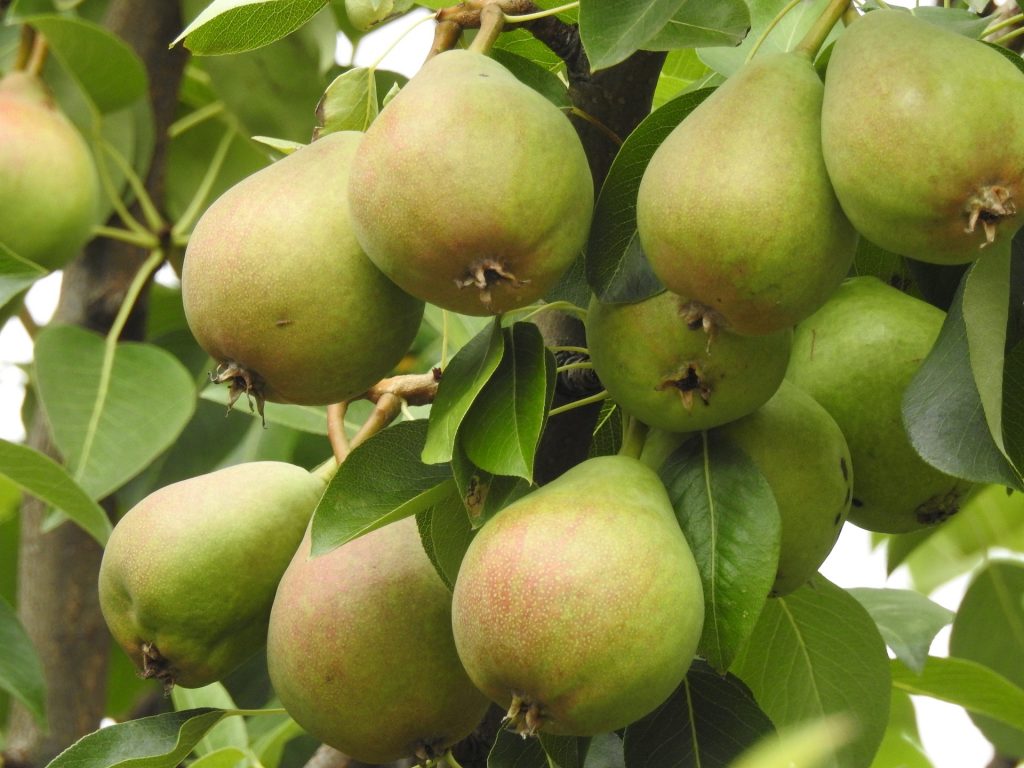
I was so excited when I first discovered that there are hardy pear trees for zone 3! Pears are one of my favorite fruits, so I immediately went out and ordered a couple. Unfortunately, pears tend to take a long time to bear, and, on top of that, tend to grow in an overly vertical, bushy form that discourages early fruiting, as well. In addition, I’ve been told that pear pollen is not favored by various pollenators, so even if you have a couple of mature trees, you may or may not get much fruit, depending on how much the bees were enticed to come to the tree.
Image by analogicus from Pixabay
We have run into each of these issues. We planted our first pears in 2011, and tended them carefully, but didn’t know that we needed to do anything special to change the branch angle (you can buy little braces to improve the angle while the tree is small, but I don’t know if there is much you can do once the branches are thick). They both flowered for several years, with no fruit, which was disappointing, and had us wondering what we had done wrong.
In 2019, we tasted our very first home-grown pear. We didn’t even realize that the tree had any fruit on it until quite late in the fall, and we didn’t pick the fruit green to ripen off the tree, which is what you are supposed to do – in many varieties, pears left to ripen on the tree develop a mealy texture, and can rot from the inside. The pears came from our Golden Spice tree, and there were only three of them. The Golden Spice pears, while extremely hardy, are reported to be inferior fruit; I have to say, however, that those three pears were delicious and sweet, although not the most pleasing texture.
In 2022 (ELEVEN YEARS after we planted it!), we got a few pears from our other mature tree – a Ure, which is another ultra-hardy tree, but the fruit is described as being less-than-stellar. We picked them green, and left them in a fruit dish on the table to ripen, which turned out to be a mistake, as one of our dogs decided to sample them before we got a chance, so we still don’t know what they taste like!
Pears are not typically self-pollenating, so plan to get two, unless you have a nearby neighbor who is growing one. Also, if you are in a cold zone, you will need to pay particular attention to the rootstocks that are used, as many are not that hardy, and won’t survive a zone 2 or 3 winter. In particular, watch out for OhxF rootstocks, which are only supposed to be zone 4 hardy, and Quince A, which simply won’t take our winters at all. You will want to look for standard Pyrus Communis, or, in the really cold zones, Siberian pear rootstock.
If you’re considering planting apple trees, as well, I also have a list of hardy apple trees for zones 2 & 3.
Over the last few years, a number of ultra-hardy Russian-bred selections have become available in Canada, which is very exciting. I have not yet tasted any of these pears, myself, but the early reports are very positive, with some of them described as being as sweet and juicy as the Bartlett pears you can get at the grocery store.
I am now on a mission to get a lot more pears, even though I know we’ll be waiting another decade or so to see fruit. Here is a list of zone 2 and 3 hardy pear trees I have found, with a resource list of where to order them (links to the individual nurseries are at the bottom of the page):
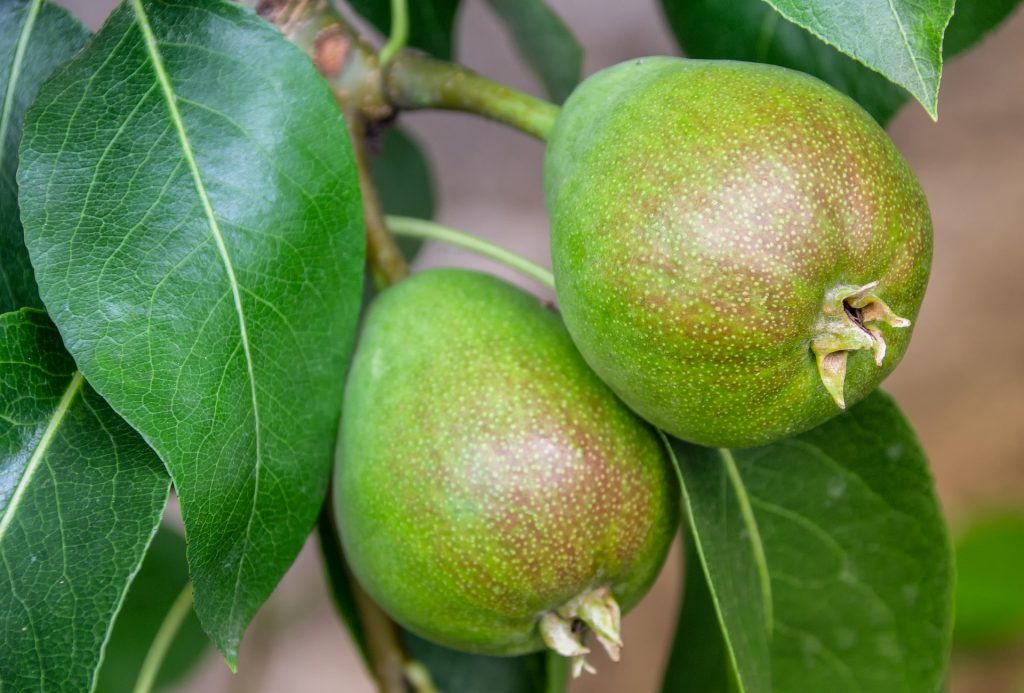
Image by Cifer88 from Pixabay
Hardy Pear Trees for Canadian Zones 2 and 3:
Beedle (zone 2) – a Siberian seedling discovered in St. Albert, AB, Beedle pears are reported to be soft and sweet, as well as being ultra-hardy. Prairie Hardy Nursery and T&T Seeds carry these.
Bolshaya (zone 3) – One of the newer Russian selections. Bolshaya means ‘large’ in Russian, but these pears are reported to grow to about 80-90 grams, which actually is not very large at all. The flavor is reported to be sweet and a bit tart, and the pears tend to stay quite crisp. Prairie Hardy Nursery carries these.
Chizhovsky (zone 3) – This Russian pear is reported to be a heavy producer, and may fruit better than other pears in cool-summer regions. The pears are said to be sweet, aromatic, soft, and juicy. Prairie Hardy Nursery carries these.
Early Gold (zone 2) – A yellow pear that is very hardy, and good for eating or canning. Boughen Nurseries and Pepinere Ancestrale carry these.
Favoritka (zone 3) – Another Russian selection, with large pears that mature with a distinctive pink blush. Favoritka pears are reported to be excellent for both fresh eating and preserving. They ripen in mid-September, and will store for up to two months in ideal conditions. Prairie Hardy Nursery carries these.
Golden Spice (zone 2) – Golden Spice pears are noted to be good for eating or canning, as well as for making perry. They are reportedly eclipsed by newer varieities, but if you are in a marginal area, these are worth a try. Boughen Nurseries carries these, as do Silver Creek, but check their rootstock for hardiness if you are zone 3 or 2.
Julienne (zone 3) – A Bartlett-type yellow pear that is large and sweet, and ripens in mid to late Septemeber. Hardy Fruit Trees carries these.
Krasnobokaya (zone 3) – Reported to be very sweet, these Russian pears are of medium size, and ripen in mid to late September. Priaire Hardy Nursery carries these.
Krazulya (zone 3) – One of the newer Russian hardy pear trees, Krazulya means ‘beauty’. These are an early-ripening (mid-August) pear that reportedly tastes great, but does not store well. They are about half the size of a Bartlett pear, and rounder, with yellow skin that has red shoulders. Like the Ure, Krazulya is not well pollenated by European pears, and you will need a Ure, Golden Spice, Early Gold, John, or one of the Russian selections in order to get fruit. Hardy Fruit Trees, Whiffletree, T&T Seeds, Pepinere Ancestrale, and Prairie Hardy Nursery all carry these.
Larinskaya (zone 3) – Another Russian selection, these are a juicy, crisp late season (September) pear. It produces smaller fruit that are light green to yellow with darker green spots. Larinskaya pears are good for fresh eating, and will store up to 8 weeks. Hardy Fruit Trees, Pepinere Ancestrale, and Prairie Hardy Nursery carry these.
Loma (zone 3) – These European pears are supposed to be precocious, bearing as early as five years after planting. Loma pears are quite round. Hardy Fruit Trees and Pepinere Ancestrale carry these.
Marshal Zhukov (zone 3) – Another recent Russian selection, Marshal Zhukov pears are reported to be quite large compared to other ultra-hardy pears. The flavor is more of a sweet-and-sour profile. These pears ripen in late August or early September, and will store for approximately one month under suitable conditions. Prairie Hardy Nursery carries these.
Nova (zone 3/4) – A large, round, flavorful dessert pear, Nova pears are reported to be good even if left to ripen on the tree. These pears appear to be scab and fireblight resistant, and are self-fertile. Hardy Fruit Trees and Whiffletree both carry these. However, they are not hardy enough for the most northerly zones.
Patten (zone 2/3) – Patten produces a very large fruit that is reportedly excellent for eating, and passable for canning. They are resistant to fireblight, and ripen in late September, though they are best picked green and ripened off the tree. Hardy Fruit Trees and Whiffletree carry these.
Peter (zone 2) – Boughen Nurseries describes them as producing “a medium size fruit good for eating or canning.” Boughen Nurseries carries these.
Sentyabrina (zone 3) – A tender ultra-hardy pear whose flavor is described as having sweet and sour notes. This is another Russian selection, which ripens in September, and stores for around one month.
So Sweet (zone 2) – This pear is self-fertile, though it will produce a lot more fruit if planted near another pear tree. So Sweet pears are smaller in size, and round in shape. The flavor is described as sweet and juicy, and these pears ripen quite early – mid-August. Prairie Hardy Nursery carries these.
Southworth (zone 3) – Described as a vigorous tree that is said to produce reliably, Southworth pears are reported to be large and sweet, with a buttery texture. They are also self-pollenating. Hardy Fruit Trees carries these.
Summercrisp (zone 3 or 4, depending who you ask) – An earlier pear, Summercrisp are ready to harvest in mid to late August, and can be stored for two months. They are reported to be fireblight resistant. We have planted one in a protected spot, and we’ll see how it fares over a few winters. Hardy Fruit Trees, Whiffletree, and Silver Creek all carry these; however, watch the rootstock with the latter, as it may not be hardy to your area.
Ure (zone 2) – A very hardy pear tree released by the Morden research station, Ure pears are considered rather primitive by many modern Prairie pear growers, but it is definitely very hardy, and also resistant to fireblight, which can be an issue for pears. Harvest is mid-September. Boughen Nurseries describes them as having “yellow fruit that is excellent for eating.” Boughen Nurseries, Pepinere Ancestrale, and Hardy Fruit Trees carry these. Hardy Fruit Trees also noted that Ure pears may not be pollenated by European pears; if you have a Ure, look into getting a Siberian pear as a pollenator.
Vekovaya (zone 3) – Another Russian pear, the Vekovaya produces large fruit that are ready in mid to late September. The flavor is described as sweet-sour, and the flesh is crisp and juicy. They are also good keepers, and can be stored up to 3 months, under ideal conditions. Hardy Fruit Trees, Pepinere Ancestrale, and Prairie Hardy Nursery carry these.
Image by satynek from Pixabay
Here is a list of nurseries in Canada that carry hardy pears, with links:
Pepinere Ancestrale, Quebec (note, this site is in French only, and they normally only ship within Quebec; however, they have been willing to make exceptions in the past)
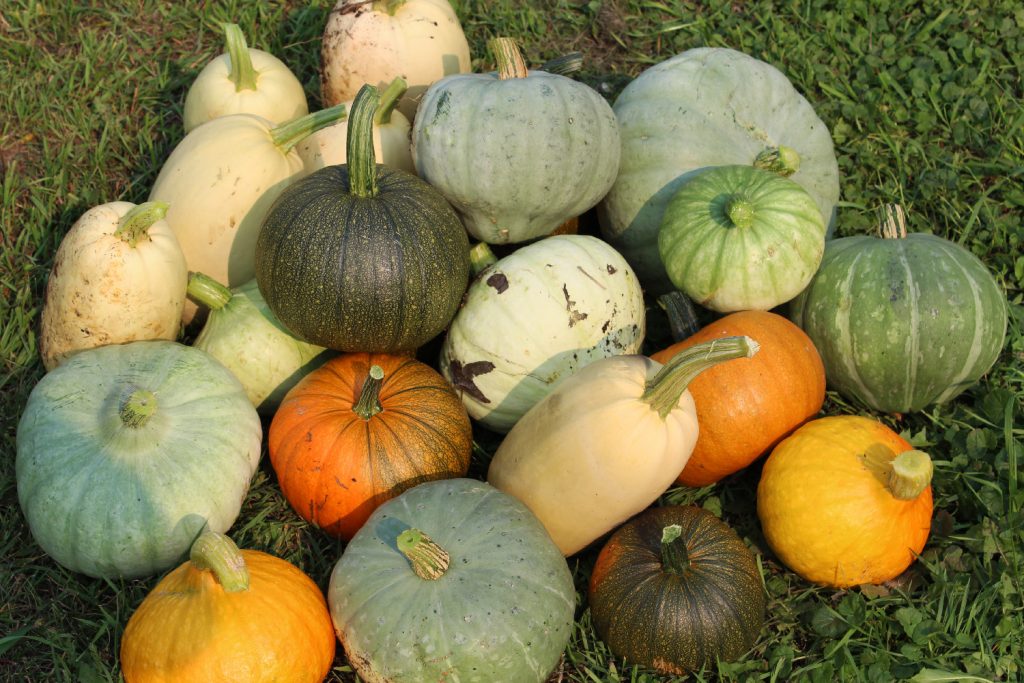
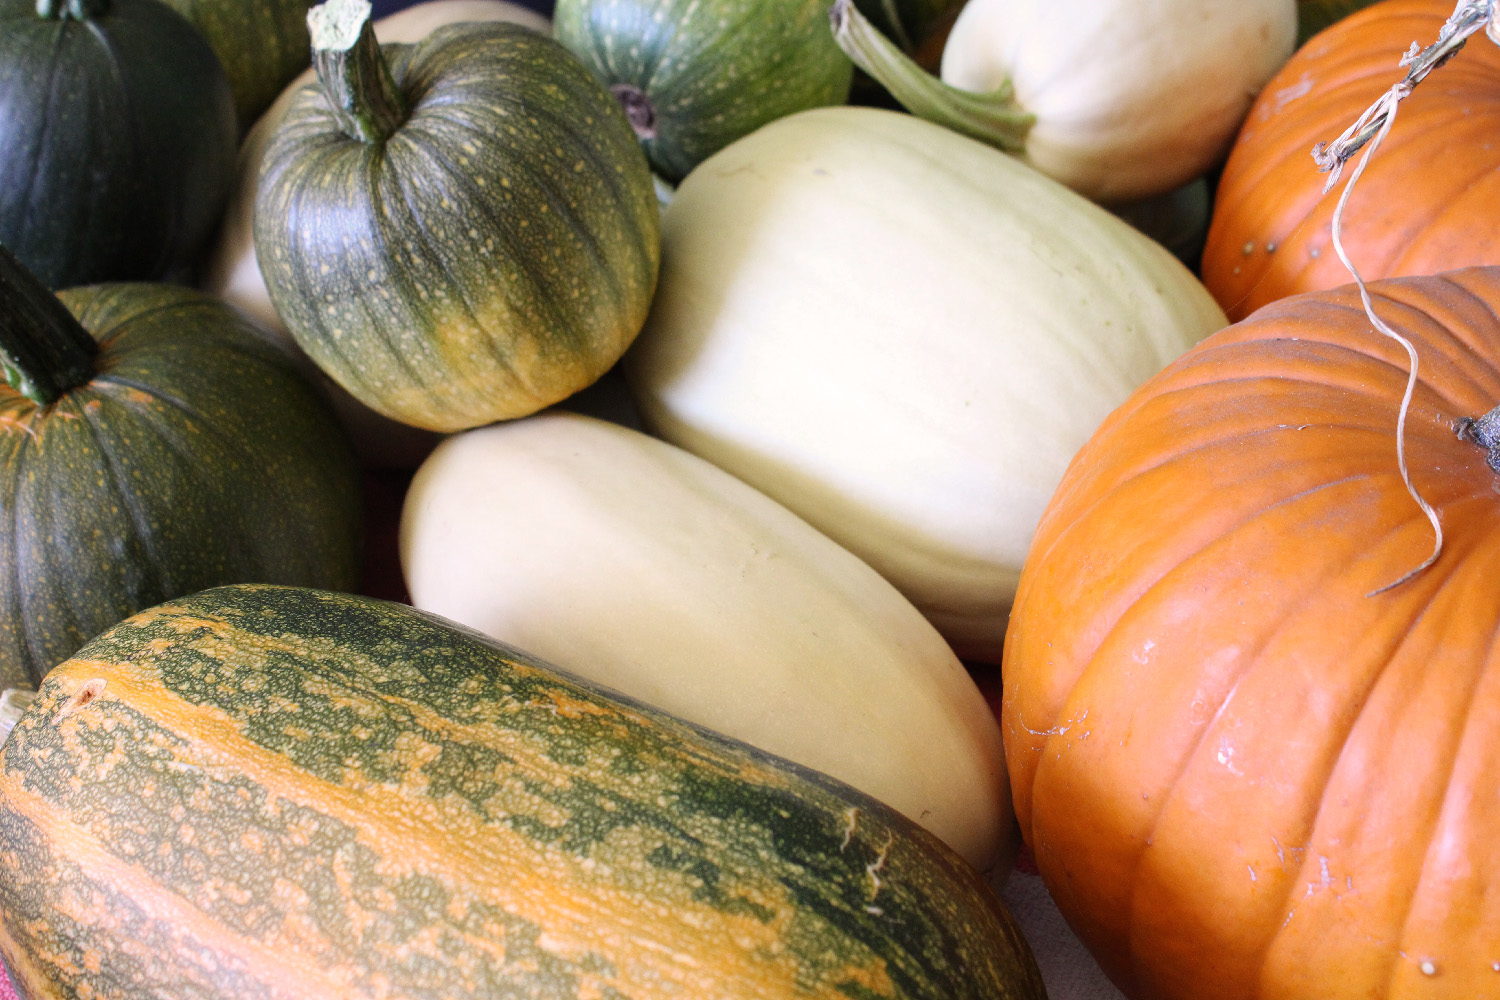
We grow a lot of squash. Our first couple of years here, we discovered that squash seems to like our particular climate, and is happy to grow here without a lot of fuss, as long as we pick a type that will mature in our very short season. Even so, we often find ourselves picking our squash before it is fully ripe, or sometimes even completely green, in order to avoid a hard frost. A lot of types of squash will store at cool room temperatures for a very long time, which makes it doubly attractive, as it doesn’t need to take up space in the root cellar or freezer. However, in order for it to last well, you need to cure winter squash, especially if you are picking it a little early.
A freshly harvested winter squash, with the stem still soft, wet, and seeping. This squash needs to be cured!
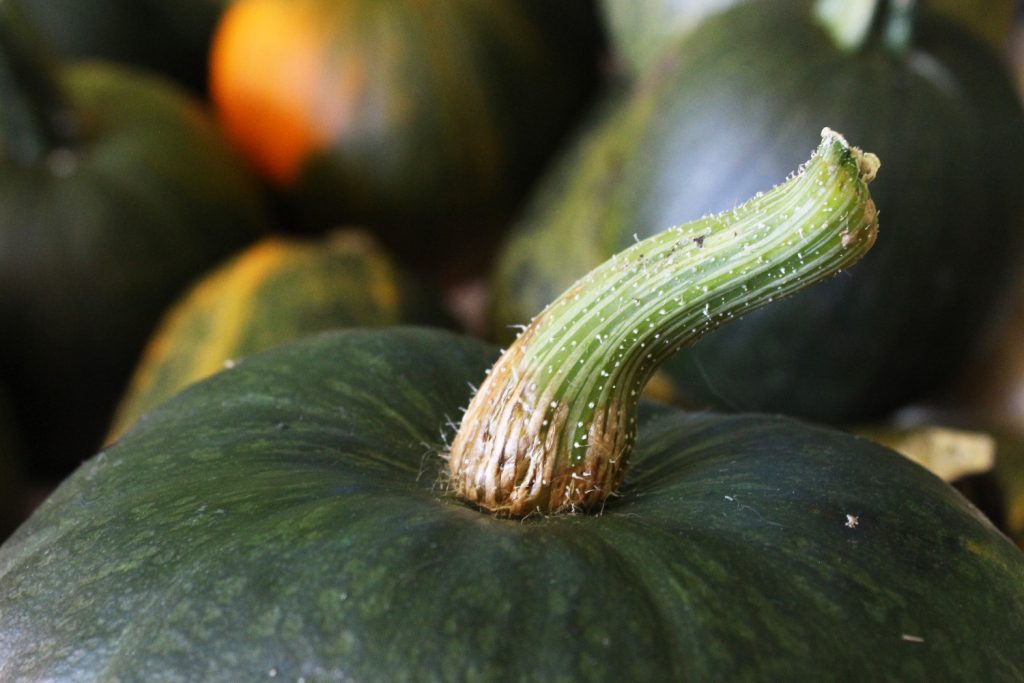
What is curing? Basically, it is letting the green or under-ripe squash dry out a bit, thicken its rind, and be ready to sit on a shelf without rotting. How do you cure winter squash? Well, the first step is to pick it at the right time. While many types of squash will take a light frost, it doesn’t appreciate freezing. We try to pick our winter squash just before the first frost, but in our zone, that often means picking it before the stem has fully dried out. When we are harvesting, we make sure to cut the stems quite a way back, leaving a good ‘handle’. Don’t pick the squash up by this handle, though! You might break the stem off, which actually makes the squash more susceptible to rotting.
A partially cured winter squash. Note the shriveled stem end, and the base of the stem starting to look dry and woody. There’s still a lot of green, tender stem, though!
After the harvest, we usually leave the squash outside on the lawn for a while to dry off, if it isn’t raining; otherwise, we take it inside and wipe it with a towel. Once the squash is dry, we brush off as much dust/dirt/mud as we can. Next, we dip the stem in a mild (about 5%, though I often eyeball it) bleach solution, and wipe down the outside with a cloth dipped in the same solution. Normally, we do this in a 5-gallon bucket in the tub, as most of our squash are small enough to easily dip in the bucket, and doing it all in the tub contains the mess a bit. For really large squashes, I dipper a handful of bleach water over the cut part of the stem and the base where the stem is attached to the squash. Then, I wipe the rest with a cloth dipped in the bleach solution. Once it has been dipped (or wiped), we towel the squash off again, using old towels, as the bleach can cause them to get discolored.
If you don’t have much time (or a good space to do any dipping in), at least make sure to get the cut part and the base of the stem wet with a bleach solution. This will kill off any bacteria that might get into the stem before it is cured, and make the squash rot prematurely.
Although I knew about the bleach thing for a long time, I resisted actually using bleach on my squash, as it seemed unnecessary and harsh. However, dipping the stems in bleach makes a huge difference in how long our squash store, so we do it every year, now. Bleach breaks down pretty quickly, and won’t be present by the time you eat the squash, plus you don’t normally eat the rind anyhow, so it is safe to do this.
Freshly bleached winter squash, laid our in a warm, dry place to cure.
Finally, we lay out the squash on towels in a warm, dry space – normally we put them on the floor in the corner of our living room. We check it over and turn each squash every few days, to make sure all sides are being exposed to the air to dry. Squash prefers a cool, dry space for long-term storage, but you need to cure them properly, first.
How long should you cure your winter squash? It really varies, depending on the type of squash, how long you were able to leave it on the vine, how warm and dry your curing area is, and how wet or dry your growing season was.
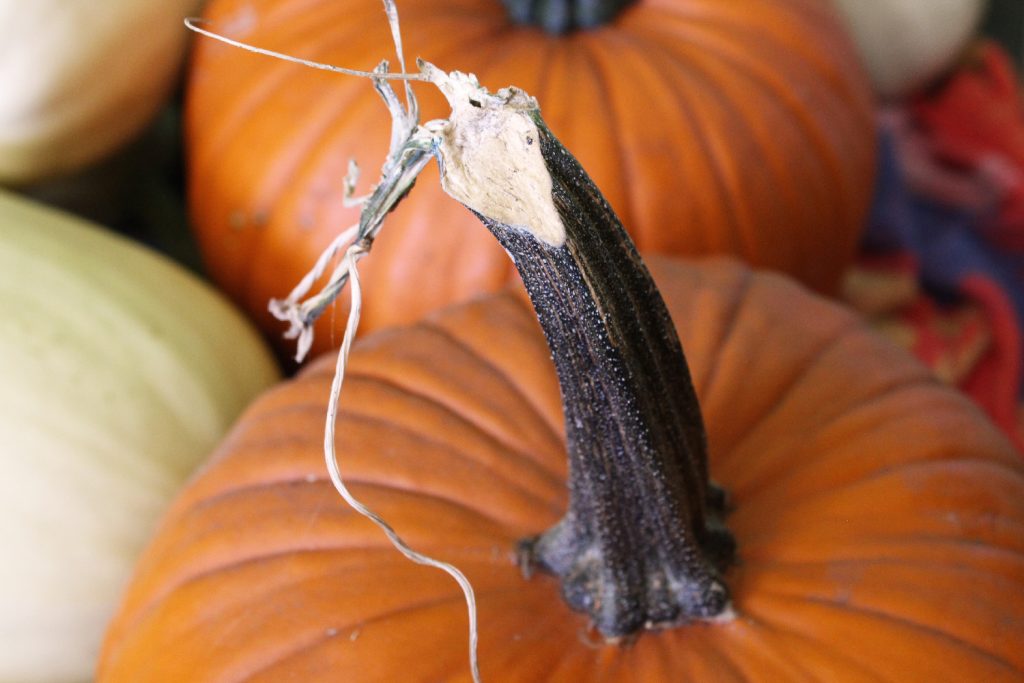
A properly-cured pumpkin, The stem is dry, hardened, and woody, and the rind is thick, and can’t be easily marked with a fingernail.
We’ve found that hard-stemmed varieties like spaghetti squash and most cucurbita pepo species of pumpkins cure fairly quickly, often in a couple of weeks for us, even if they are picked green. Once the stem feels hard and dry to the touch, and the skin of the squash itself has hardened to the point that you can’t easily pierce it with a fingernail, it is good to go. Fleshy-stemmed winter squash like Red Kuri, Buttercup, and Sweet Meat, and many other cucurbita maxima varieties, seem to take for-ev-er, often a month or more. For these, you need to cure them until the bulbous part where the stem meets the squash is hard and dry, as this is where the rot usually starts.
The rind on this spaghetti squash is still thin, and easily marked with a fingernail. It needs to cure longer!
Once it is completely cured, winter squash prefers to be stored in a cool, dry place. Many basements would be too damp, though if you have a dry basement or run a dehumidifier, it could work well. We often store ours in a spare room with the door closed and the furnace vent covered; our squash does very well in there. How long any given squash will store can vary quite a bit; this depends on the type of squash, your growing conditions, and your storage conditions. Generally, though, for us, c. pepo pumpkins are usually done by Christmas or shortly after, followed by small-sized c. maxima squash like Red Kuri, which usually last until February or March. Larger c. maxima squash like Sweet Meat and Mandan last quite a bit longer, until April or May at least. Spaghetti squash is the champion out of the varieties we can easily grow, lasting a year or more in good shape. We haven’t found any variety of c. moschata that will set fruit in our short season, but I understand that that species tends to store very well, also.
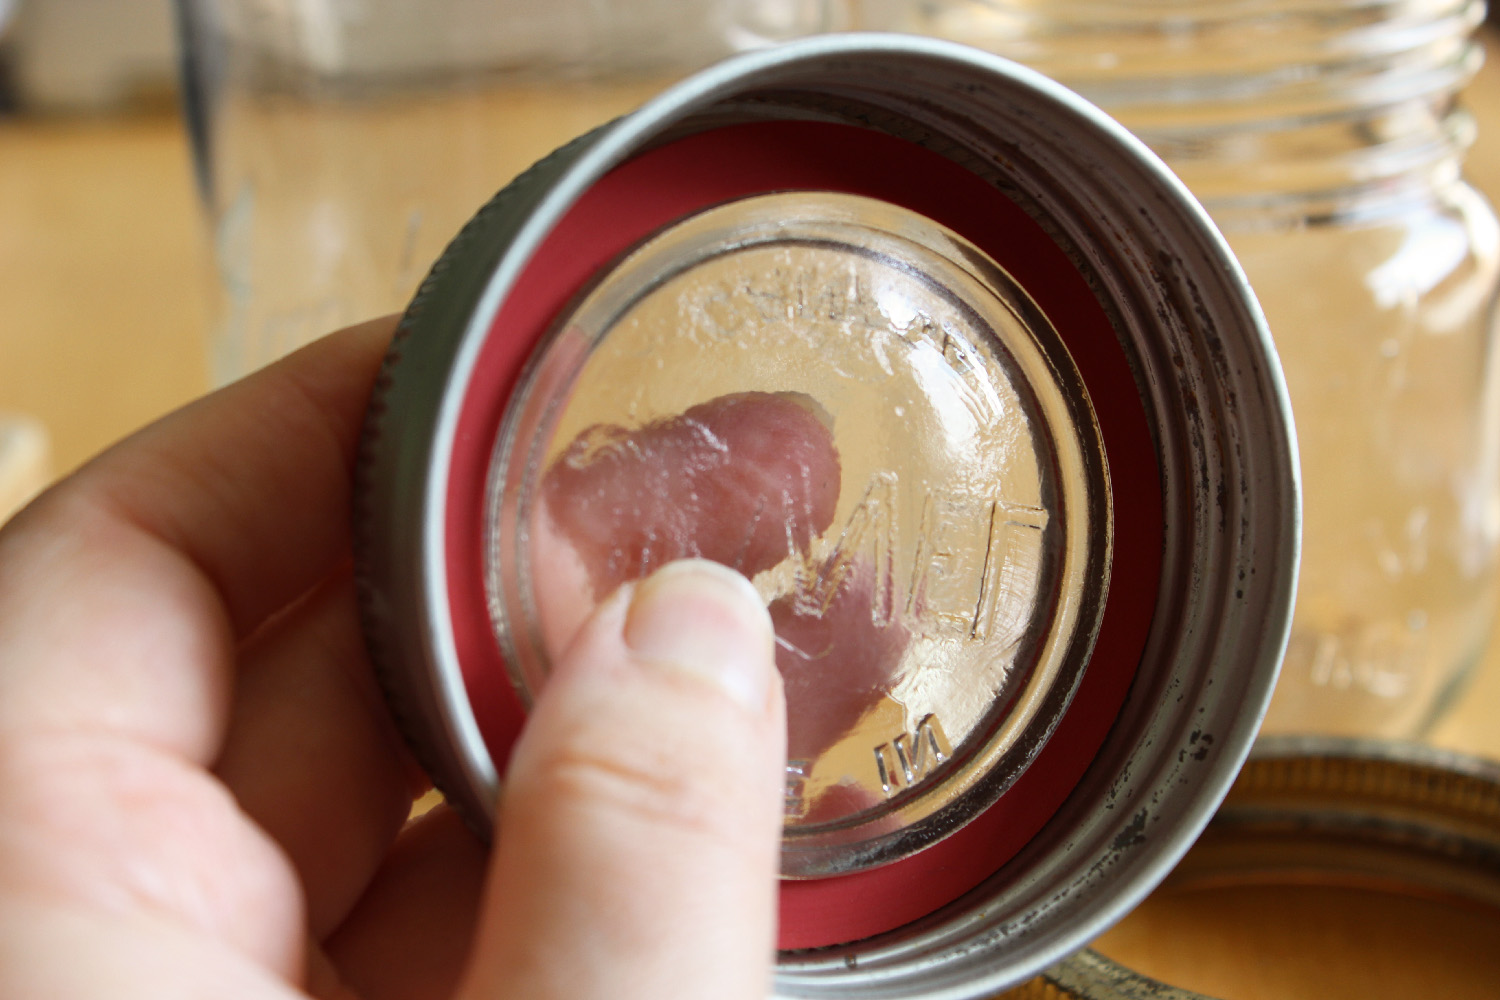
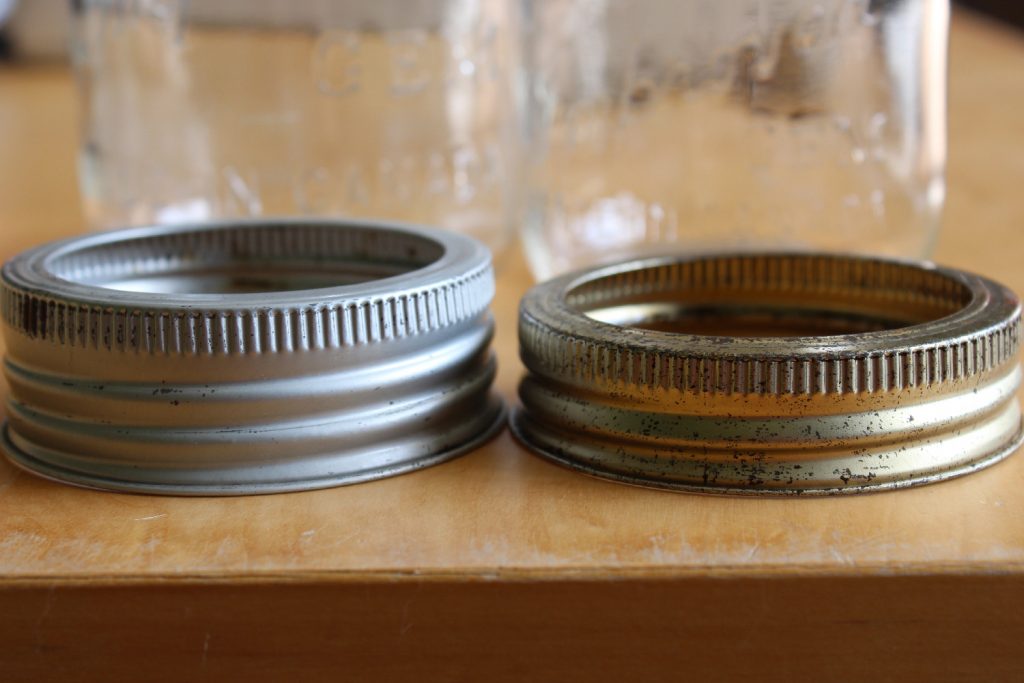
This weekend, I started experimenting with canning with glass lids on my Gem jars.
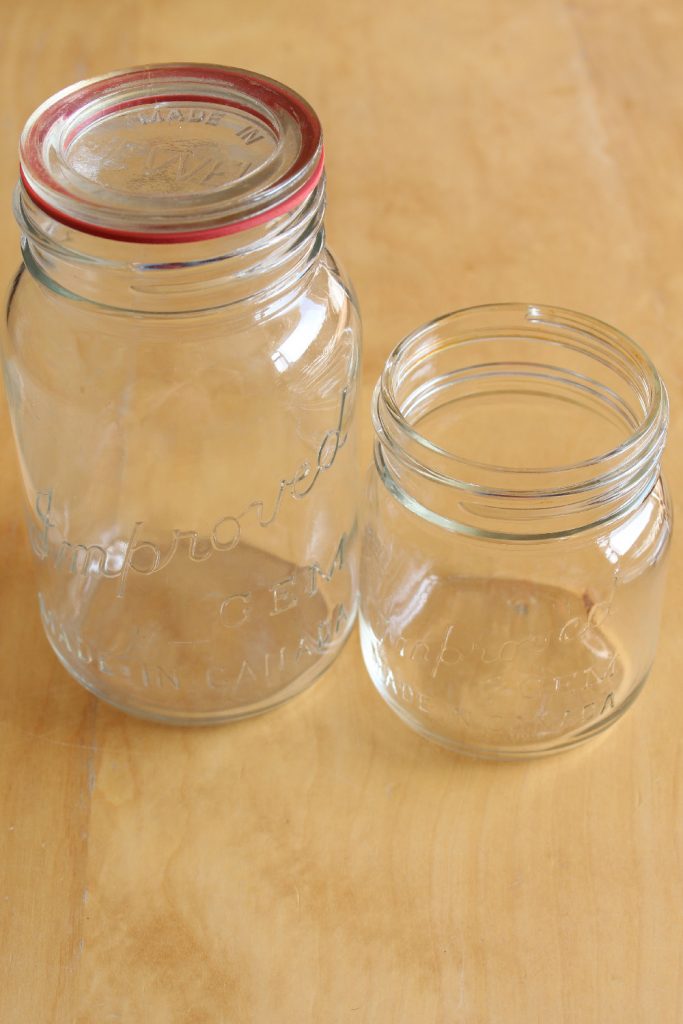
In Canada, especially Western Canada, we have a unique size of canning jar, with a 78mm mouth. They were produced up until the late 1990’s or early 2000’s, and were sold under a variety of brand names, including Gem, Jewel, and Crown. Originally, these jars used a glass lid, with a rubber gasket underneath to allow a seal to form; however, when the metal lids became available, most home canners switched over to those. This blog has an interesting article on the history of 78mm mouth jars and lids in Canada.
I have a sizeable collection of Gem and Jewel jars. Some were inherited from family members, and others I acquired from yard sales. Even though the jars were discontinued before I ever started canning, I preferred them, because the 78mm mouth is a nice size for peach and pear halves, and the jars themselves have a bit of a shoulder that helps to keep canned fruit under the liquid. Plus, I could get them for a couple dollars a dozen at the yard sales, and I’m cheap. Up until this spring, you could still get new lids and bands for the 78mm mouth size in a variety of local stores, so I was happy to keep using them.
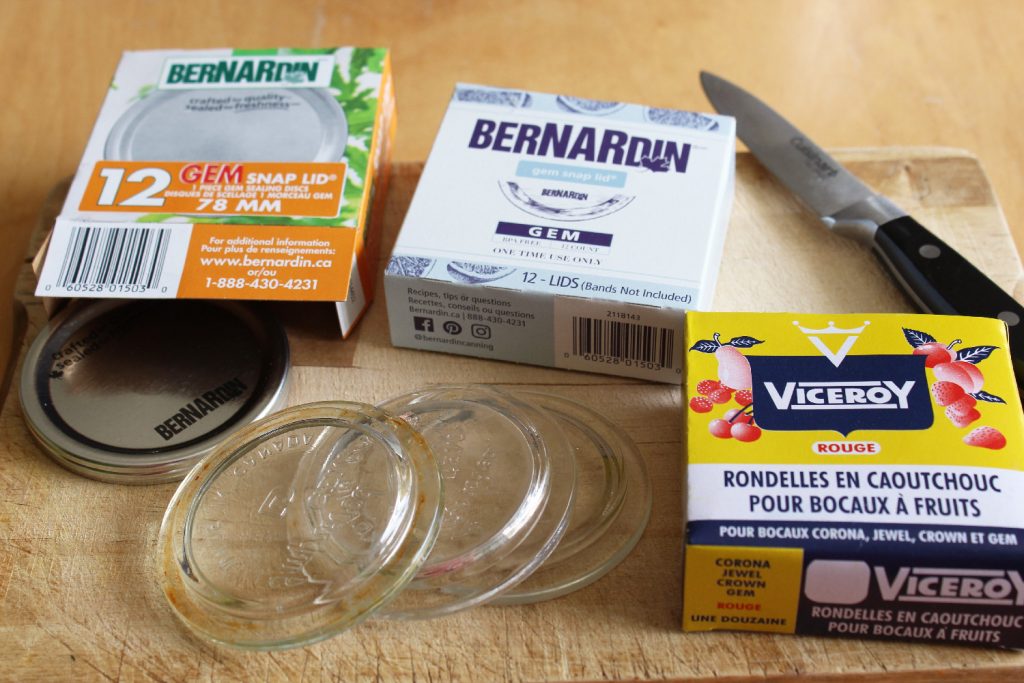
Unfortunately, Bernardin, the last lid manufacturer in Canada, discontinued the lids in the spring of 2022. They tried to discontinue these lids once before, in the early 2000’s, but there was such an outcry that they relented, and continued making them for another 20 years! However, it doesn’t look like they are going to change their minds this time. I got more than a little panicky about this, and asked my friends across the country to scour stores for the last remaining lids. I have a few years’ worth of lids, now, and plenty of bands, so I’m good for a little while, but with the price of canning jars right now, I was dreading the cost of trying to replace my dozens (hundreds?) of Gem jars with modern wide-mouth jars between now and when my lid stash runs out.
I was cleaning in my basement late this summer, and came across a box that had been shoved in a dark corner since we moved here. In the box…surprise! A huge collection of the old glass Gem lids, with a big stack of the old deep zinc bands that were made to accommodate them! My mother-in-law had saved her glass lids when she switched over to metal ones, and must have given me her collection just before we moved.
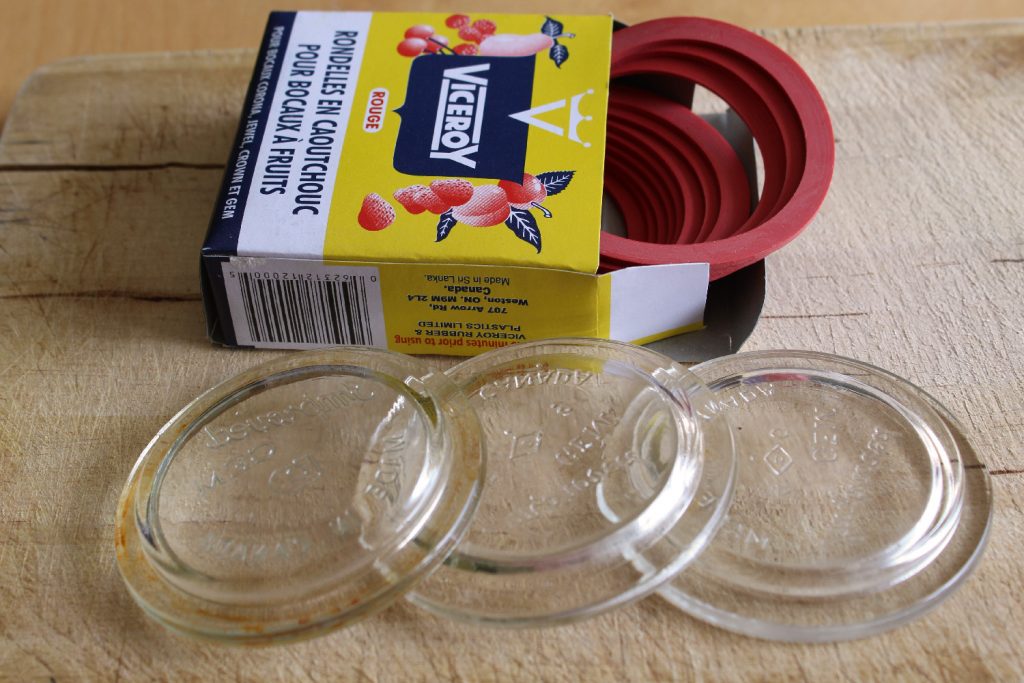
This prompted me to do a little googling, to see if I could still get the rubber gaskets for these lids, and wouldn’t you know it, but Canadian Tire still carries them! I have also seen them at our local Co-op Grocery store and at Peavey Mart. They are sold under the brand name Viceroy, and are not at all expensive, so I’m planning on buying a bunch. From my internet research and from speaking with my mother-in-law, the gaskets can be re-used for years, until they get stretched or until they start cracking, which is also handy. Financially, using a $2 box of gaskets for several years is way better than replacing a $6 box of metal lids annually, so that’s another bonus to the glass lids.
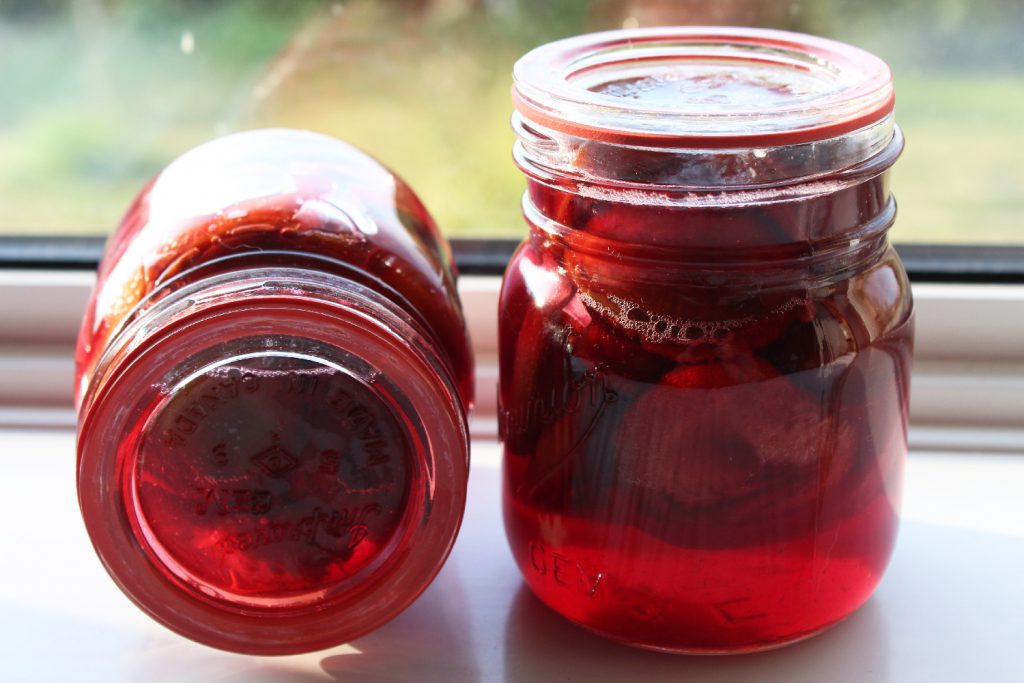
Having gotten my hands on all the necessary parts, I decided to try canning with glass lids this weekend. Anecdotally, a number of my friends have reported that they have more seal failures with their Tattler reusable lids, so I thought I might run into that with the glass ones, too. I was doing a second batch of pickled plums yesterday, mostly because I needed to use up the plums, so a few seal failures wouldn’t be a disaster. Worst-case scenario, we could throw the jars in the fridge and turn the kids loose on them. Plus, with pickles, if I have a seal failure later, I’m less likely to end up with a fizzy, fuzzy mess in the pantry.
I found a couple of resources for using the glass lids – this youtube video shows you the process, and this blogger also goes through it, step-by-step, an a three-part series. Interestingly, the blog post noted that the modern bands can be used with the glass lids, which I did not know. I was a little dubious, since there is a substantial difference in the depths of the two styles of ring, but what the heck – I decided to experiment with that, too.
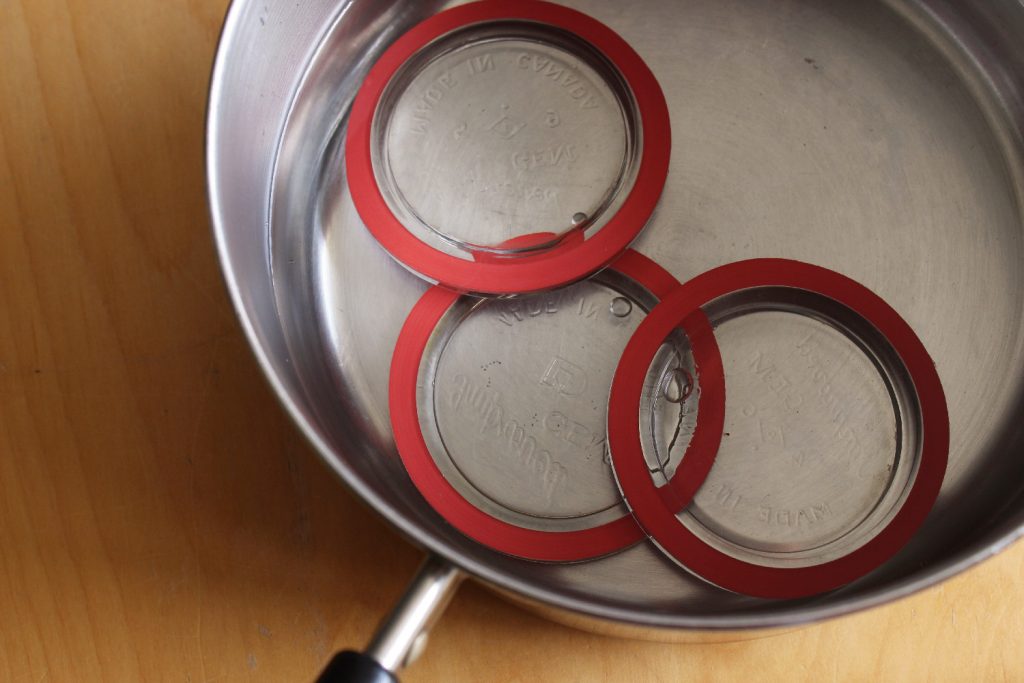
What I did was scrub the glass lids very thoroughly with a toothbrush to get off any dust or goo, then put a rubber ring on each lid. I found that the rubber rings seem to have a ‘right way’; if one was fighting and not staying on well, flipping it over seemed to solve the problem. Then I put the lids, with the gaskets, into a pot, which I simmered on the stove while I made the brine for the pickles. It seems that the recommendation is to boil them for at least ten minutes; mine probably simmered for closer to half an hour, and that did not seem to cause any issues. I used kitchen tongs to grab the lid/gasket sets out of the boiling water and put them on the jars, which worked great.
I filled my jars a bit less than I otherwise might; with raw pack fruit, I usually do that anyhow. When I put on the rings, I didn’t crank them down tight; I put them on snugly, then backed them off just a tiny bit. I got that from the recommendations for how to use Tattler reusable lids, and it seemed like a good idea. For my canner load of 7 pints, I used the old deep bands for 4 of my jars, and the modern shallow bands for the other 3. When the processing time was done, I turned off the burner and let the jars rest for 5 minutes in the canner. I haven’t seen this recommended anywhere, but I find it reduces siphoning, and it doesn’t seem to affect how the jars seal. Then, I took the jars out and tightened the bands down as much as I could. The shallow rings actually felt easier to tighten than the deep rings, which is interesting.
I was so excited to check my jars that it was hard to leave them on the counter and go to bed without fiddling with them. This morning, though, I went and took off those bands first thing, before I even had coffee! I took off each band, poked each lid a bit to see if it would move, then picked up each jar by the lid. I didn’t lift them far off the counter, less than an inch, but enough that the lid was taking the full weight of the jar. If it didn’t seal, or formed a weak seal, the lid would pop off, so don’t lift too far, or you could have a mess on your hands! My mother-in-law mentioned that her mom would also flip the jars over and watch for bubbles sucking into the jar, which would also suggest a seal failure, so I tried that, too, but I kept a couple of fingers over the lid so that the contents wouldn’t pour out if the seal was bad.
Success! All seven jars sealed!
Seven jars is too small a sample size to tell if I will have the same failure rate with glass lids that I do with metal ones, which is usually about 1 jar failing to seal out of every 2-3 canner loads. I’d even be okay with a seal failure in every 1-2 canner loads, as I usually want to sample things anyhow, and we have plenty of fridge space. I also don’t know if the seals will hold as well or as long as they do with the metal lids, so I guess I will have to report back in a year or so, but for now, I’m happy to have a way to keep using my Gem jars.
It’s that time of year again, where we are drowning under the weight of the vegetables we planted in a ridiculous burst of optimism in the spring. Tomatoes, onions, garlic, and zucchini all need dealing with, and dealing with *right now*. Produce is not patient.
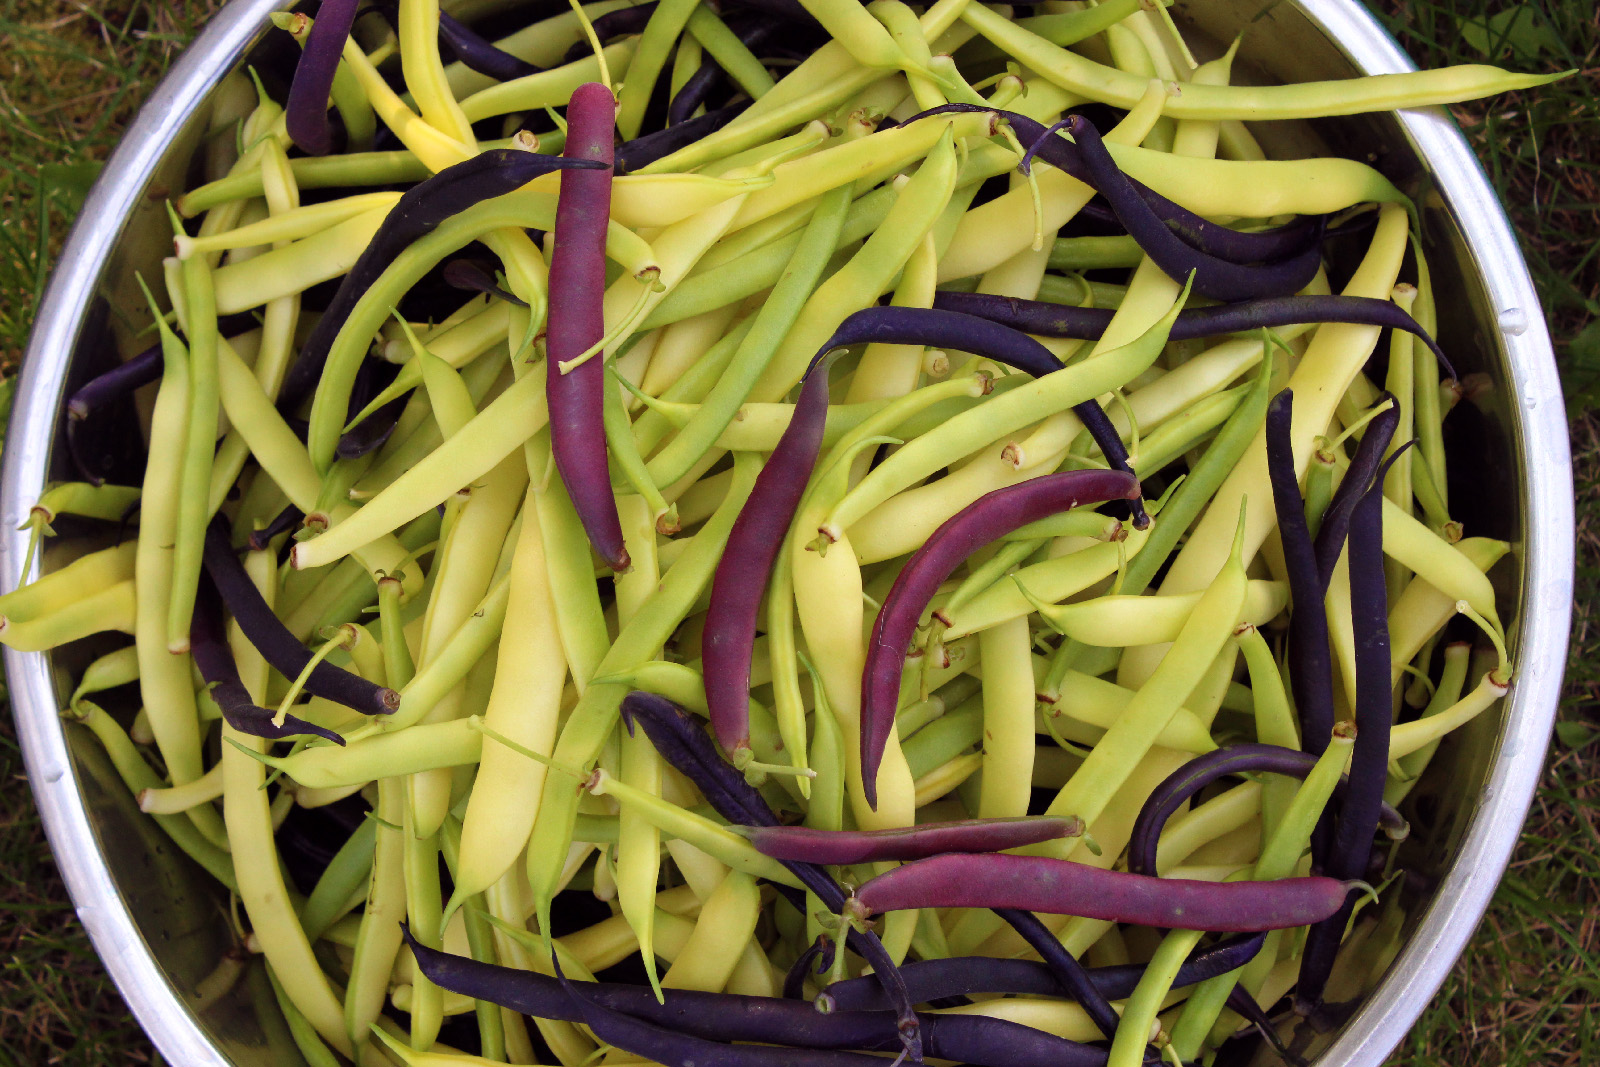
The big winner this year has been the wax beans. This is mostly because our cold, wet, spring led to germination issues, and over and over, we just shrugged and planted beans in those rows, thinking that at least beans can produce in the 60-75 day window we had left before frost. We did not keep track of how many rows this happened to, since we gave up on the parsnips far earlier than we gave up on the beets, and somehow we ended up with seven (!) rows of various types of beans by the time it was all said and done.
We really did not do much to deserve all this bounty. We dropped some seeds into some rows, and the rains came more or less when we needed them, so it’s mostly been a matter of keeping things weeded and picked. The beans seem to handle heat and drier weather better than a lot of our other vegetables, so I guess we picked the right summer to plant lots of them!
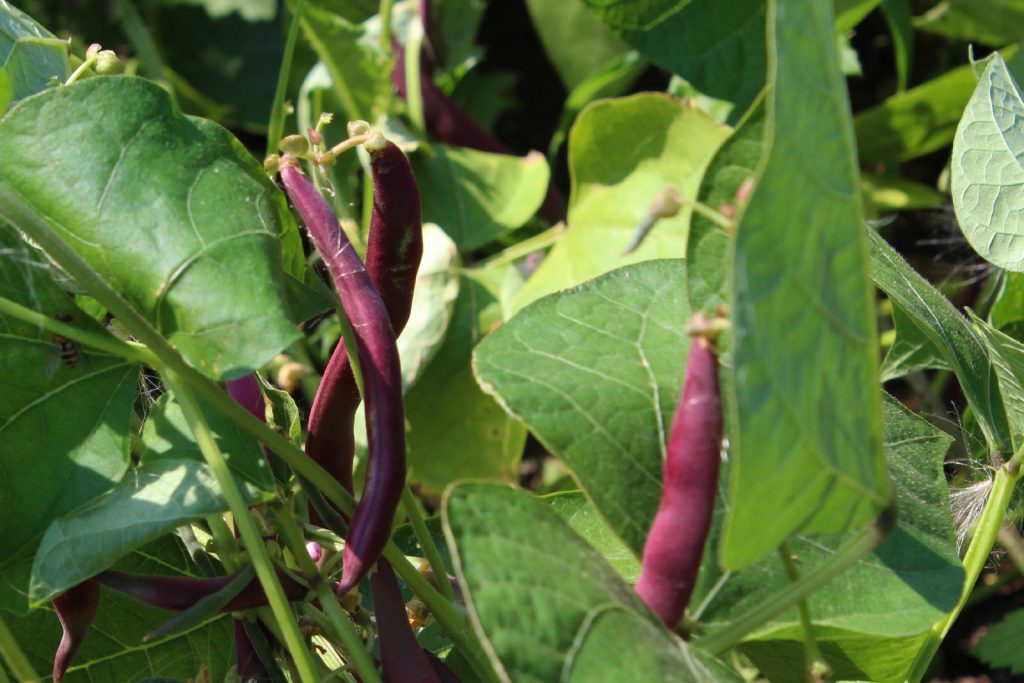
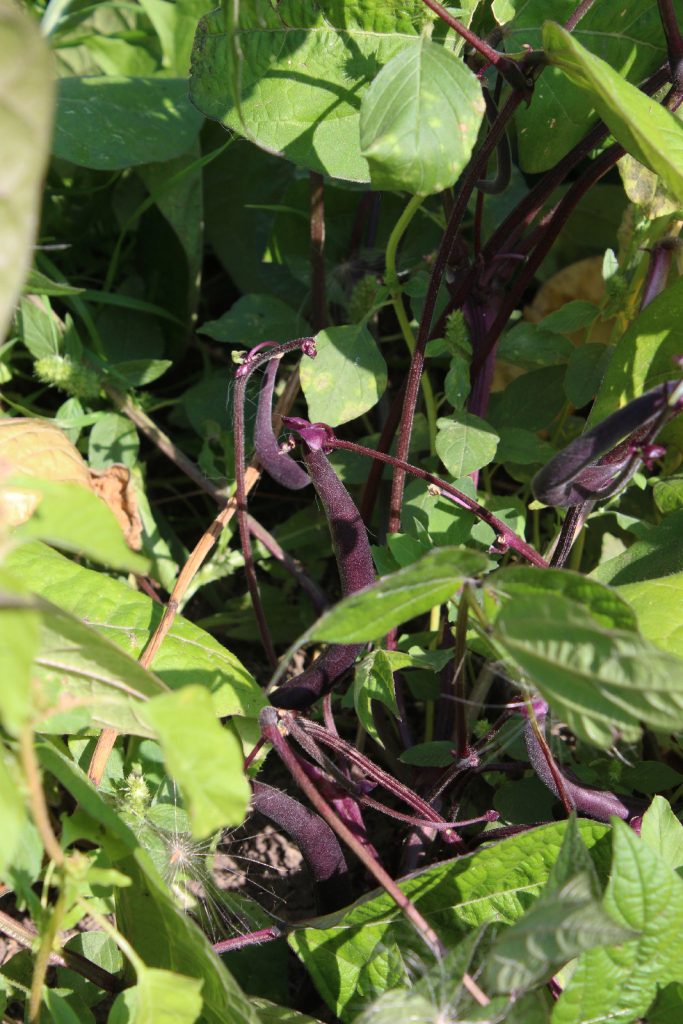
We find it easier to see colorful beans among the green leaves, so we planted red, purple, and yellow beans. The red and purple beans turn green when they are cooked, but they sure look fun in the picking bucket!
I wish I had written down variety names when we were planting, but we were scrounging half-packets from the bottom of my seed box to fill in the rows, and we have no idea how many varieties we even stuffed in there, or what they actually were. The purple beans were probably ‘Royalty’, but that’s really only my best guess. The purple and yellow varieties were heavy producers in the early part of the season, but have tapered off; the red ones were slow starters, but are going great guns now, when everything else is taking a break, so I guess the combination worked out well.
So far, we’ve picked upwards of fifteen gallons of wax beans, which sounds like a lot, but once they are topped and tailed, chopped, and packaged up in neat little four-cup vacuum-sealed bricks, the pile in the freezer is shockingly small compared to the buckets of freshly-picked beans. To be fair, we’ve eaten beans with every second meal for weeks, now, and I’ve pickled a bunch, too, so it’s not a disappointment in any way.
We were blanching our beans for the first five or six gallons’ worth, but a friend cheerfully informed me she doesn’t bother, and her beans are not tough, even after ten or twelve months. Given that it’s been 30-plus degrees here for much of the last month, and given that we don’t have air conditioning, we’re happy to test out this theory, and save on heating up the house. I’ll try to remember to do a blog post about how that worked out!
Meanwhile, I’ll be washing and chopping zucchini and beans…
Asparagus is a big favorite in my family. In the beginning, it was just me who really loved it, but the more I tried to keep it all for myself, the more the kids wanted a share. Go figure.
Asparagus is very hardy, and easy to grow here in zone 2/3. We have a substantial amount of the stuff, spread over three different patches. We’re currently harvesting from maybe 35 – 40 plants, and this spring, we were getting around 1.5 to 2 pounds, every second or third day. It still isn’t enough!
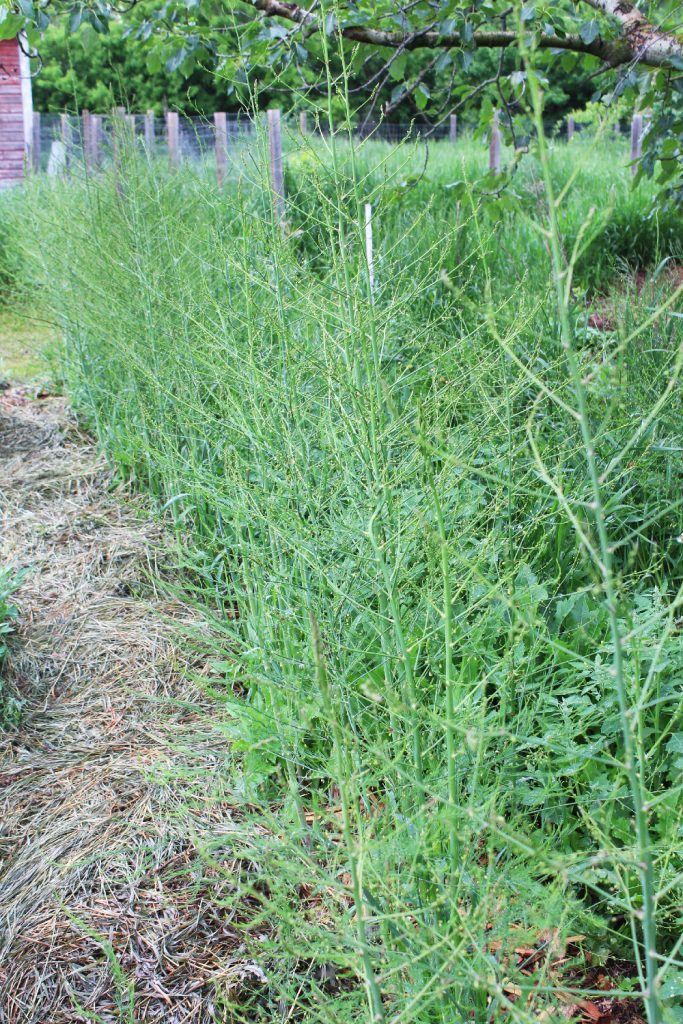
An asparagus row in my garden.
We did plant 10 more roots last year, and another 10 this year, so hopefully we will have enough for everyone to eat their fill in another few years.
Here are my thoughts on growing asparagus:
Asparagus will survive in not-weeded conditions, but they won’t get to the big, juicy spears you can harvest lots of (or it will take a lot longer for them to get there). We dug one patch out of sod around 8 or 9 years ago, and planted asparagus there, but the arrival of child #2 meant we ran out of time to stay on top of it, and that bed got abandoned. I still see several asparagus plants growing in that spot, but the spears are too small to harvest, even after all that time. They are hanging in there, but barely.
Wood chip mulch around the base of an asparagus plant – with grass mulch piled nearby.
What we’ve done with our two surviving beds is weed them well, dump on a bunch of compost, then cover the whole thing heavily with wood chips. It hasn’t completely eliminated the weeds, but it vastly reduces the amount of weeding needed. The established asparagus doesn’t seem to mind pushing through the extra several inches of ‘stuff’, and the mulch really helps with water retention during hot, dry spells.
Asparagus also likes significant amounts of water, so we do water them if it’s really dry. We try to water deeply when we do water, as the roots are way down there, and won’t benefit from light surface watering. They will survive drought, but again, you won’t get great production without sufficient water.
Asparagus don’t really spread through roots, but they can self-seed if you have female plants (some of the cultivars that commercial places sell are male-only crowns – great for production, but they won’t set seed). They don’t really self-seed on wood chips, though. One of our patches is at the edge of our garden, and we sometimes find little baby asparagus there; we try to relocate those back into the patch, but the survival rate is not great. I’ve also tried growing asparagus from seed, but haven’t had much luck with that. They sprouted, and grew, but did not survive their first winters on any of the occasions I’ve tried, so now I just order the 2 year old roots from nurseries.
Once a root is healthy and established, they will push out lots of spears, though not necessarily all at once. I have one bed that is healthy, well-tended, watered, and ten years old; from that bed, I am getting initial spears that are bigger around than my two thumbs together. I harvest all of the big spears from those plants, over and over. So I might pick 4 or 5 spears one day, then another 4 or 5 in a few days, and so on, until each spear coming up is smaller than my pinkie finger. I have big hands; my pinkie is bigger in diameter than a pencil, but I like to leave lots for the plant to re-establish with, in case there is drought or other weather issues. At that point, I stop picking and let the asparagus grow up and form ferns.
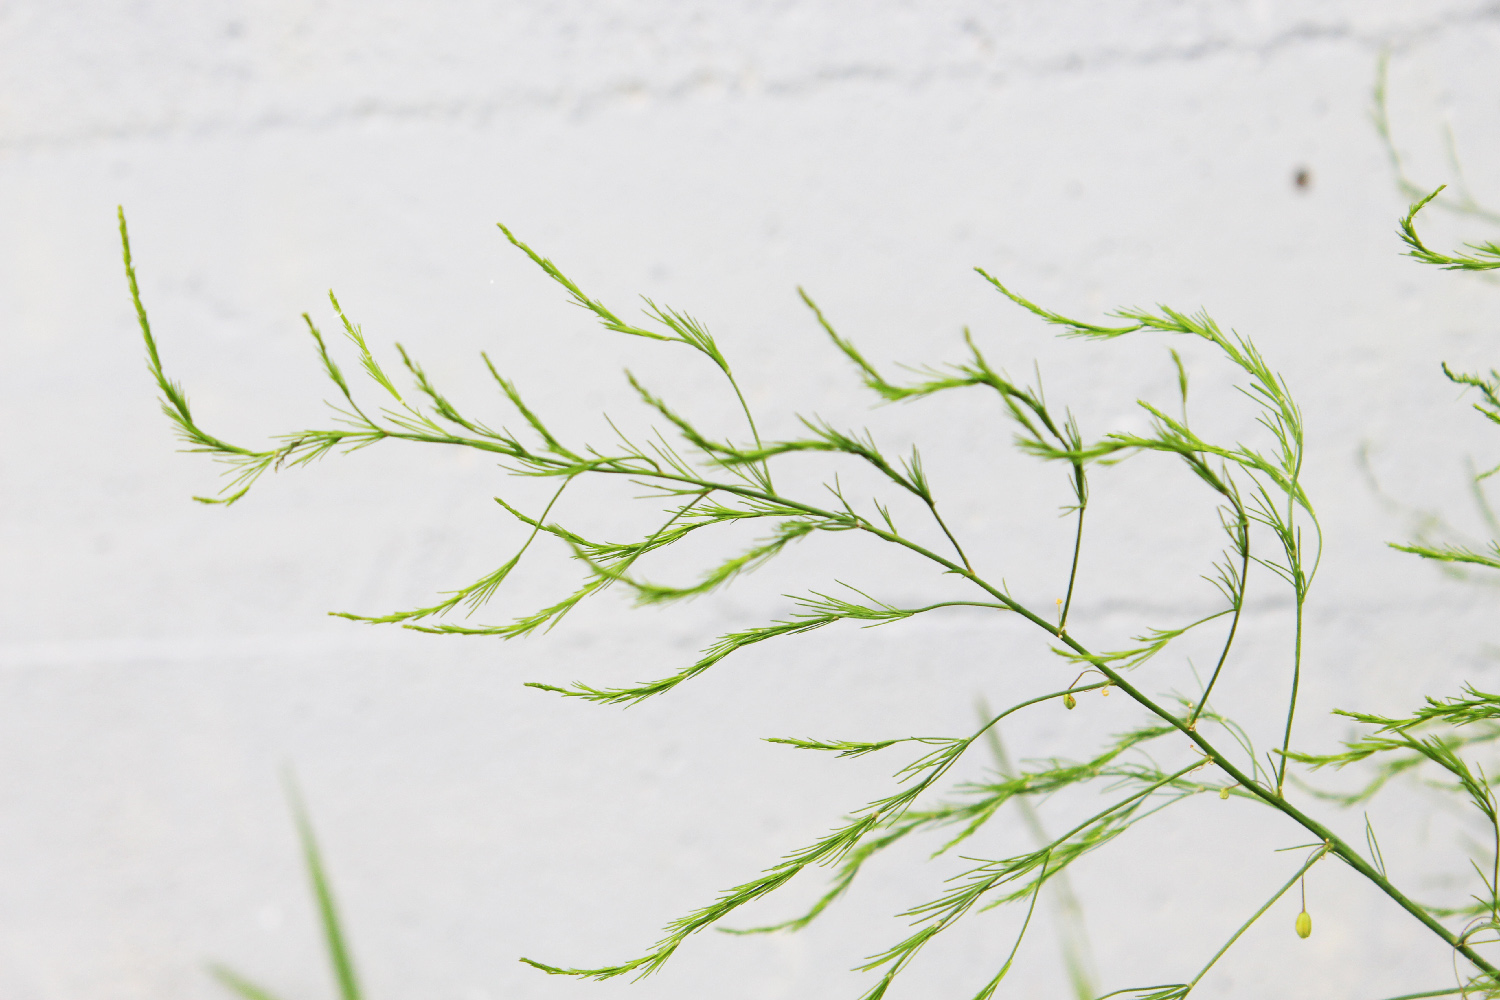
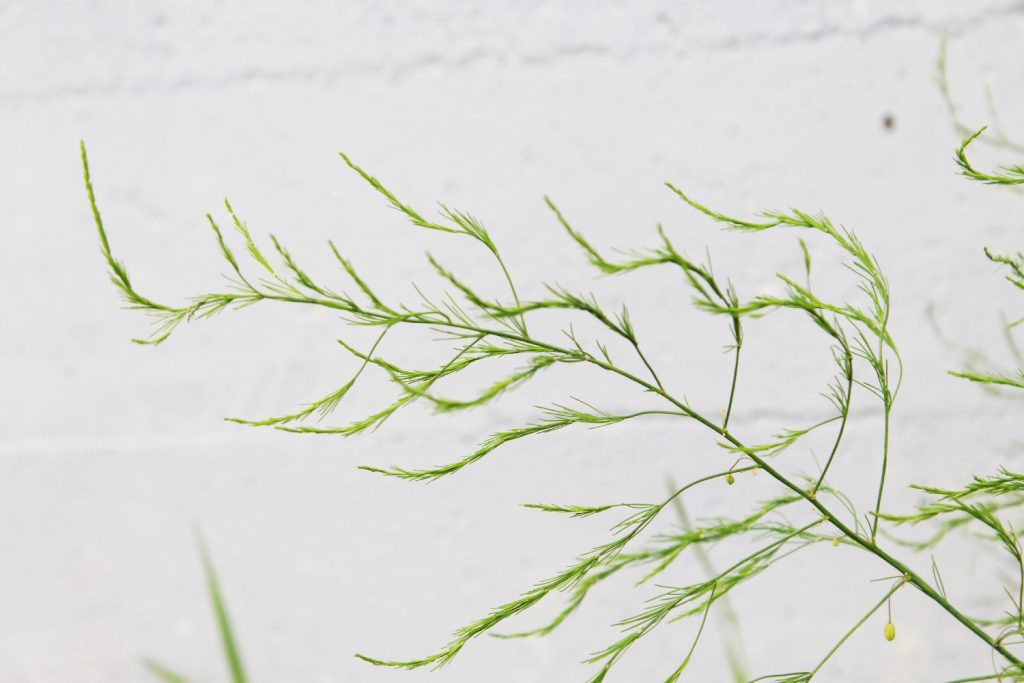
An asparagus leafing out – it looks very fern-y!
Most of the articles I’ve seen recommend waiting until year 3 to harvest, and only harvesting spears that are bigger in diameter than a pencil. However, when you are establishing new beds, I actually recommend giving the plants more time to establish, and fewer pickings, than the literature suggests.
The way asparagus works is that it stores up energy and nutrients in its roots, and uses that energy to push up the spears. I find that if you can be patient and go easy on it for the first few years of harvest, then you end up with a stronger, more resilient plant, and to me, long term resilience is more important than large and early harvests.
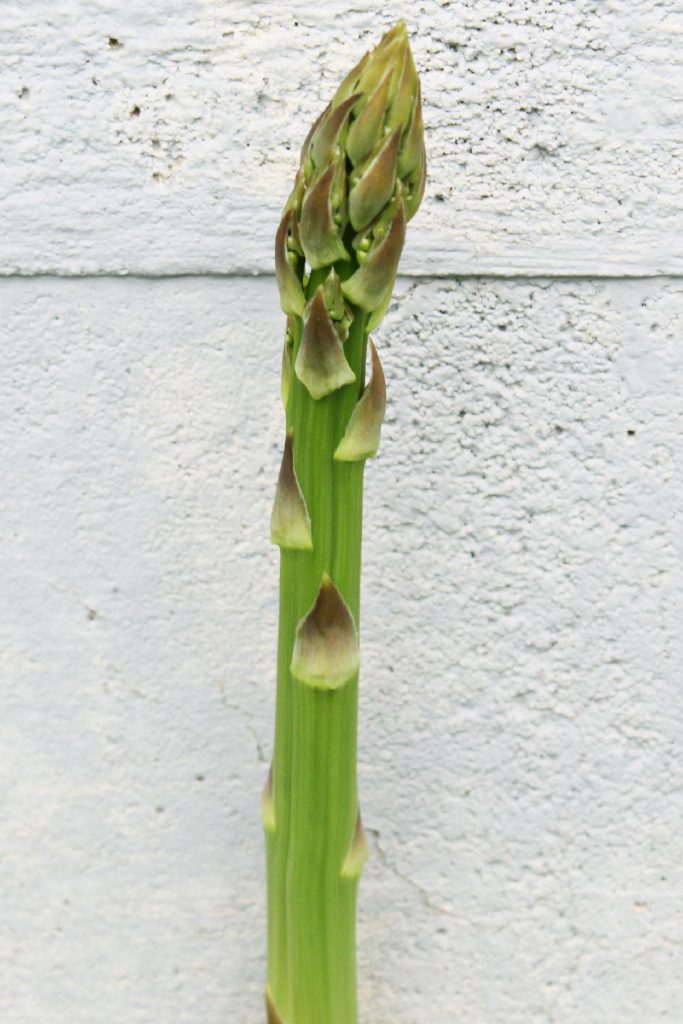
An asparagus spear – I stop picking them at a much larger diameter than recommended.
I try not to harvest until the plants are 4+ years old (I buy 2 year old roots, than wait at least 2 years to harvest), or at least putting out multiple spears bigger around than my thumb. Like I said earlier, I also stop harvesting well before the recommended minimum size, as I want my plants to have lots ‘in the bank’ to size up the roots with, even if summer growing conditions are less than ideal.
Personally, I think asparagus is a great perennial food plant for northern gardens, and if you have the space and the time, I would encourage you to plant a bunch!