Tag Archive : winter squash

/ winter squash

A photo of winter squash curing

We grow a lot of squash. Our first couple of years here, we discovered that squash seems to like our particular climate, and is happy to grow here without a lot of fuss, as long as we pick a type that will mature in our very short season. Even so, we often find ourselves picking our squash before it is fully ripe, or sometimes even completely green, in order to avoid a hard frost. A lot of types of squash will store at cool room temperatures for a very long time, which makes it doubly attractive, as it doesn’t need to take up space in the root cellar or freezer. However, in order for it to last well, you need to cure winter squash, especially if you are picking it a little early.

A freshly harvested squash with a cut stem, that needs to be cured before long storage.
A freshly harvested winter squash, with the stem still soft, wet, and seeping. This squash needs to be cured!

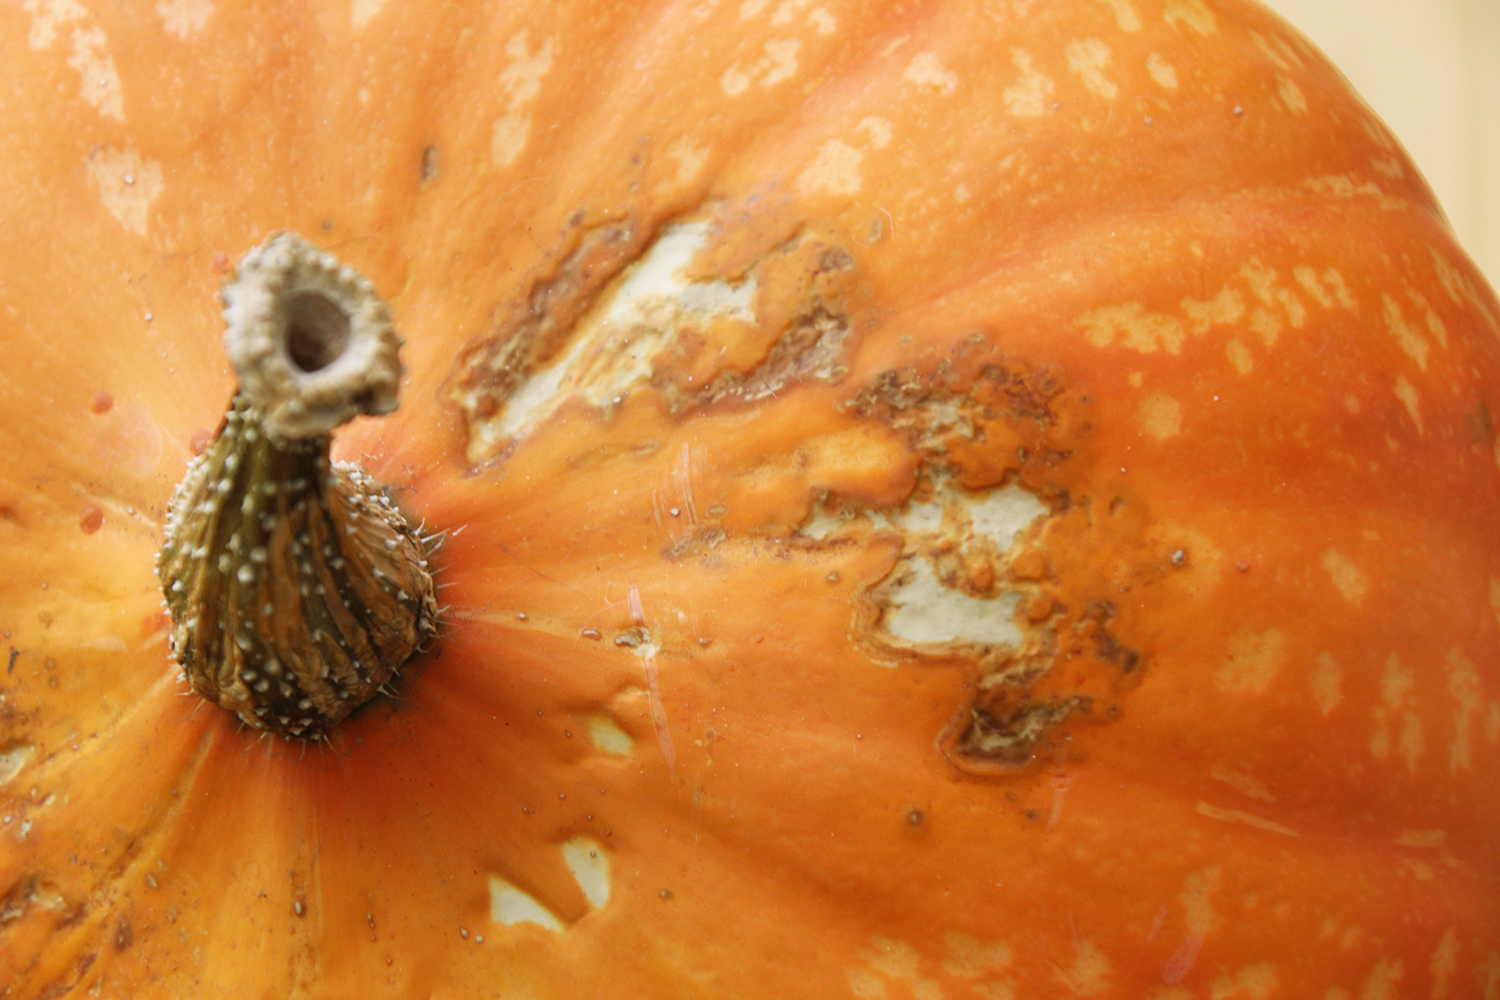
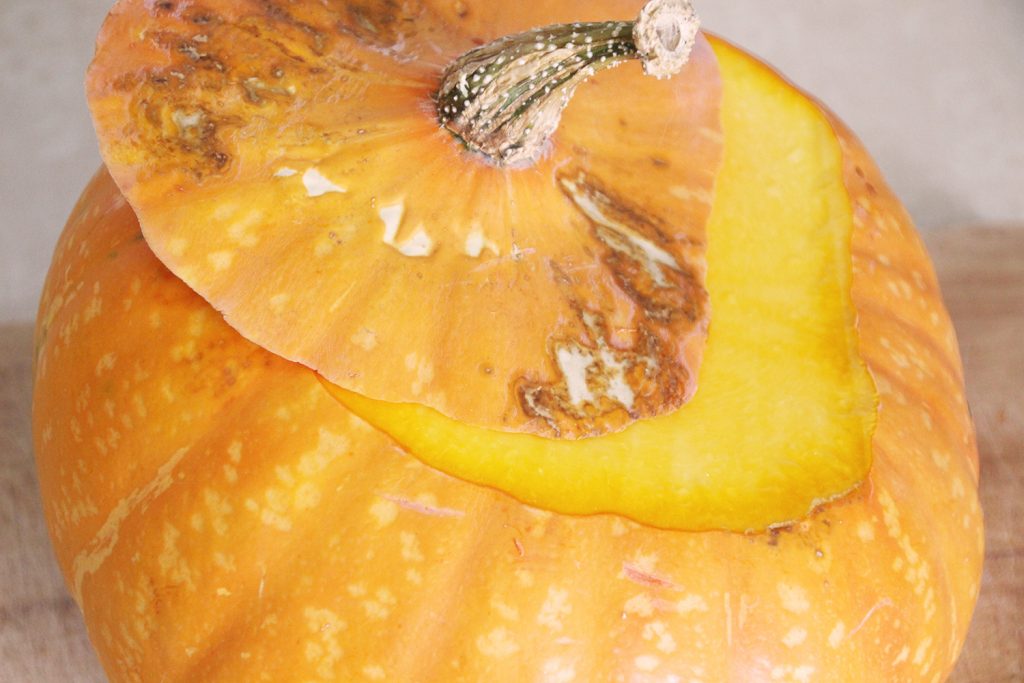
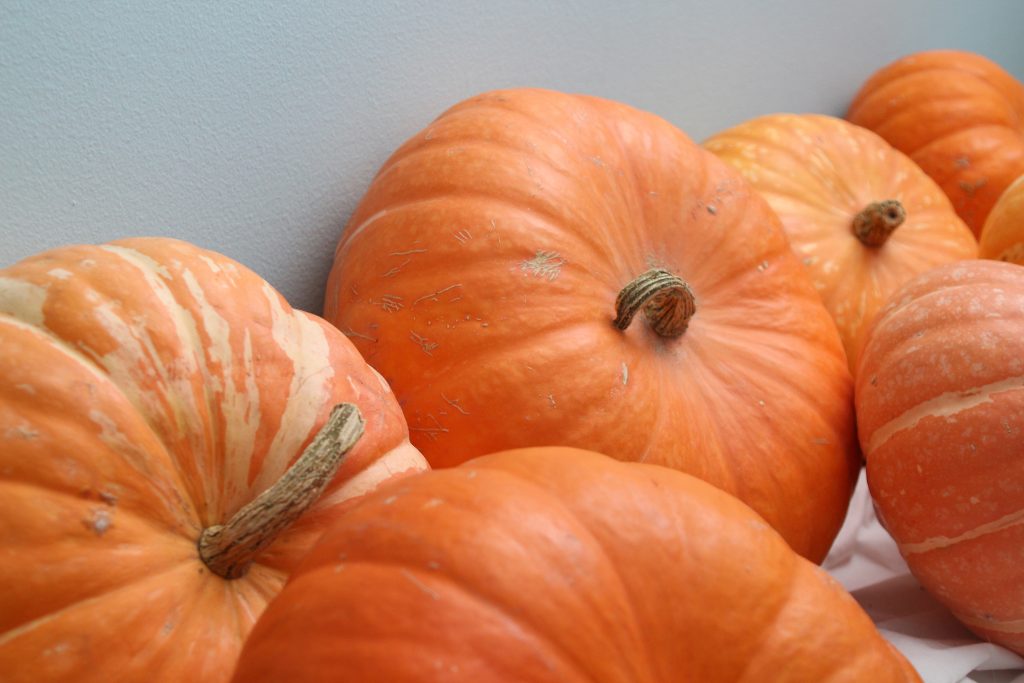
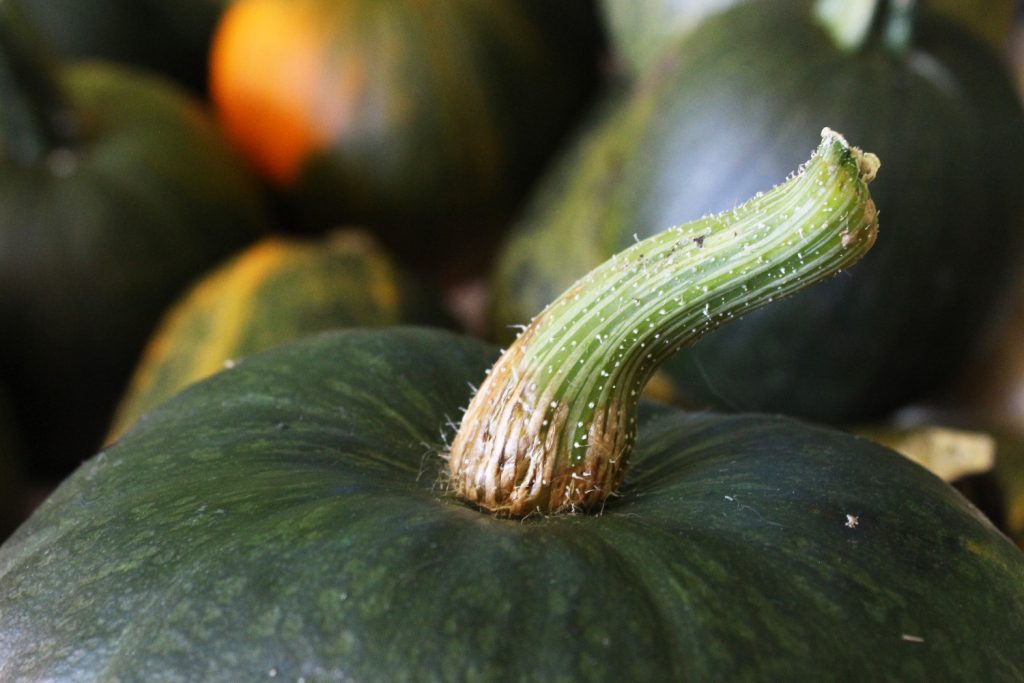
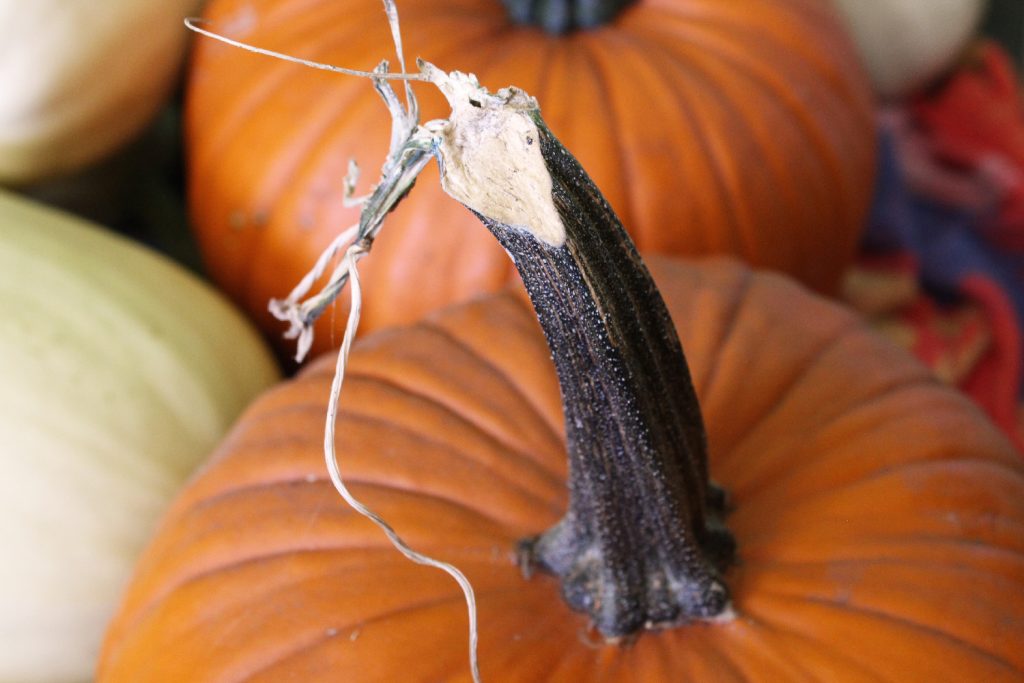
What is curing? Basically, it is letting the green or under-ripe squash dry out a bit, thicken its rind, and be ready to sit on a shelf without rotting. How do you cure winter squash? Well, the first step is to pick it at the right time. While many types of squash will take a light frost, it doesn’t appreciate freezing. We try to pick our winter squash just before the first frost, but in our zone, that often means picking it before the stem has fully dried out. When we are harvesting, we make sure to cut the stems quite a way back, leaving a good ‘handle’. Don’t pick the squash up by this handle, though! You might break the stem off, which actually makes the squash more susceptible to rotting.

A partially cured winter squash stem.
A partially cured winter squash. Note the shriveled stem end, and the base of the stem starting to look dry and woody. There’s still a lot of green, tender stem, though!

After the harvest, we usually leave the squash outside on the lawn for a while to dry off, if it isn’t raining; otherwise, we take it inside and wipe it with a towel. Once the squash is dry, we brush off as much dust/dirt/mud as we can. Next, we dip the stem in a mild (about 5%, though I often eyeball it) bleach solution, and wipe down the outside with a cloth dipped in the same solution. Normally, we do this in a 5-gallon bucket in the tub, as most of our squash are small enough to easily dip in the bucket, and doing it all in the tub contains the mess a bit. For really large squashes, I dipper a handful of bleach water over the cut part of the stem and the base where the stem is attached to the squash. Then, I wipe the rest with a cloth dipped in the bleach solution. Once it has been dipped (or wiped), we towel the squash off again, using old towels, as the bleach can cause them to get discolored.

If you don’t have much time (or a good space to do any dipping in), at least make sure to get the cut part and the base of the stem wet with a bleach solution. This will kill off any bacteria that might get into the stem before it is cured, and make the squash rot prematurely.

Although I knew about the bleach thing for a long time, I resisted actually using bleach on my squash, as it seemed unnecessary and harsh. However, dipping the stems in bleach makes a huge difference in how long our squash store, so we do it every year, now. Bleach breaks down pretty quickly, and won’t be present by the time you eat the squash, plus you don’t normally eat the rind anyhow, so it is safe to do this.

freshly harvest winter squash, some under-ripe, laid out for curing
Freshly bleached winter squash, laid our in a warm, dry place to cure.

Finally, we lay out the squash on towels in a warm, dry space – normally we put them on the floor in the corner of our living room. We check it over and turn each squash every few days, to make sure all sides are being exposed to the air to dry. Squash prefers a cool, dry space for long-term storage, but you need to cure them properly, first.

How long should you cure your winter squash? It really varies, depending on the type of squash, how long you were able to leave it on the vine, how warm and dry your curing area is, and how wet or dry your growing season was.

A properly cured pumpkin stem.
A properly-cured pumpkin, The stem is dry, hardened, and woody, and the rind is thick, and can’t be easily marked with a fingernail.

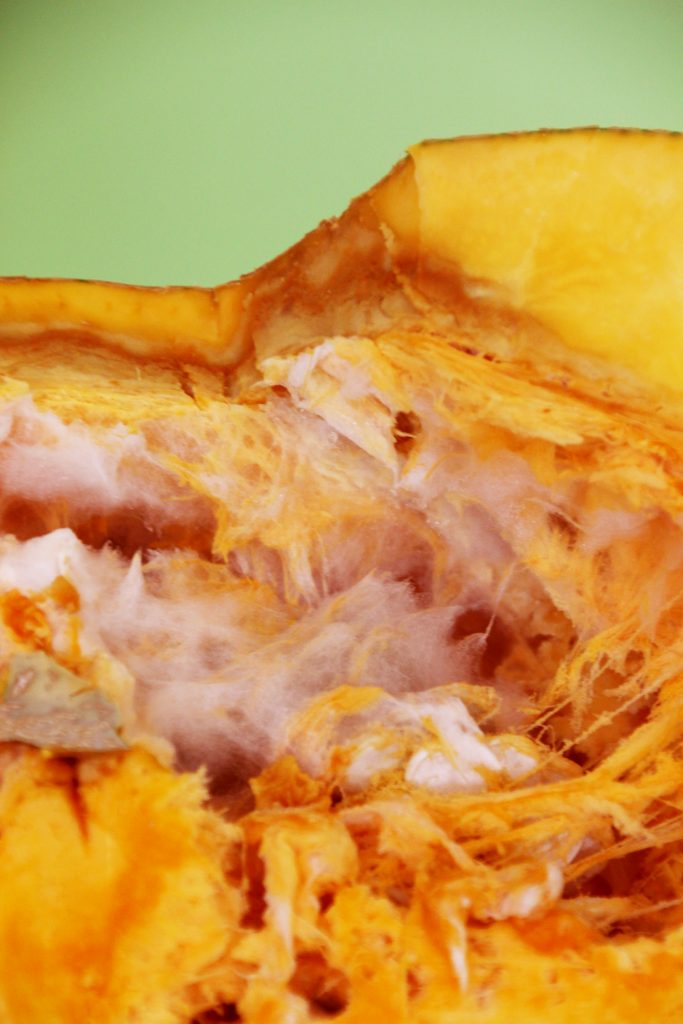
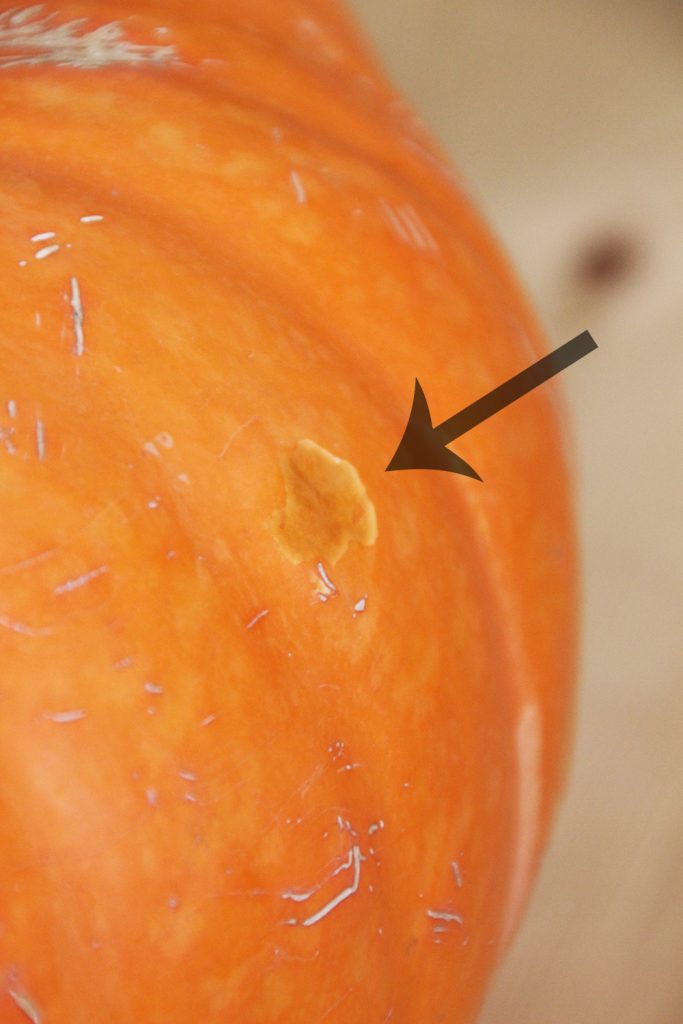
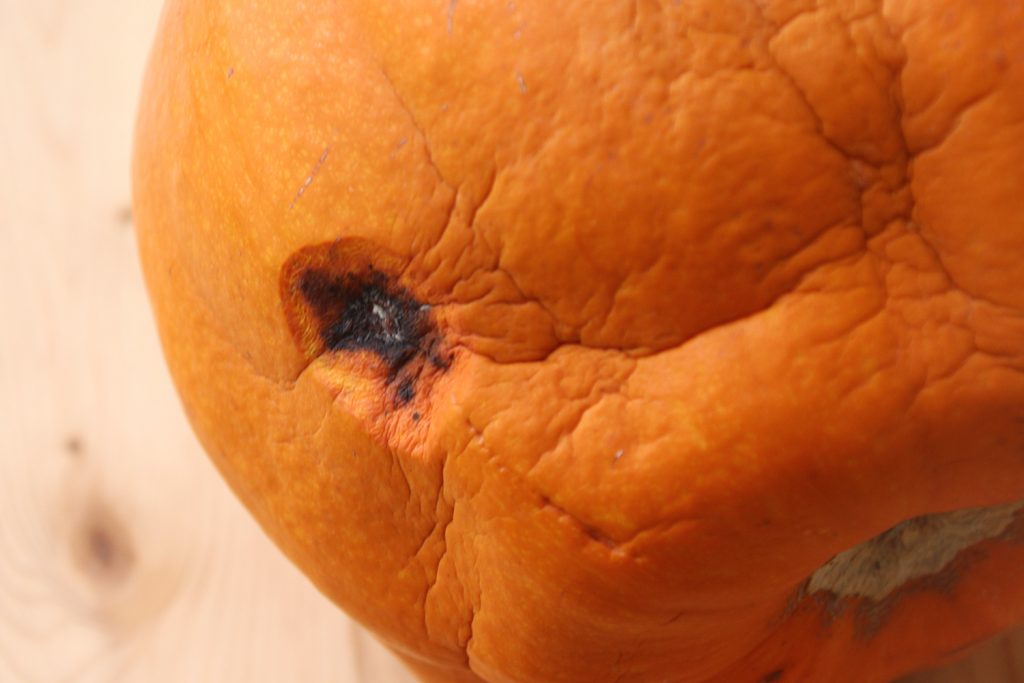
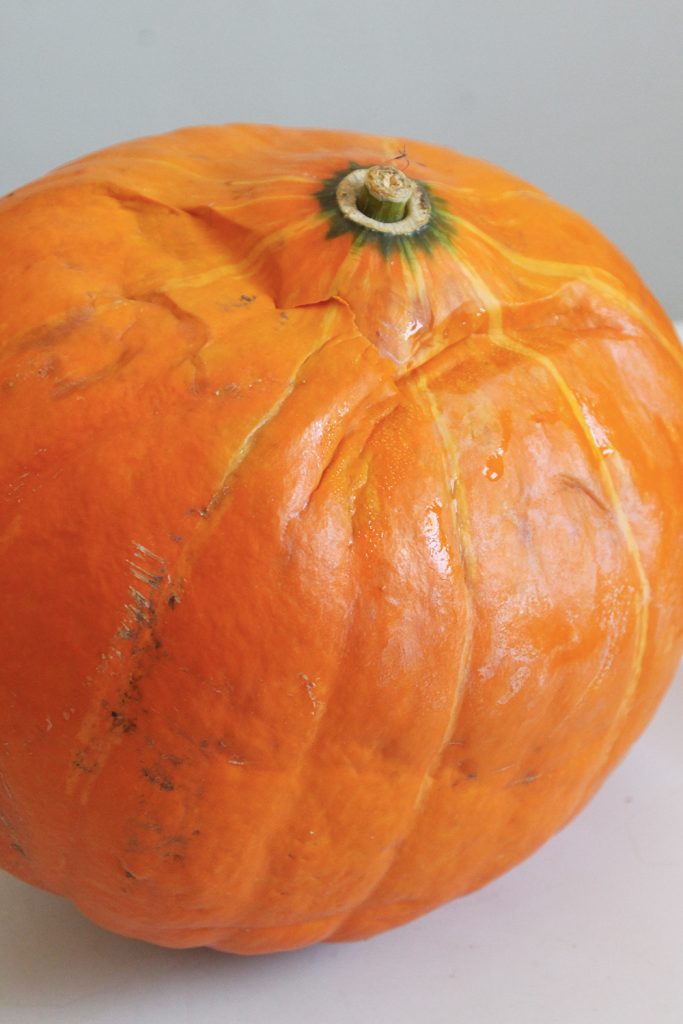
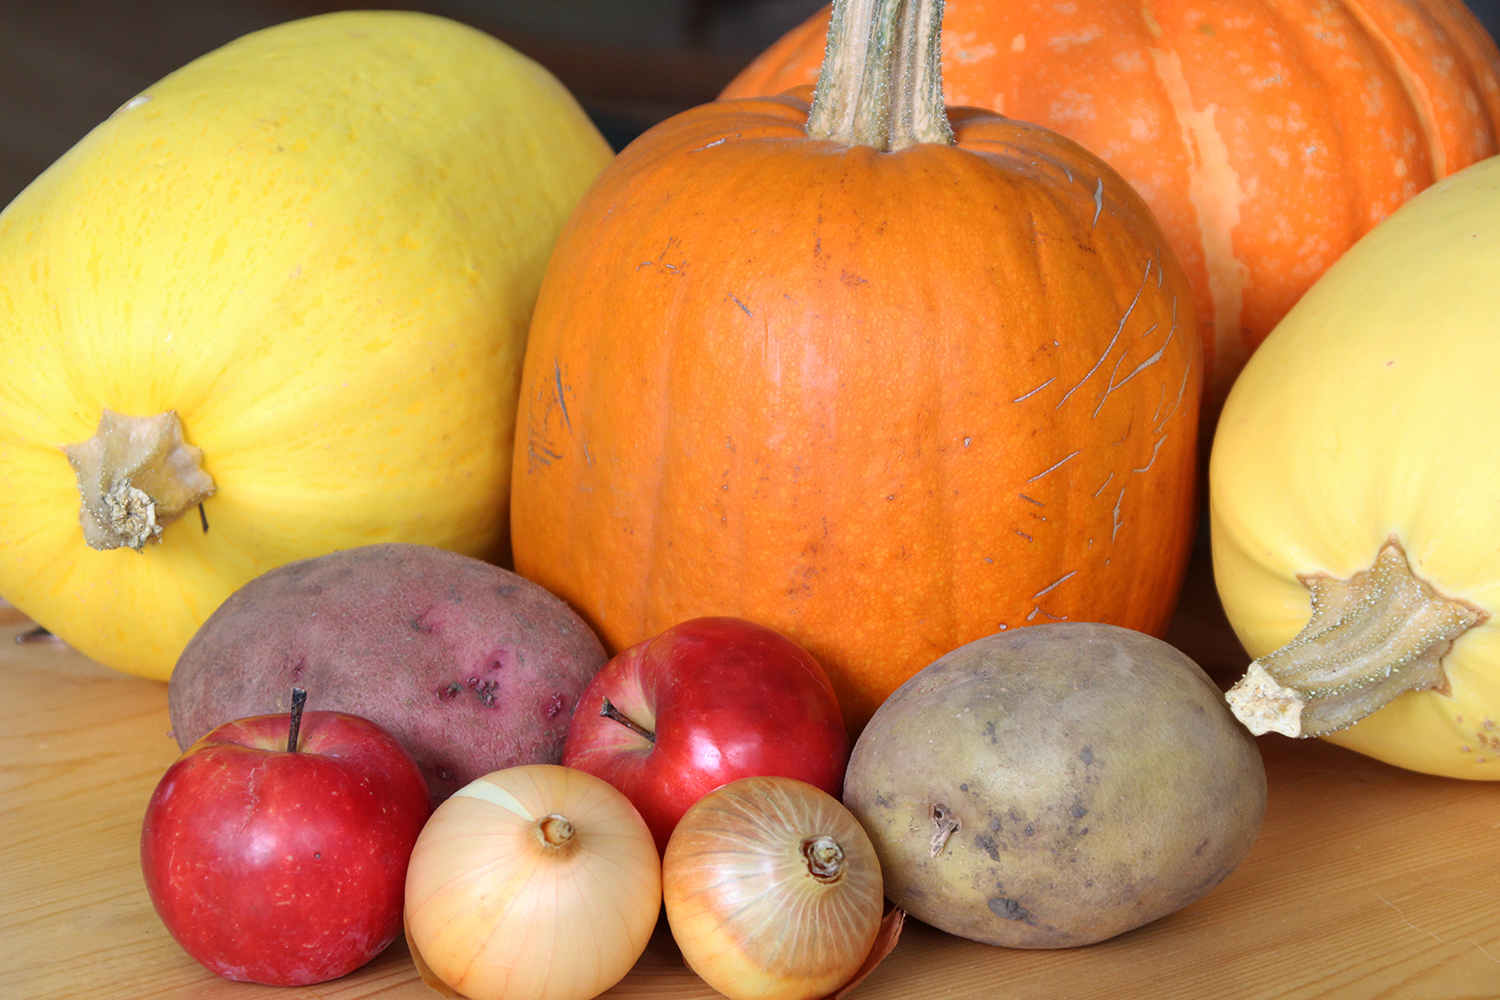
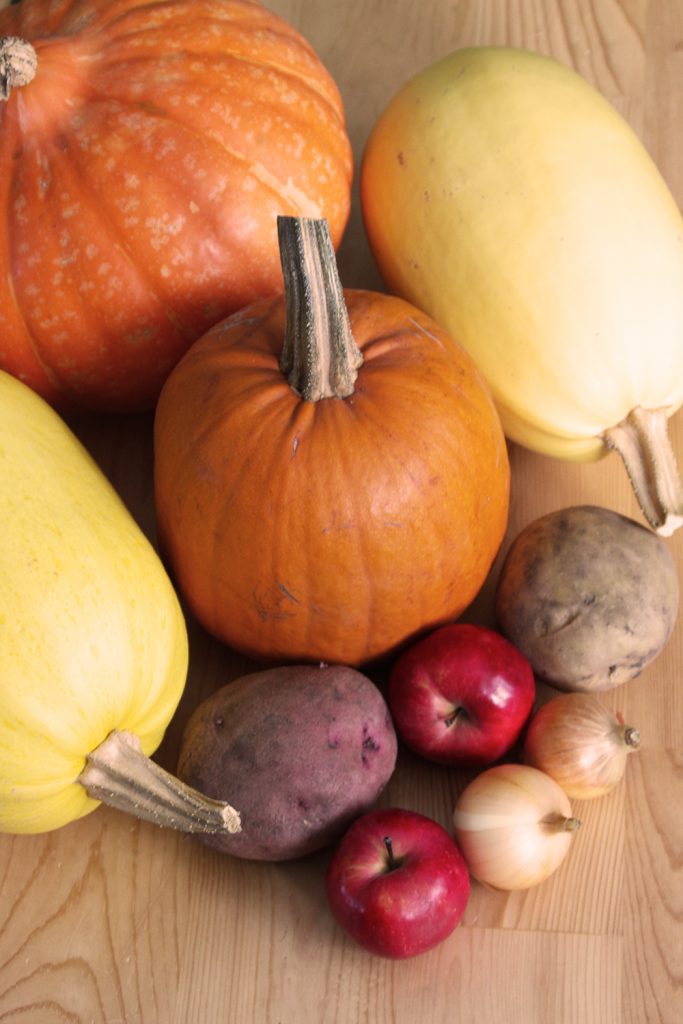
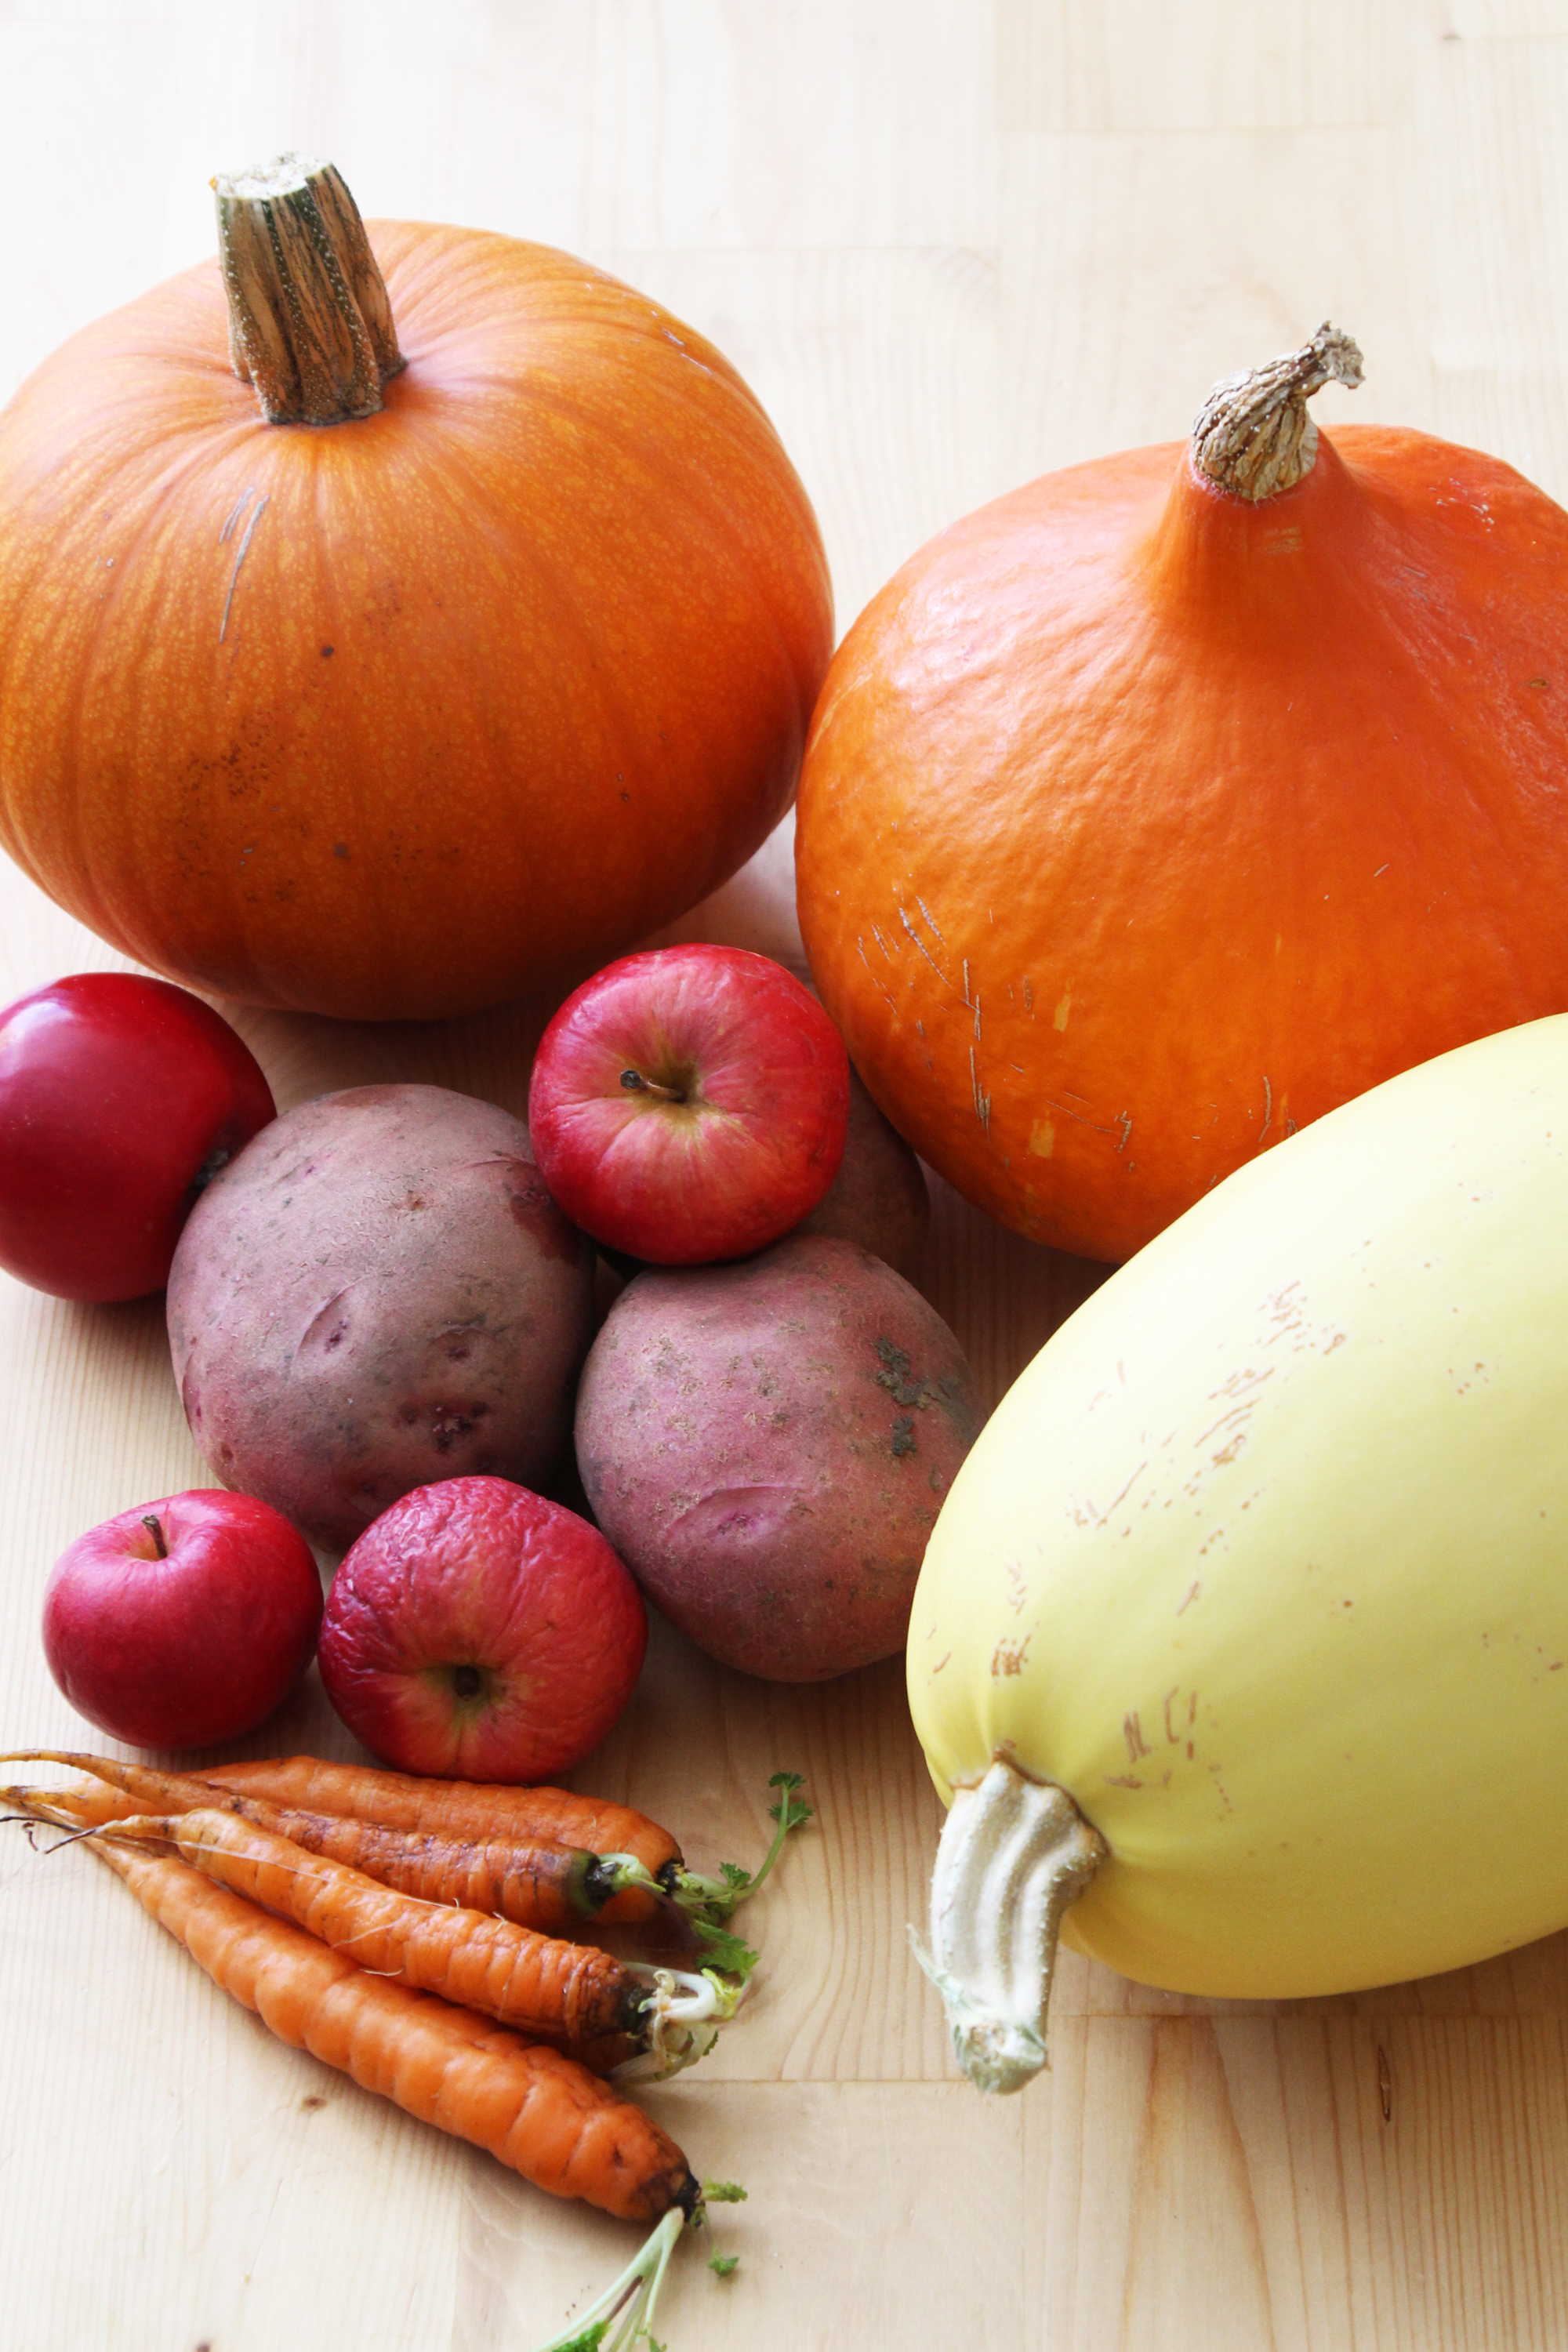
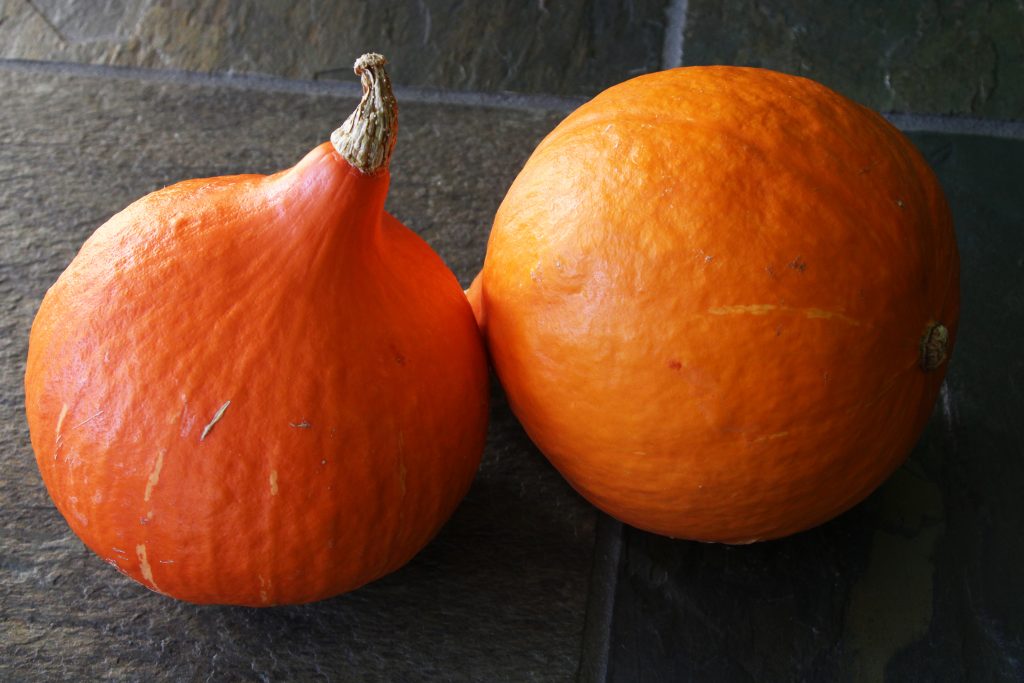
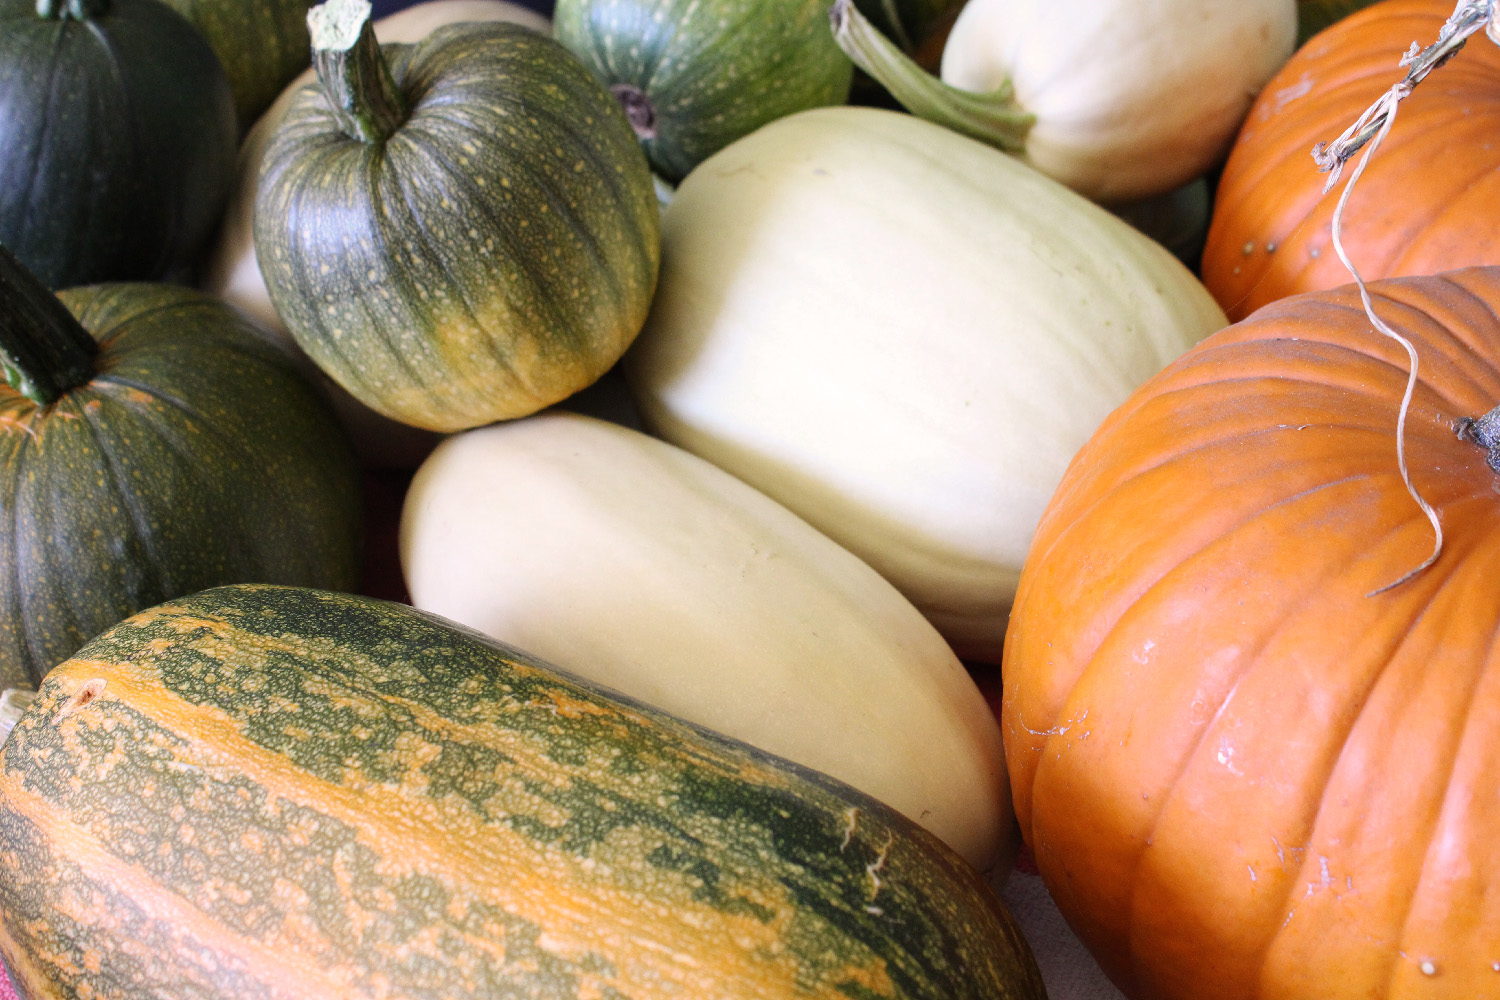
We’ve found that hard-stemmed varieties like spaghetti squash and most cucurbita pepo species of pumpkins cure fairly quickly, often in a couple of weeks for us, even if they are picked green. Once the stem feels hard and dry to the touch, and the skin of the squash itself has hardened to the point that you can’t easily pierce it with a fingernail, it is good to go. Fleshy-stemmed winter squash like Red Kuri, Buttercup, and Sweet Meat, and many other cucurbita maxima varieties, seem to take for-ev-er, often a month or more. For these, you need to cure them until the bulbous part where the stem meets the squash is hard and dry, as this is where the rot usually starts.

a mark made by a fingernail in a spaghetti squash, demonstrating that it is not yet cured.
The rind on this spaghetti squash is still thin, and easily marked with a fingernail. It needs to cure longer!

Once it is completely cured, winter squash prefers to be stored in a cool, dry place. Many basements would be too damp, though if you have a dry basement or run a dehumidifier, it could work well. We often store ours in a spare room with the door closed and the furnace vent covered; our squash does very well in there. How long any given squash will store can vary quite a bit; this depends on the type of squash, your growing conditions, and your storage conditions. Generally, though, for us, c. pepo pumpkins are usually done by Christmas or shortly after, followed by small-sized c. maxima squash like Red Kuri, which usually last until February or March. Larger c. maxima squash like Sweet Meat and Mandan last quite a bit longer, until April or May at least. Spaghetti squash is the champion out of the varieties we can easily grow, lasting a year or more in good shape. We haven’t found any variety of c. moschata that will set fruit in our short season, but I understand that that species tends to store very well, also.

By Jess

Who cares about rotting squashes, anyway?

Well, it’s actually kind of a big deal around here.

You see, we normally harvest at least 90 squashes and pumpkins of various types each fall, and most of those get stored to be used through the winter. Over the years, we’ve discovered approximately how long each variety of squash we grow will last in our storage conditions, and we use them up in that order. Pie pumpkins first, since they usually don’t last much past Christmas for us. Then the long-keeping c. maxima squashes like Red Kuri and Sweet Meat, which generally make it until March or April. Lastly, we dig into the Spaghetti squash, which seems to last virtually forever, or at least until our next harvest. I’m not sure if we’ve ever had a Spaghetti squash go bad on us, though one time we cut into one to find all of the seeds had sprouted!

Our little landrace breeding experiment, where we save cross-pollenated seeds and replant them, has added a new twist to our squash eating schedule. I assumed that since all of the parent squash were long keepers, that my F1 (first-generation) hybrids would store well. I was wrong. About half got rotten or soft spots before we even finished curing them.

A winter squash with a moldy seed cavity

It messes us up when things go bad out of order, or get gooey on the spare room floor. Not only is there the mess to clean up, but we also hate to waste the food. It’s kind of been a year for that, though. First, half the maxima hybrids unexpectedly went kapoot. Then, the pie pumpkins went and lasted until April. Now, some of my c. maximas are stealth rotting.

Of course, at the exact same time, some of our squashes have developed weird spots or discolorations that did not affect the meat at all, which has made it more difficult to identify which squashes are actually starting to go off. We had an exceptionally dry growing season, and grew some of our squash in a different spot than we have in the past, which may have caused some of the spots.

A winter squash with ugly spots that are not actually rot or mold

Usually, a squash that’s about to go bad develops little indented soft spots. This isn’t exactly rot, but it’s where the rot will happen. A lot of the time, on our squash, at least, it tends to start around the stem, or on the ‘shoulders’ of the squash. If we notice it in time, we use the squash right away, or roast it and freeze the puree for baking later. The little spots are hard to notice, though, especially if you’re not going looking for them. We know to look for them, and try to check the squash over at least once a week, but they don’t last long, and are easy to miss if you’re in a hurry.

A squash with a soft spot that indicates it will mold soon

Next, there is the mold. Usually, our squash develops a black or dark colored mold, often in several places at once. We have been known to cut out the moldy spots and feed the firm flesh to the chickens; we don’t usually eat it if it gets to this point, though you probably could if you were careful to cut a wide margin around the moldy spots. Often, by the time there is visible mold on the outside of the squash, the whole seed cavity is moldy, too, which is a shame, since the chickens seem to enjoy the seeds.

A black moldy spot on a rotting winter squash

If we don’t catch it at the black and spotty stage, the squashes tend to collapse into a gooey, smelly, disgusting mess that is no fun at all to clean up.

This year, we’ve had a couple of squashes go from looking completely sound to being a crumpled, oozing mess with no warning, whatsoever. They don’t smell, and there is little or no mold; it is almost like they froze and the insides liquefied, though I know for a fact that none of these squashes got more than a light frost at any point. Combined with this pumpkins-till-April thing, I’m kind of scratching my head. Maybe we’ve got a new type of mold in our garden, or maybe our growing or storage conditions were subtly different in a way that favors a different kind of rot than we’ve seen in previous years.

A squash that rotted and crumpled without warning.

Regardless, we’ve moved all of the still-sound squashes off the floor and onto something a little easier to clean up. We’re in the big push to use up the last of the c. maxima squash before they go bad, anyway, since they don’t normally last past April for us. We only have nine maximas left, which isn’t many; we’ll often use two of the little ones in a single recipe. We’ll roast them and freeze the puree, and try to sneak in a couple more of our favorite maxima dishes before they’re done for the season.

By Jess
a photo of what is still good in our root cellar in April

Here we are, the first week of April. Last month, I did a food storage / root cellar report for March; this is hopefully going to be a recurring feature. Here’s what we’ve still got in the root cellar (and other cold storage) in April:

Honeycrisp Apples: The apples were stored in ziploc bags; some in the root cellar, and some in the fridge. They were basically done last month, but we left the firm ones to check again this month. While they looked good on the outside, the insides were pretty brown. You could probably eat these in an emergency, but we chose to feed them to the chickens for a treat, instead.

Honeycrisp apples after seven months storage in the root cellar

Maxima Squash: We store our squash in a cool room, though with the sun really hitting the windows on the house now, the temperature in there is starting to fluctuate quite a bit. These squashes look to be some sort of Mandan cross, from our landrace breeding experiment. We still have nine good-sized (ten-ish pounds) orange winter squashes left, and they seem to be going strong, despite a number of our other squashes succumbing to sudden rot. They have a really waxy feel to them, which may have been what allowed them to store so well. We will save the seeds from these for replanting.

Sugar Pie Pumpkins: I am blown away by these. I have no idea why they are storing so long, but we still have three sound pie pumpkins (a couple have gone soft since March). Normally, the pie pumpkins don’t last much past Christmas. At this rate, we’ll have pumpkin pie for Easter!

Spaghetti Squash: No surprise here. These often last until the next harvest. We even store them on shelves in the (much warmer) pantry and kitchen, and they don’t seem to care. We have more than a dozen left, and are really just starting to use them now, as we run low on the other types of squash. I do notice that the spaghetti squash that were stored in the cool room are denser and heavier than the ones stored in warmer locations, which is an interesting thing that I will try to keep paying attention to.

Potatoes: Our potatoes are still firm, and not yet sprouting. They are starting to get slightly bitter, though. I don’t know if it’s light exposure (from the little window in our root cellar) or just age, but it does seem to happen to us every year in the spring.

Onions: Again, the only surprise with the onions was that we have basically run out. Onions store well for us, just loose in a basket in the cool room.

pumpkins, spaghetti squash, apples, onions, and potatoes after seven months in the root cellar

Our carrots are done, now, and I think we can call the apples done, though we’ll keep a few kicking around just to see what happens with them. Pretty soon, we will have spring eggs and early chives to add to our local food diet, and not too long after that, we’ll be enjoying asparagus and rhubarb. I’m excited about that, as we’ve tried to eat mostly seasonal vegetables through the winter, and I’m just a bit tired of root veggies, cabbage, and squash. The snow is just starting to melt off the garden, and in a couple of weeks, we’ll be able to dig up the parsnips and carrots we left in the ground last fall. We didn’t leave a lot for eating – we’re going to try to save seeds from these – but I might just try one or two to see how they taste!

By Jess
Pumpkins, squash, apples, potatoes, and carrots that have been stored since harvest.

I want to keep track of what we’ve stored, how long it’s lasted, and how our storage conditions have fluctuated over time, so this is the start of a (hopefully) monthly(ish) report. It’s pretty late in the (storage) year to start this little project, but I think it is worth doing anyhow.

We specifically plant a lot of our garden with an eye to long-term storage vegetables. Our house has a lovely, dirt-floored root cellar built right in to the north-west corner of the basement, and that is the backbone of our vegetable storage. However, a few of our veggies prefer dry conditions; we store those in a spare bedroom with the furnace vent closed off, so it is quite cool (maybe 10-15 degrees Celsius), but not at all damp. While we also store a lot of produce by canning and freezing, it’s nice to be able to simply put a part of our harvest away, without having to process it in any way.

As of March 1, 2019, here is what’s still going strong:

Sugar Pie Pumpkins – these are a surprise to me, as the pumpkins usually get soft by late December for us. We stored them in the spare room, same as always; the only thing we did differently this year was dipping the stem ends in a bleach solution before bringing them in the house to harden off. We had one for supper a few days ago, and it was still perfect.

Red Kuri Squash – the Red Kuris usually last until sometime in March or April, so it’s not surprising that they are still doing fine.

Sweet Meat Squash – this is another variety that has a good shelf life for us.

Various cross-breed c. maxima squash – we’ve been doing a little breeding project in our garden, trying to come up with an improved c. maxima that will tolerate our short, often droughty seasons, taste good, and store well. We have a handful of squashes left that seem to be going strong; we will save seeds from these ones, for replanting in the spring.

orange winter squash

Spaghetti Squash – spaghetti squash is always a particularly good keeper for us, and they don’t even seem to care whether they are stored in warm or cool conditions. If we run out of space in the spare room (we usually do), the spaghetti squash goes into the pantry, or even on shelves in the kitchen! This year, we’ve got spaghetti squashes all over the house, and they are all still perfect.

Onions – our onions typically last until the chives come up in the spring. This year, we didn’t plant enough of them, and have had to supplement with store-bought; however, the few teeny onions we’ve got left are keeping just fine. We usually keep our onions in baskets in the spare room, though this year, they got moved to the basement around Christmas, because they were in the way.

Potatoes – potatoes are another long-storage champ for us. We have tried numerous varieties, and they all seem to keep very well. Our current potato stash is still going strong, and they normally hold out until sometime in late April or early May, when they tend to sprout and get bitter. They don’t rot, though, and are generally in fine condition for replanting by the time we’re ready to do so. We store the potatoes in burlap sacks in the root cellar.

Carrots – this year, we tried storing our carrots in perforated plastic vegetable bags in the root cellar, and they stored for considerably longer than they have in the past, when we put them in covered plastic bins. We also tried storing carrots in bins of sand, but that didn’t work out well at all – I suspect the sand was too dry, as the carrots shriveled up in just a couple of months. The carrots are starting to go a bit limp, now, and sprouting green tops, but they still taste fine.

Honeycrisp Apples – most of the Honeycrisps were stored in regular zip-top plastic bags and perforated vegetable bags in the root cellar. We didn’t do a good job of sorting through them over the winter to use up the ones that were going bad, so it’s hard to tell which type of bag was better for storage. However, the bags have held the apples much longer than last year, when we stored the apples in uncovered five-gallon buckets in the root cellar. We also tried storing some in a bag in the fridge, though the bag was not zipped tight. Most of the apples from all three storage methods are shriveled to some extent, though a handful are still quite firm.

A Honeycrisp apple that is still firm after almost 6 months in a root cellar

All of the apples I cut open had some extent of browning on the inside, but the majority are still edible. All were sweeter in flavor than they were in the fall, but the ones in the fridge had a stronger flavor and a somewhat better texture. While mealy and not exactly ideal for eating raw, the apples are still mostly edible, and could be used in a pie or crisp or porridge.

All in all, I’m pretty happy with the veggie storage this year, as we managed to extend our storage season on several things. The pumpkins, carrots, and apples, in particular, are big wins.

By Jess

Red Kuri Squash Muffin Recipe

February 26, 2019 | Recipes | 1 Comment

A photo of Red Kuri winter squash muffins, to illustrate our recipe

Around this time of year, we’re all about the squash. Our pumpkins have usually given up by late December or early January (though this year, they are still going strong at the end of February, which is amazing!), and we are on to the c. maxima squash, which tend to be better keepers for us. However, even the best of our c. maximas don’t usually last much past early April, so by February and March, we’re motivated to use them up.

Two Red Kuri winter squashes

One of our favorite c. maxima varieties are Red Kuri squash. They are a cute little teardrop shaped squash (around 3-5 pounds), that has a gorgeous deep red-ish orange color. They generally keep until sometime in March for us, and they are very dense, with a distinctive nutty flavor that is not as sweet as our other favorite c. maximas (Sweet Meats). We often use Red Kuri squash as a substitute for sweet potatoes in various savory recipes, because they hold their shape fairly well when cooked. However, sometimes, it’s nice to highlight the squash for what it really is.

A Red Kuri winter squash, cut in half.

These muffins are a nice way to use up some Red Kuri squashes, especially late in the year when they can sometimes get soft spots, and roasting and mashing is simpler than trying to cut out the spots and still get nice cubes. They are great for a hearty winter breakfast, with a bit of a gingersnap flavor.

Red Kuri Muffins:

2 cups whole-wheat flour

1 cup brown sugar

1 teaspoon baking powder

3/4 teaspoon baking soda

1 teaspoon salt

2 teaspoons ground cinnamon

1/2 teaspoon ground nutmeg

1 Tablespoon fresh grated ginger

2 cups red kuri squash, roasted and puréed (to roast the squash, just cut it in half, scoop out the seeds, and roast in the oven at 350 degrees F until it is soft when you check it with a fork. Refrigerate or freeze leftover purée)

3 eggs

1.5 Tablespoons molasses

1/4 cup olive oil

1 cup raisins

Preheat oven to 325 degrees F.

In a medium bowl, stir together the flour, sugar, baking powder, baking soda, salt, cinnamon, nutmeg and ginger.

In a large bowl, mix puréed squash, eggs, olive oil, and molasses until well blended. Add the dry ingredients and stir until combined, but don’t over-mix, as the texture of the muffins will suffer.

Stir the raisins into the batter.

Spoon the batter into paper-lined muffin tins and bake for approximately 30 minutes, or until a toothpick inserted into a muffin comes out clean. Serve warm with butter.

Red Kuri squash, and muffins from our recipe

By Jess