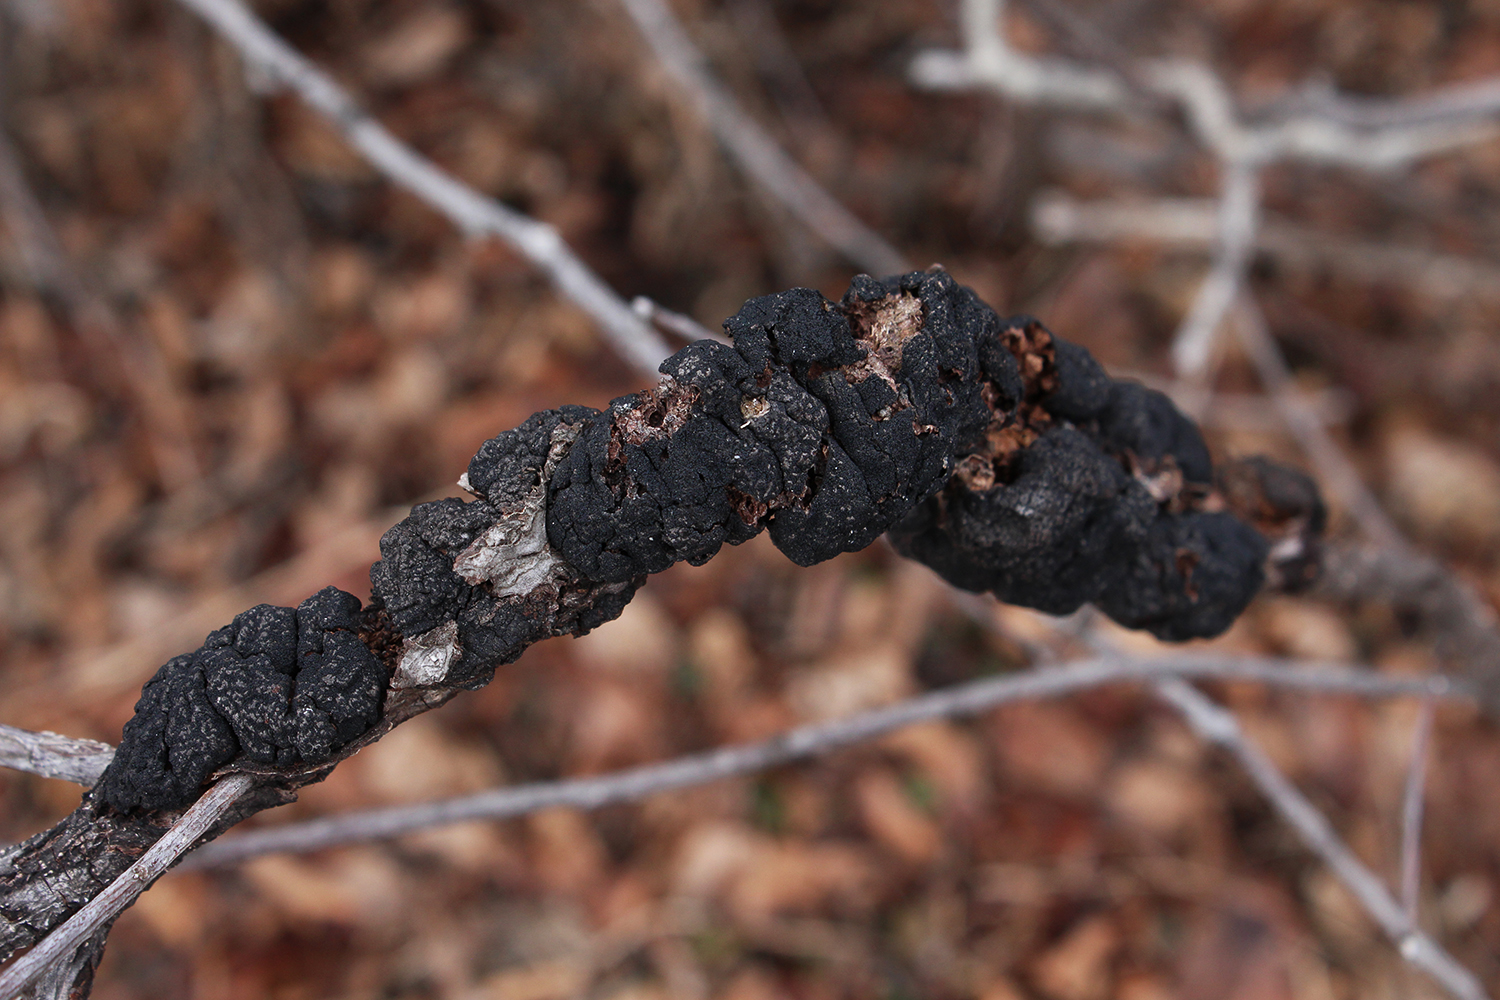
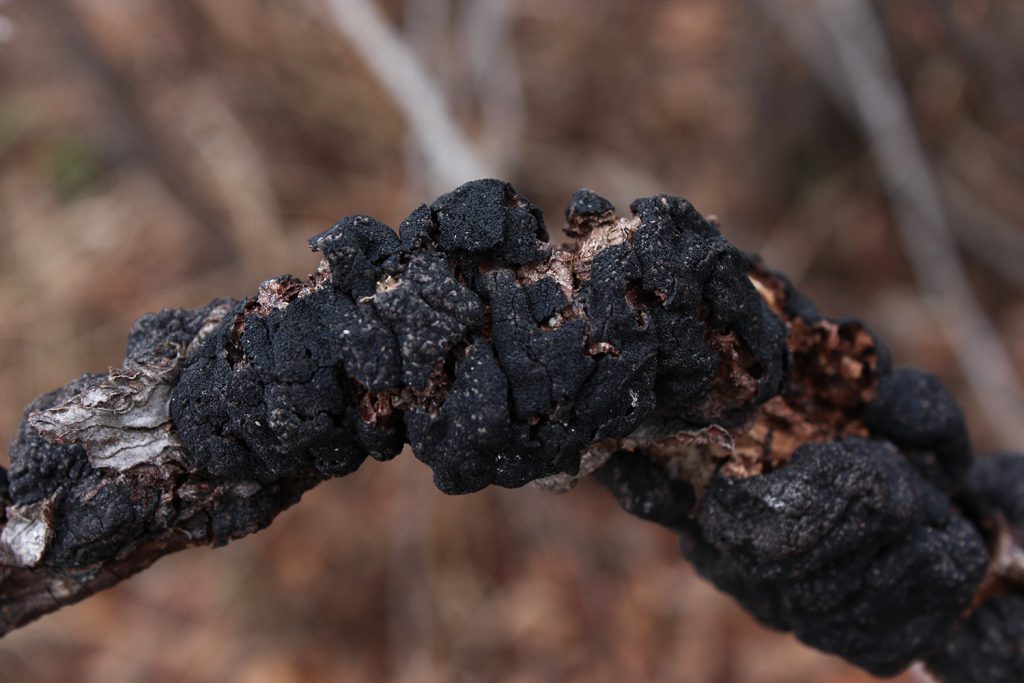
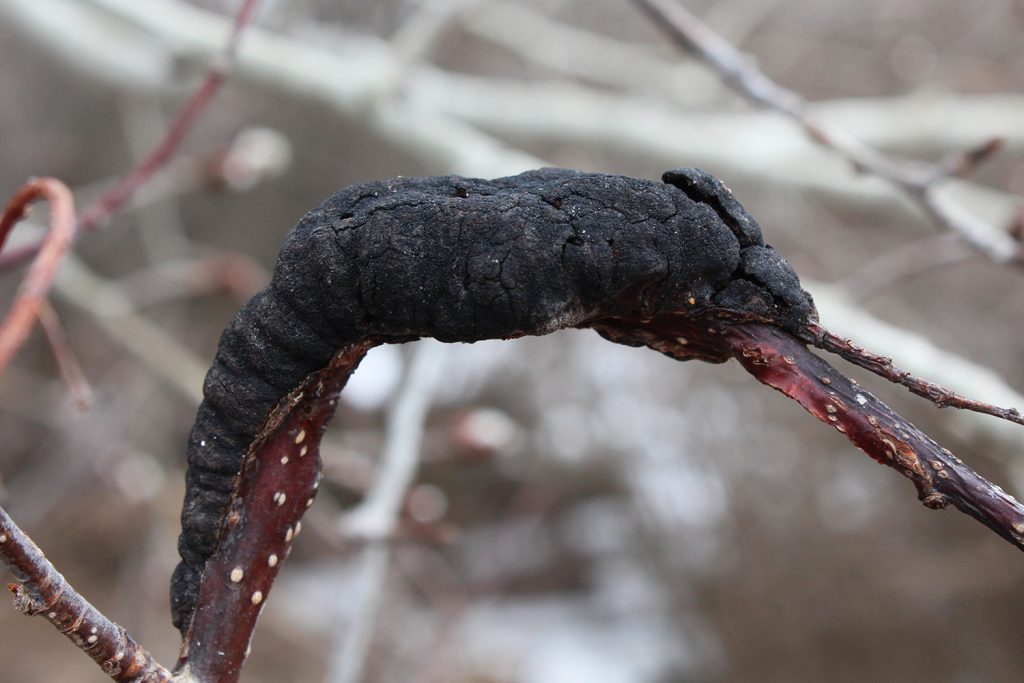
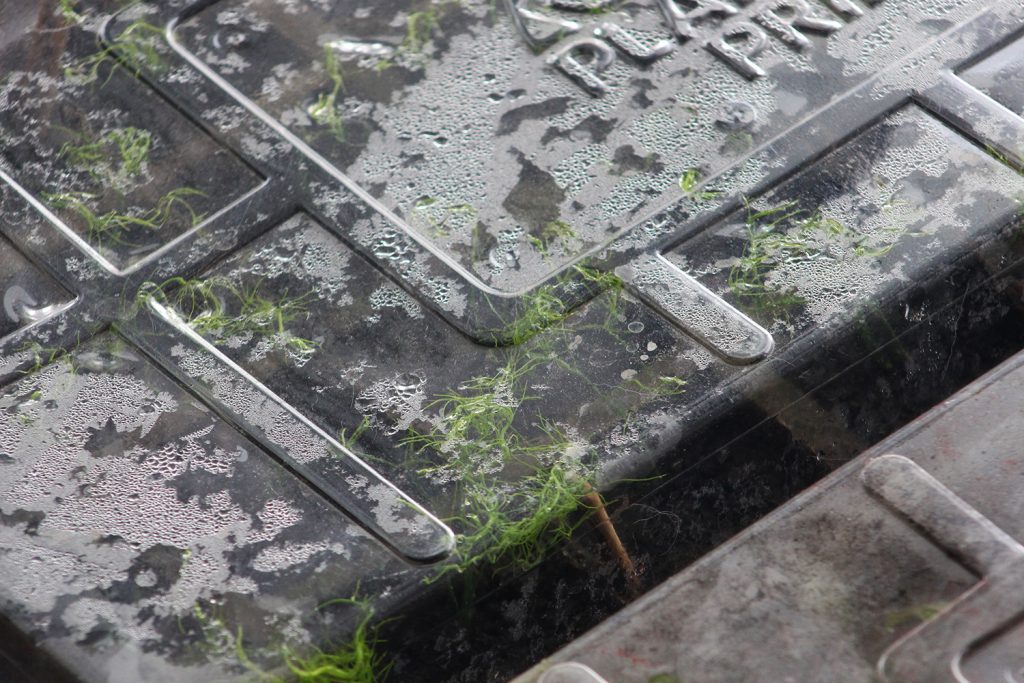
We have a lot of chokecherries here on our acreage, which means we have a lot of Black Knot Disease. It looks an awful lot like a big chunk of dried up dog poop wrapped around the tree branches – pretty gross! Black knot is a fungal infection (Apiosporina morbosa ) that is endemic in prairie Canada, and it is particularly common in my region.
The Government of Alberta has published an article with a handy list of affected trees – black knot targets trees and bushes in the Prunus species. Besides chokecherries, the list includes Nanking cherries, apricots, sour cherries, and plums. While some cultivars of fruit trees are bred for black knot resistance, it is best to remove it any time you see it anywhere on your property.
There are not a lot of ways to deal
with black knot, except for pruning. You will need to prune well
back from the infected lump – at least 6 inches, though more is
better. Dispose of the infected branches by burning them or removing
them from the property immediately – the fungus can continue to
grow and spread spores for months, even on dead branches. Once you
are done, disinfect your pruning shears with a solution of 10% bleach
in water, to prevent spreading the disease to other trees the next
time you do any pruning.
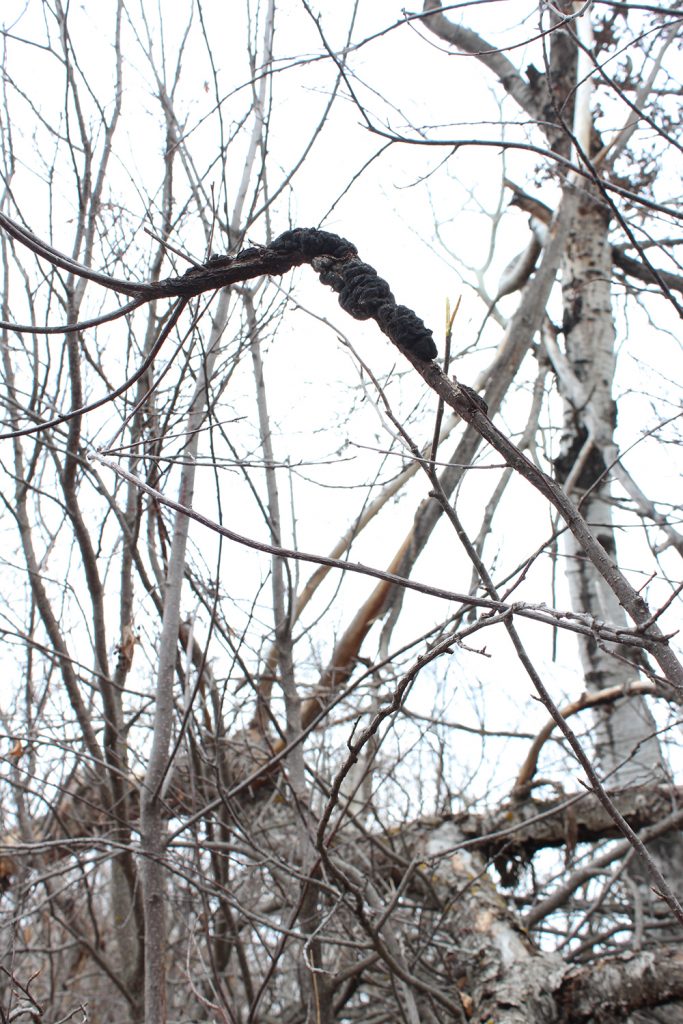
Now is a great time to tackle pruning out black knot in your affected trees, since the affected trees and branches are much easier to see before the trees leaf out; the recommendation is to do it as early in the spring as possible, which, for us, is whenever the snow melts enough for us to be able to get to the affected trees. We have acres of scrubby chokecherry and caragana brush, so obviously we’re never going to get rid of all of it here, but I like to cut back affected trees that are close to our current orchard areas, since black knot can affect so many of the types of fruit we have planted here.
While it may be possible to save a tree that has become infected with black knot, it hits me as a losing battle. If you have infected trees, there is obviously a source sonewhere nearby, and it is likely that your susceptible tree will get re-infected at some point. Better to save on heartache, cut down the infected tree, and plant something that isn’t susceptible.
Of course, with our place being surrounded by scrubby brush full of infested chokecherries, I expect we’ll be battling black knot disease, but we try to keep our prunus fruit trees away from the most infected areas, and we remove black knot wherever we see it in the wild chokecherries. So far, it hasn’t been a huge issue, but it certainly has the potential to become a problem for us. Hopefully, we’ll be able to keep it out of our plums and cherries!
As a child, I remember Mom pointing out ‘tiger lilies’ in the ditches when we were driving to Grandma and Grandpa’s farm. I later discovered that they were more properly called Western Red Lilies – the floral emblem of Saskatchewan. I don’t recall seeing them from then until we moved to the acreage in 2008 – that summer, I noticed them in some of the ditches around here, and I was really delighted by that! Mom really hammered it into my head that the lilies were endangered, and should never be picked or dug up, so I’ve just been enjoying them as I drive by for the last several years.
However, when I was doing research on native plant sources for a pollenator garden, I came across an actual seed source for these lilies – Blazing Star Wildflower Seed Company out of Aberdeen, Saskatchewan. I had no idea you could grow Western Red Lilies from seed – I thought they propegated via bulbs…which they do, but you can grow them from seed as well. Of course, as soon as I saw them, I had to have them.
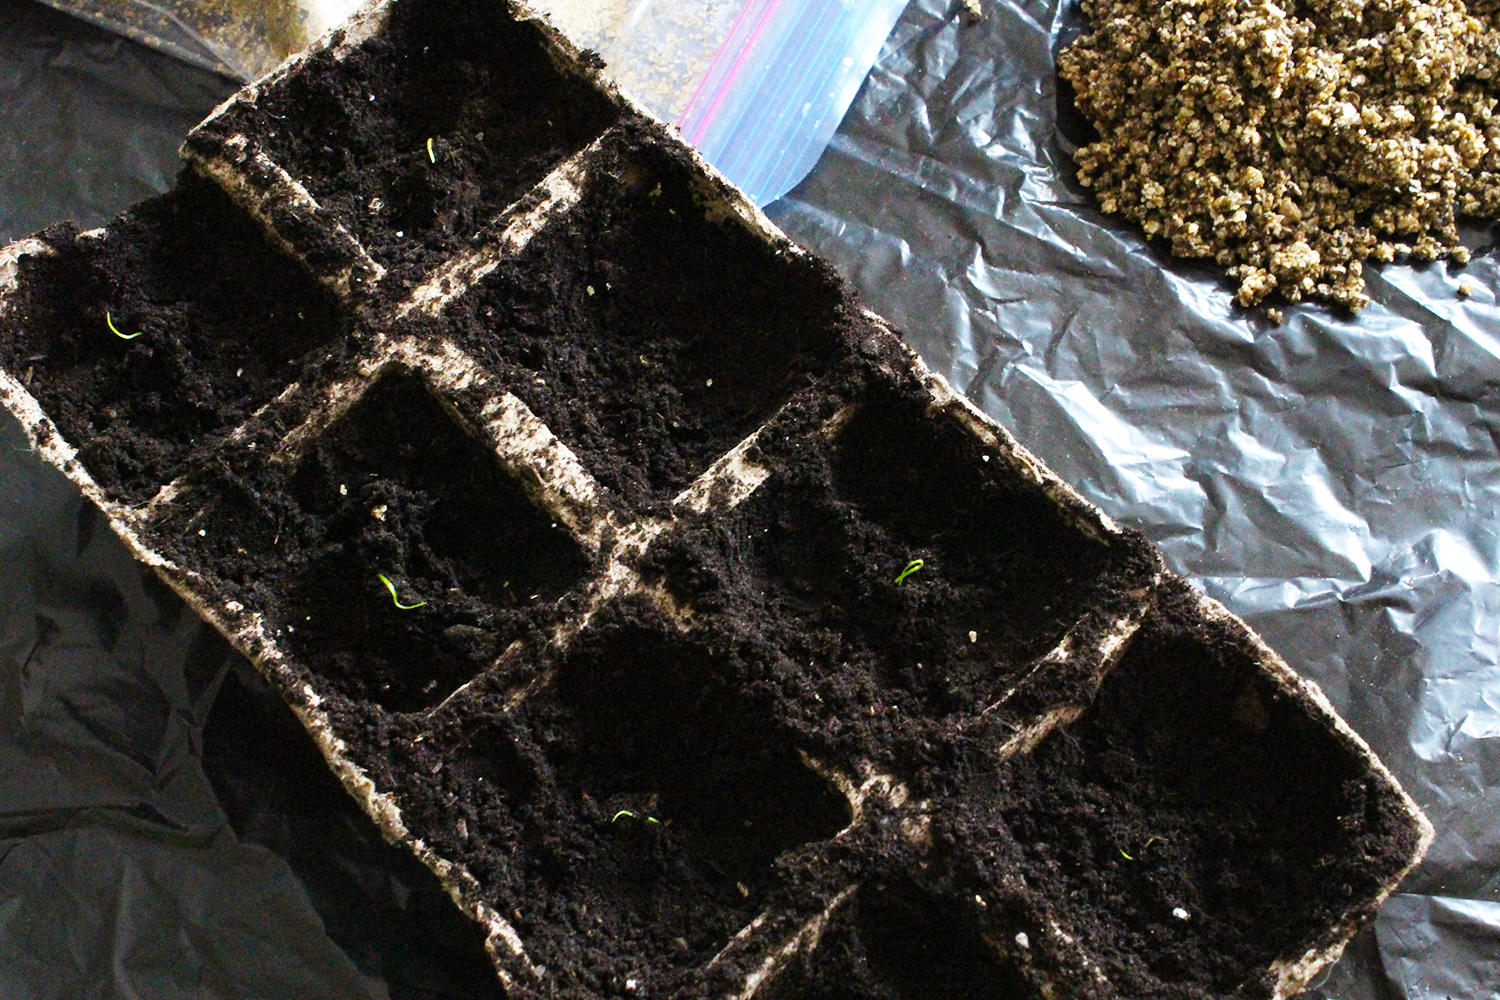
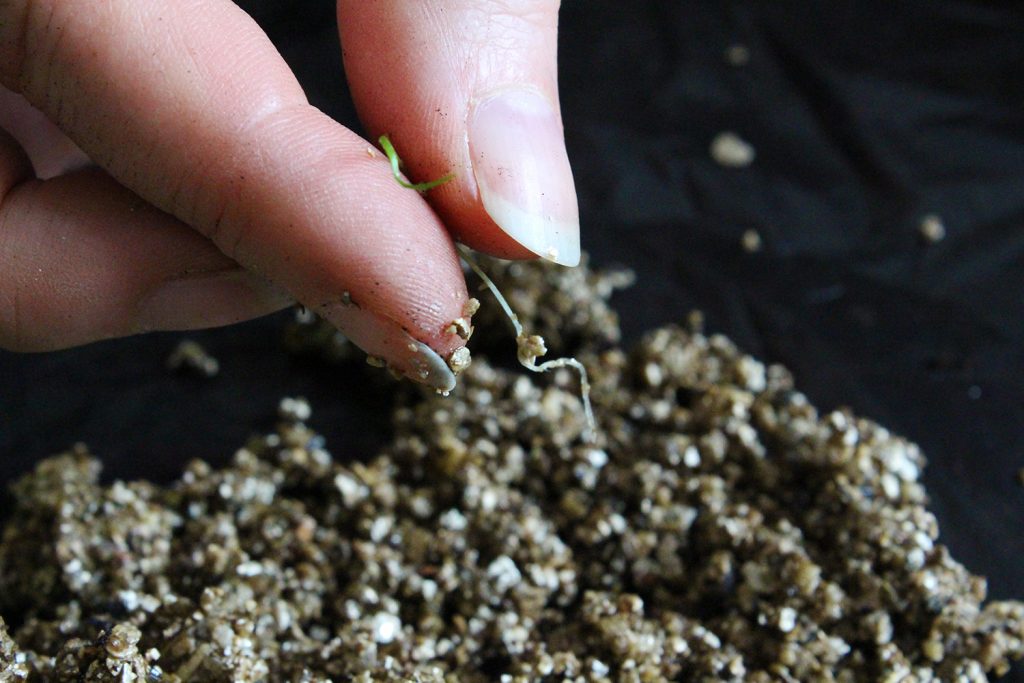
I read the packet instructions when they arrived. The directions called for starting the seeds in a baggie of damp vermiculite, and noted that the seeds could take up to four weeks to germinate. Once they had sprouted, the directions called for transplanting them into pots to grow until they could go out into the garden.
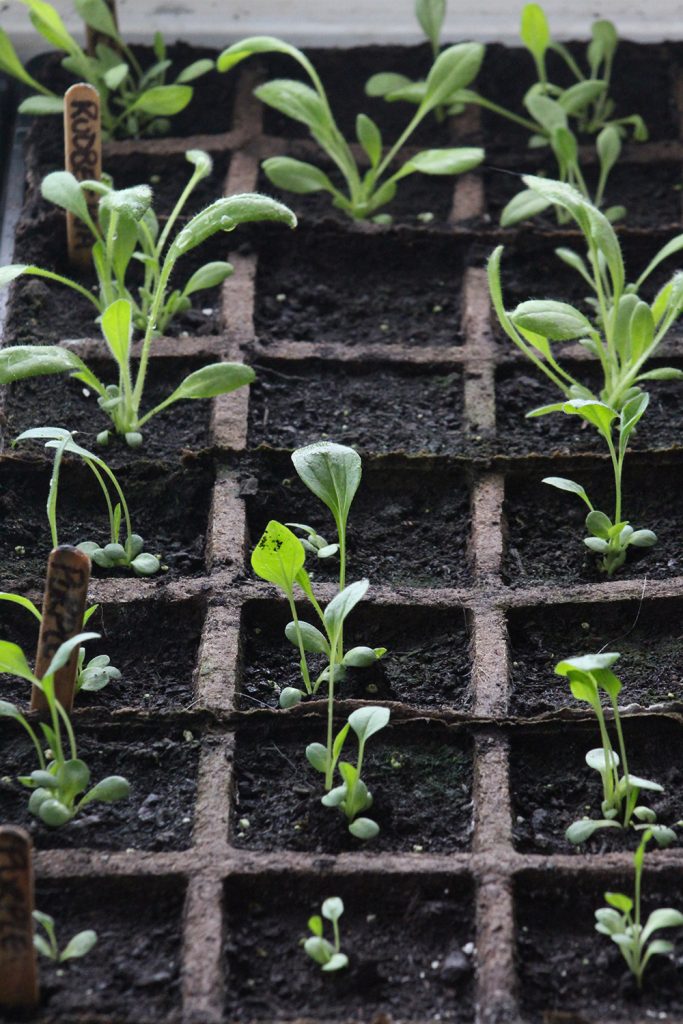
The whole packet of seeds were dumped into a plastic baggie of damp verimculite on March 13th, when I started the asparagus. I set them in a warm-ish spot on a bookshelf, out of direct sun. The lily seeds actually did take over three weeks to germinate, and on April 7th, I picked the teeny little sprouts out of the (overly sticky) vermiculite, and transplanted them into peat pots to grow for a while before they go outside. Given that it was still snowing last week, they should have some time to grow. I got 14 little lily sprouts, which is not bad, but if these work out okay, I’ll order several more seed packets for next year.
I am really excited about these little plants – if I can grow them out to a decent size in my flowerbed without too much trouble, I’ll start transplanting them in the ditches along my lane, so the pollenators (and I) can have even more of them to enjoy!
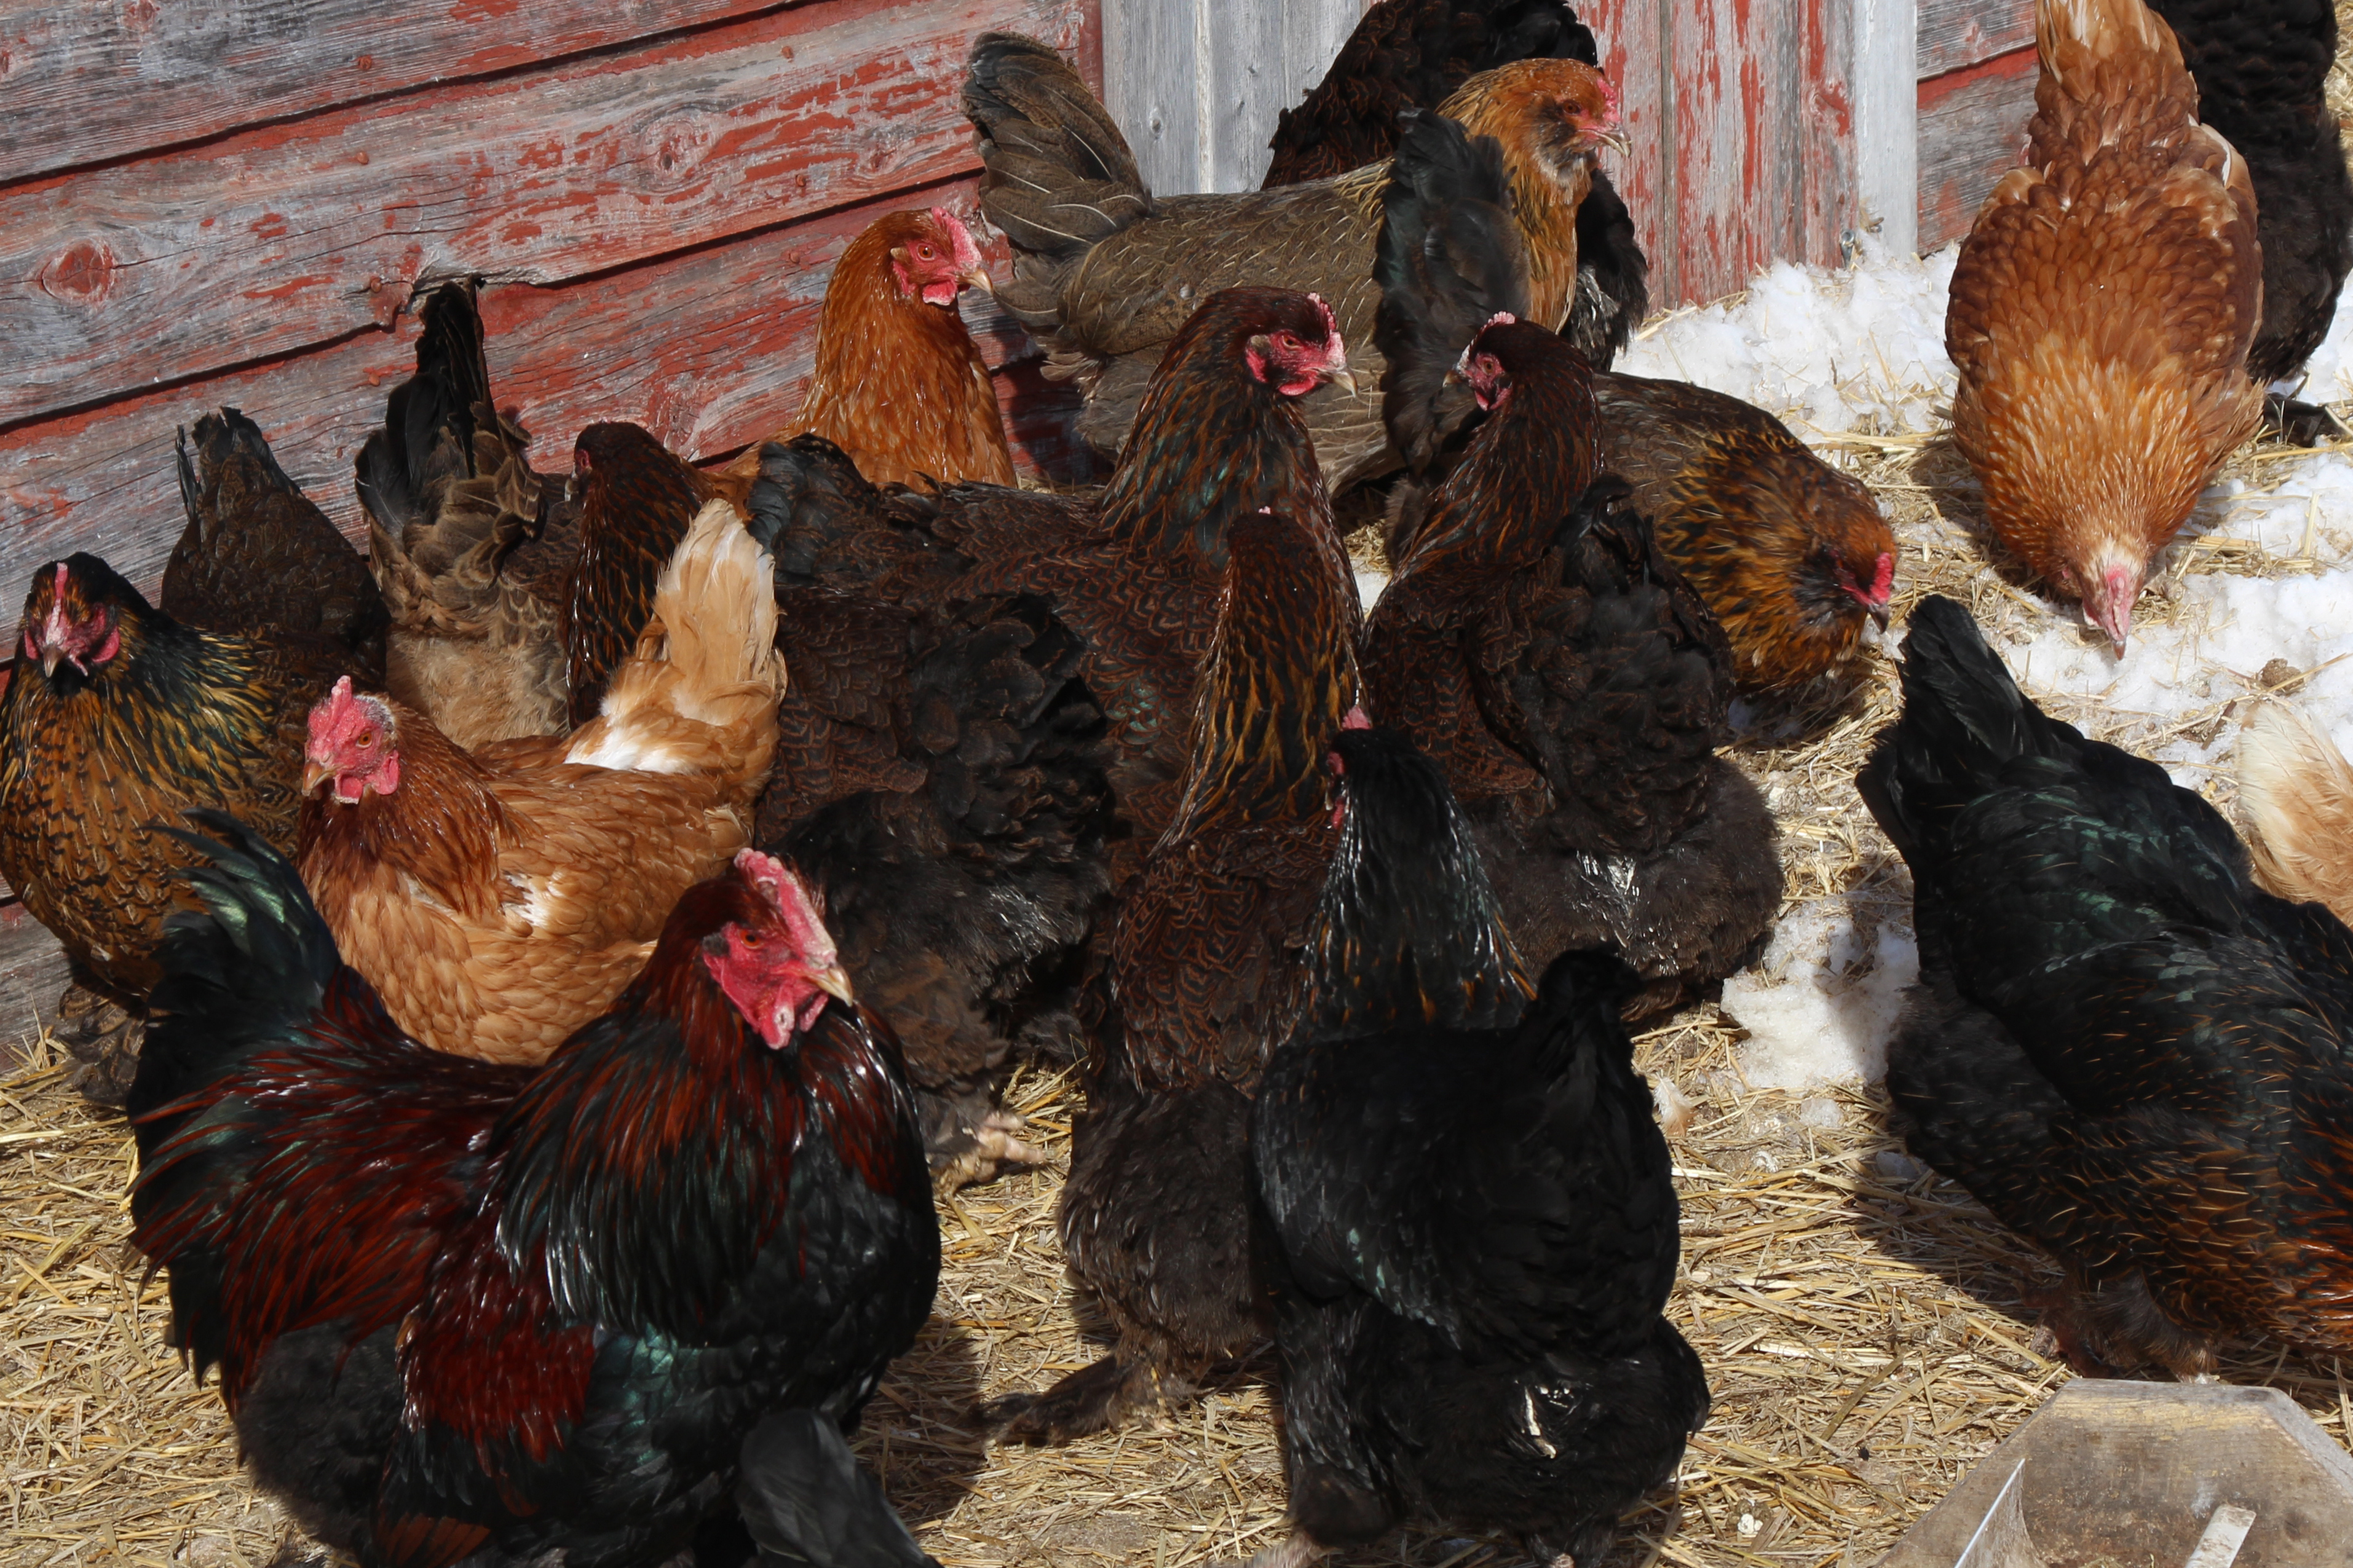
Our chickens have mites. Specifically,
Northern Fowl Mites. These little critters are pretty common all
across Canada, and they can be a great big problem.
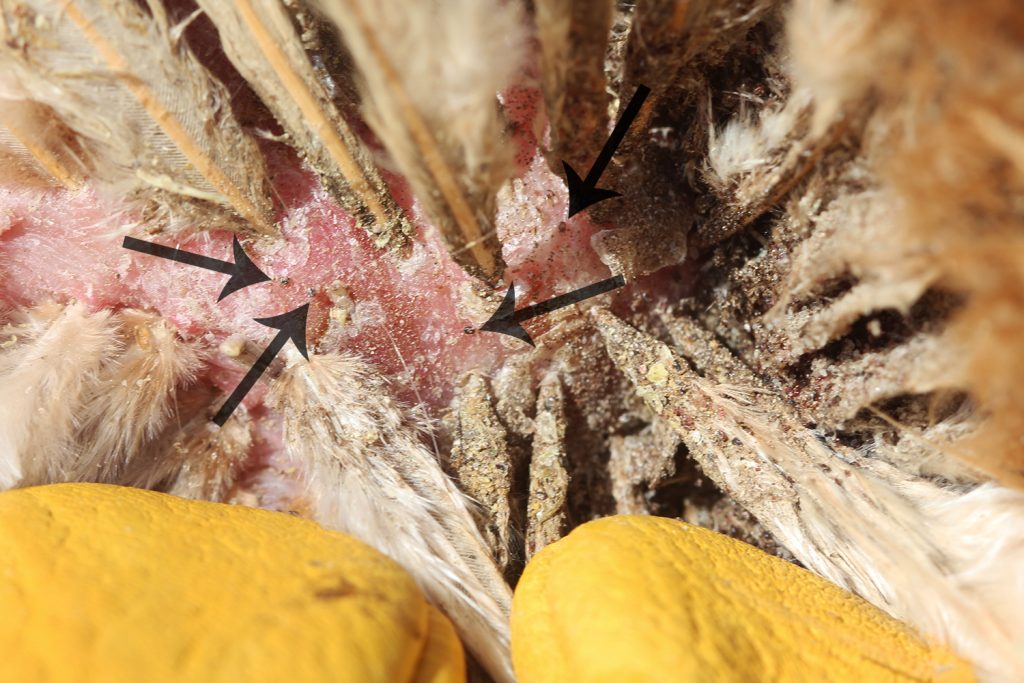
The most obvious symptom of poultry mites are poopy bums on your chickens. If you pick up a chicken and examine their vent (bum) area, you will see dirty feathers (mite eggs and other yuck), and you will also probably see some tiny dark brown or black round specks moving around – these are the mites themselves. Northern Fowl Mites hang out on the skin around the vent and under the wings, and they bite the chickens and feed on their blood.
The Chicken Chick has a great article about how to identify parasites in chickens, which is helpful in figuring out whether you are dealing with mites or lice, as the treatments may differ.
Northern Fowl Mites are difficult to
treat. They have a short life cycle (5-7 days), and they quickly
develop resistance to various treatments. Besides living on the
chickens, they also infest nesting boxes and coop bedding, adding to
the difficulty in dealing with them.
Right now, though, the biggest issue
with treating them is that there is no approved treatment in Canada.
It used to be that you could buy an
over-the-counter dusting powder that you sprinkled on your chickens,
the nesting boxes, and the bedding, with a repeat in a few days, and
generally the mites were dealt with. However, that product was
pulled off the shelves last year, with no tested and approved
replacements.
There is all sorts of advice floating
around the internet for how to treat mites without dusting powder,
but I had trouble finding sources that were Canadian (and therefore
recommending products that are actually available here) and also
reliable.
So I asked my vet.
My vet said that any treatments would
be off-label, which is a problem, because there is no information
about withdrawal times. Withdrawal time is the amount of time that
any medication keeps showing up in the eggs or meat, and could
therefore affect anybody eating those eggs or that meat. You
definitely don’t want to poison your kids when you’re trying to kill
the mites!
Ugh. I needed more information.
Through a long and winding series of
phone calls and emails, I eventually found myself speaking with
Poultry Veterinarian Dr. Stephanie Smith. Dr. Smith has a passion
for chicken issues, and was extremely helpful.
Dr. Smith recommended treating every
bird in the flock, whether they had obvious mites or not, as there is
a very high chance that they are all carrying at least a few mites,
and we definitely don’t want them passing those mites between the
treated and untreated chickens. That would increase the chances of
the mites developing resistance to whatever treatment we use.
The first treatment we discussed was Diatomaceous Earth (DE). This is a powder made from a particular type of rock full of fossilized diatoms. The particles in the powder are tiny, but have very sharp edges that cut insects’ bodies when the insects crawl across it. Diatomaceous Earth is organic, so some people like to use it for bug control, but its effectiveness is questionable, and the sharp particles can cause respiratory problems if the chickens breathe it. If you were using DE, you would need to thoroughly dust each bird with the powder in a well-ventilated area (preferably outside). Some people also spread DE around their coop, but this runs the risk of causing respiratory problems as the chickens dust bathe and breathe the DE.
Sulfur can also be used to control
Northern Fowl Mites, but it can cause allergic reactions in people,
and is generally not a good choice for a backyard flock.
There is a product called Ectiban that is an insecticide approved for use in cattle in Canada; Dr. Smith suggested it as a good way to control the mites in the nesting boxes and coop litter, though it is not approved for use on the chickens themselves in Canada. I did find a website that gives dosage information for actual use on chickens, with accompanying withdrawal times before butchering. Unfortunately, there is no information about withdrawal times in laying hens, and it is not clear if this is an approved use in Canada.
Another option for spraying directly on chickens is called Debantic. Dr. Smith noted that the nice thing about this insecticide is that there is no withdrawal period for eggs. Debantic is a powder that gets mixed with water to make a spray that you spray on the chickens. The downside of this product is that it has to actually contact the mites in order to kill them, and it might need several applications to be effective. Here is some further information about Debantic.
Lastly, we discussed Ivermectin.
Ivermectin is a product used in horses, cattle and swine; it has not
been tested or approved for use in chickens. It is available in a
paste that is used for worming horses, as well as an injectable
liquid for cattle and swine. The paste is not a good idea for use on
chickens, as it is very hard to control the dosage; using the liquid
(injectable or pour on) 1% Ivermectin product gives you a lot more
control.
Dr. Smith noted that you can put a drop or two of the injectable Ivermectin on the chicken’s skin (not injected) at the bottom of its neck, and it will be absorbed into the chicken and kill the mites when they suck the chicken’s blood. She suggested that people consult their vets for dosing, as chicken weights vary from scrawny little layers to the big dual-purpose and meat breeds, so it’s a good idea to run it by a professional before medicating your flock.
Some people put Ivermectin in their
chickens’ water, but this is not recommended for backyard flocks, as
it is very difficult to calculate and control the dosage. Dr. Smith
also mentioned that if you use Ivermectin too frequently (less than 7
days between doses), there can be problems with toxicity – it can
make your chickens sick. There is no established withdrawal period
for meat or eggs, but most vets recommend not slaughtering the
chickens or eating the eggs for 3-4 weeks.
It is frustrating that there is not a simple solution to poultry mites in Canada. There is a fine line between killing all the mites and preventing resistance on one hand, and having lengthy (or just plain unknown) withdrawal times to make sure you don’t poison your family. I also would be very careful about disposing of the treated coop bedding, as you don’t want to be adding insecticides to your garden, especially since it is hard to find information about how long they persist in the soil.
I would have probably been a gardener
and chicken keeper and wanna-be orchardist whether the environment
was under threat or not. I have to say, though, that climate change,
extinctions, and environmental degradation make the whole project
feel more…urgent, somehow.
At the same time, sometimes it really feels like a fart in a windstorm. I mean, the dozen or so trees we plant this spring won’t make a lick of difference in the face of North American carbon emissions…including our own, given that I have to commute by car to get to work. We can grow all of our own potatoes and squash for the year, but still make no substantial difference in the grand scheme of things. It’s disheartening.
Reading the news stories on climate change, and seeing the effects right here on our acreage is scary. Scary and demoralizing. Depressing, even. There doesn’t seem to be much good news, or even hope.
I hang out on a forum called Permies – and it is a pretty cool place, with a bunch of people making their own hope by doing all sorts of things to benefit the planet and themselves. Permies is run by Paul Wheaton, and Paul Wheaton has just launched a kickstarter to publish a book that he co-authored with Shawn Klassen-Koop: Building A Better World in Your Backyard (Instead of Being Angry at Bad Guys). I am really excited about this book, because it looks at solutions, and solutions that don’t involve self-deprivation. From the Kickstarter page:
“What this Book is About
This book is a rich collection of things you can do at home that make a huge, positive, global difference. Without politics or being angry at bad guys. This book features a strong focus on adding luxury to your life instead of sacrifice. And the frosting on the cake is saving a lot of money.
There have been too many recent reports that have spelled out “it’s too late.” Maybe if the authors of those reports get this book, they will change their report to “there’s still hope! If enough of us do the stuff in this book ….”
Anyhow, I have already made a pledge, and am looking forward to getting my copy of the book. If you’d like to make a pledge, check it out here!
(The link is an affiliate link, and if you click on it and make a pledge, I may get a small reward that will help support my blog, at no extra cost to you. If you are uncomfortable with affiliate links, click here to support the project without my affiliate link)
Well, it’s actually kind of a big deal
around here.
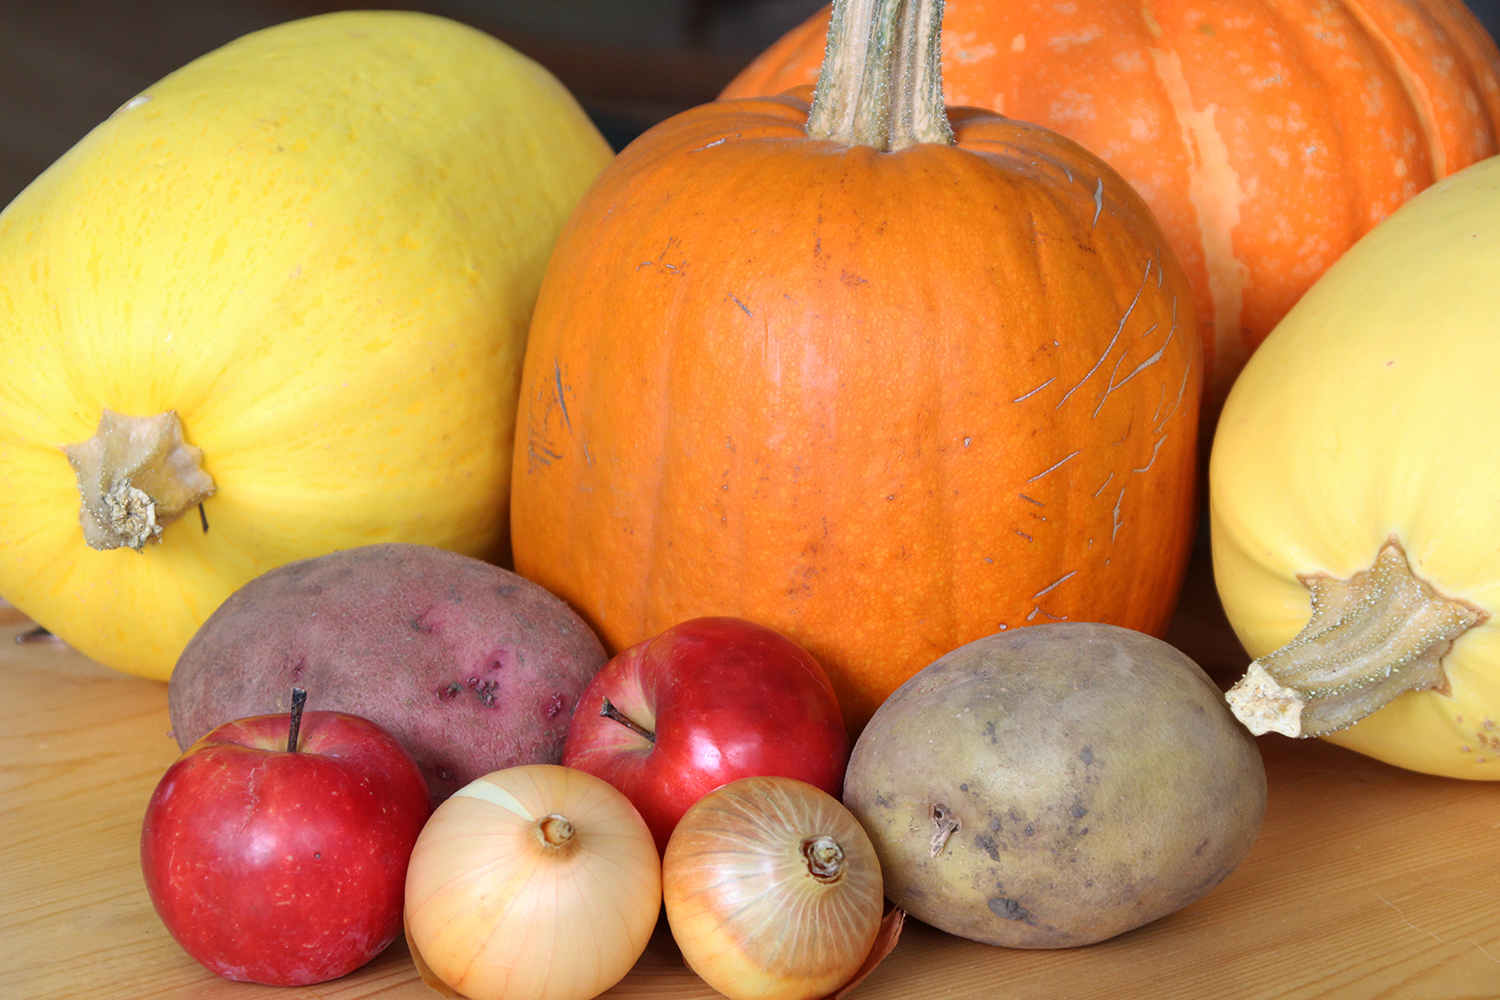
You see, we normally harvest at least
90 squashes and pumpkins of various types each fall, and most of
those get stored to be used through the winter. Over the years,
we’ve discovered approximately how long each variety of squash we
grow will last in our storage conditions, and we use them up in that
order. Pie pumpkins first, since they usually don’t last much past
Christmas for us. Then the long-keeping c. maxima squashes like Red
Kuri and Sweet Meat, which generally make it until March or April.
Lastly, we dig into the Spaghetti squash, which seems to last
virtually forever, or at least until our next harvest. I’m not sure
if we’ve ever had a Spaghetti squash go bad on us, though one time we
cut into one to find all of the seeds had sprouted!
Our little landrace breeding experiment, where we save cross-pollenated seeds and replant them, has added a new twist to our squash eating schedule. I assumed that since all of the parent squash were long keepers, that my F1 (first-generation) hybrids would store well. I was wrong. About half got rotten or soft spots before we even finished curing them.
It messes us up when things go bad out
of order, or get gooey on the spare room floor. Not only is there
the mess to clean up, but we also hate to waste the food. It’s kind
of been a year for that, though. First, half the maxima hybrids
unexpectedly went kapoot. Then, the pie pumpkins went and lasted
until April. Now, some of my c. maximas are stealth rotting.
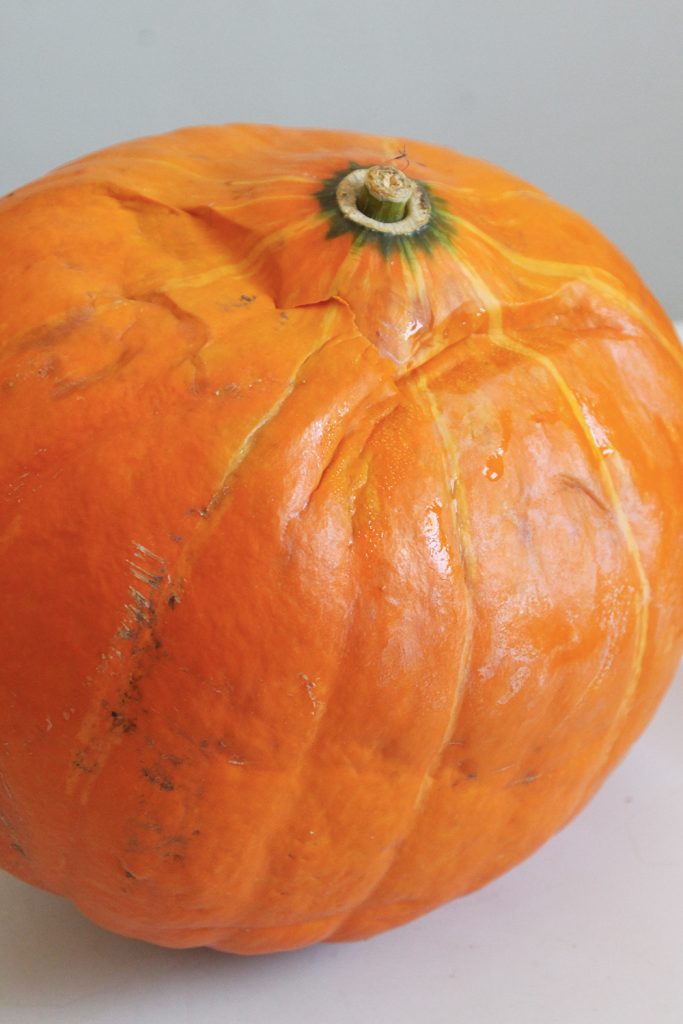
Of course, at the exact same time, some of our squashes have developed weird spots or discolorations that did not affect the meat at all, which has made it more difficult to identify which squashes are actually starting to go off. We had an exceptionally dry growing season, and grew some of our squash in a different spot than we have in the past, which may have caused some of the spots.
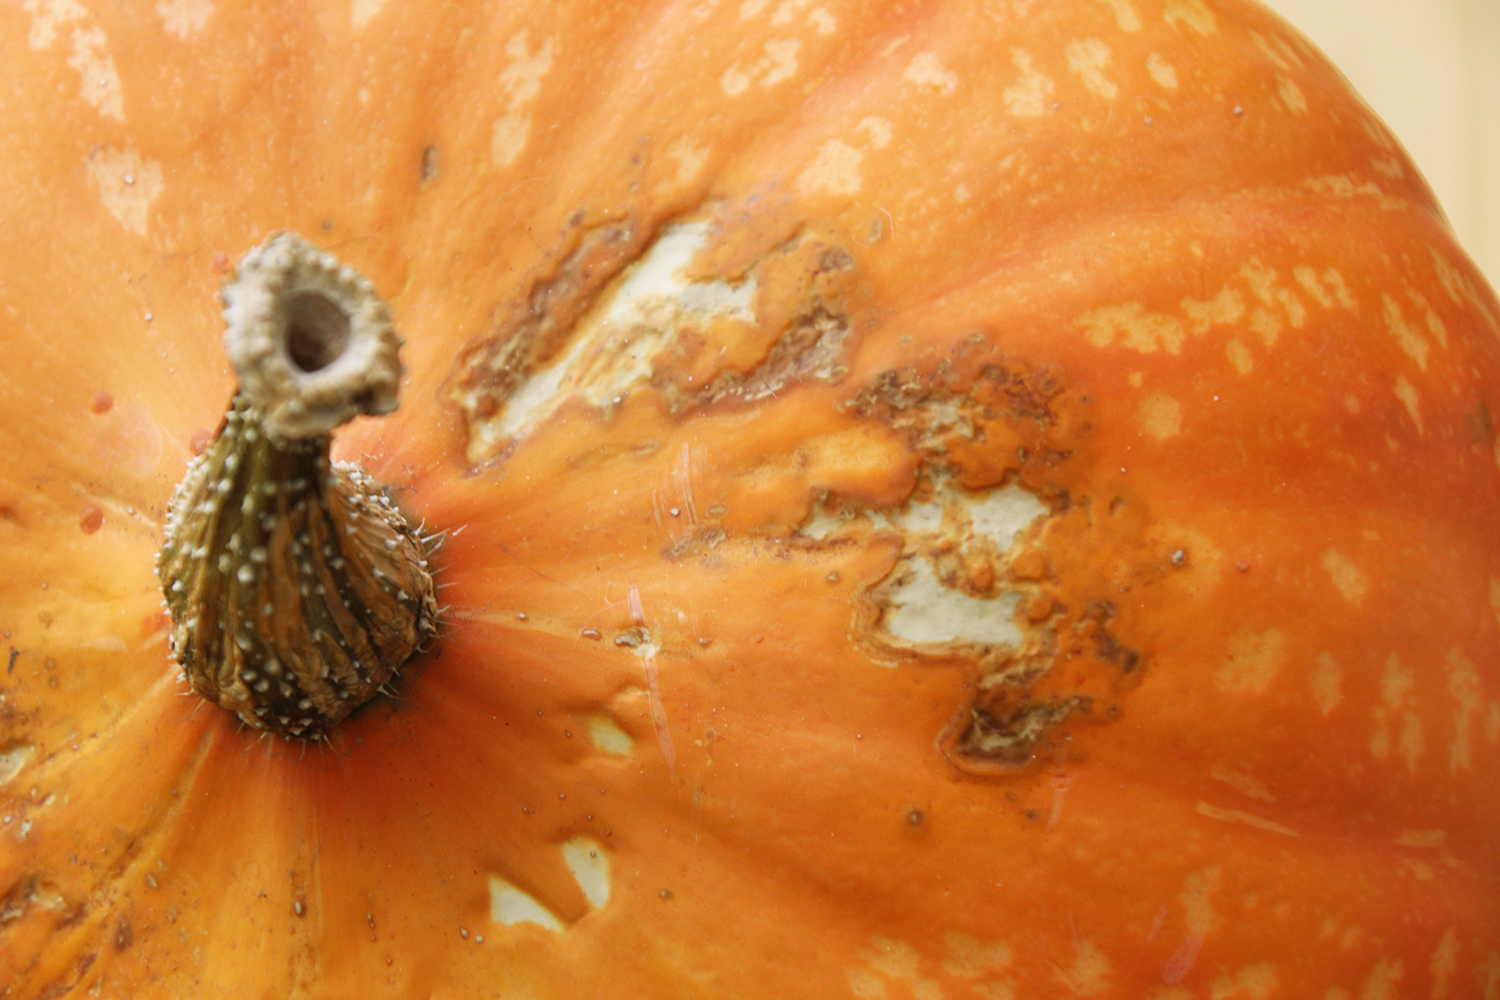
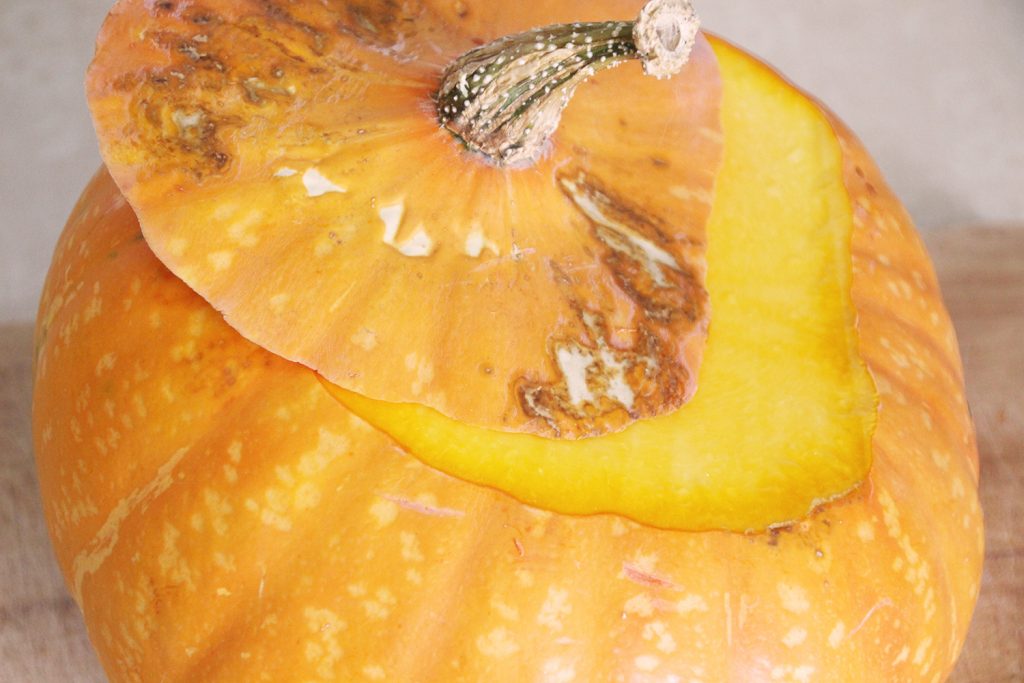
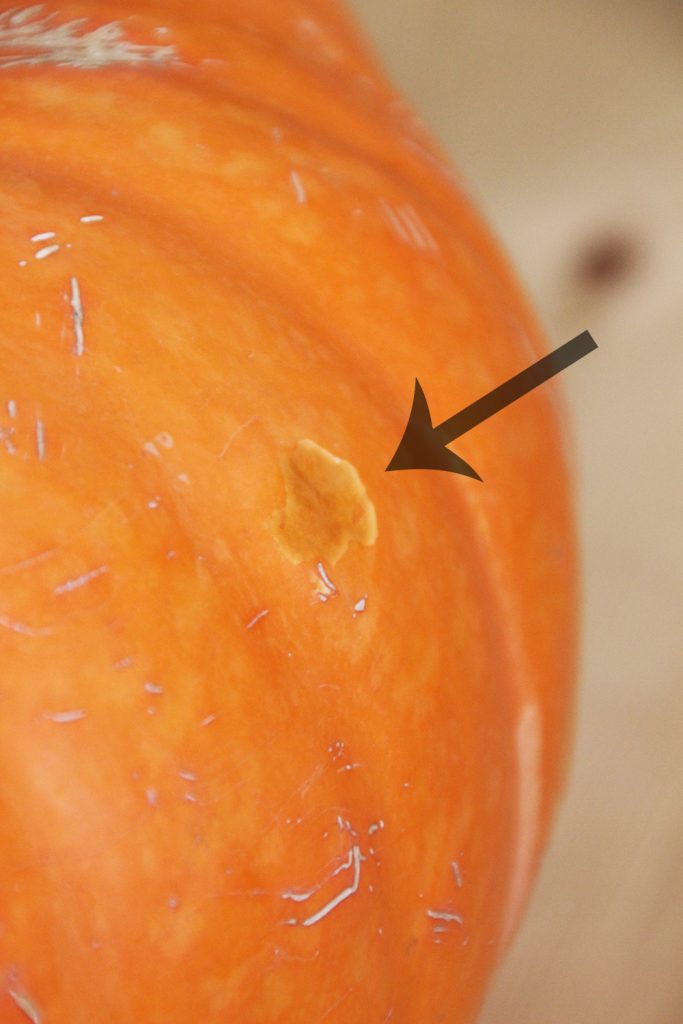
Usually, a squash that’s about to go bad develops little indented soft spots. This isn’t exactly rot, but it’s where the rot will happen. A lot of the time, on our squash, at least, it tends to start around the stem, or on the ‘shoulders’ of the squash. If we notice it in time, we use the squash right away, or roast it and freeze the puree for baking later. The little spots are hard to notice, though, especially if you’re not going looking for them. We know to look for them, and try to check the squash over at least once a week, but they don’t last long, and are easy to miss if you’re in a hurry.
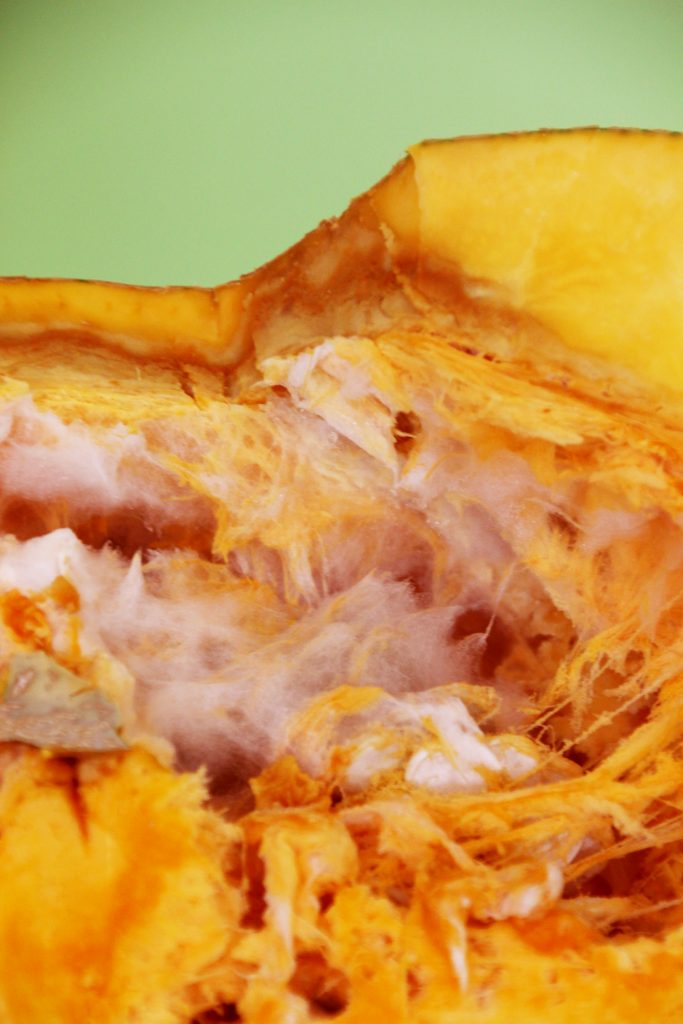
Next, there is the mold. Usually, our squash develops a black or dark colored mold, often in several places at once. We have been known to cut out the moldy spots and feed the firm flesh to the chickens; we don’t usually eat it if it gets to this point, though you probably could if you were careful to cut a wide margin around the moldy spots. Often, by the time there is visible mold on the outside of the squash, the whole seed cavity is moldy, too, which is a shame, since the chickens seem to enjoy the seeds.
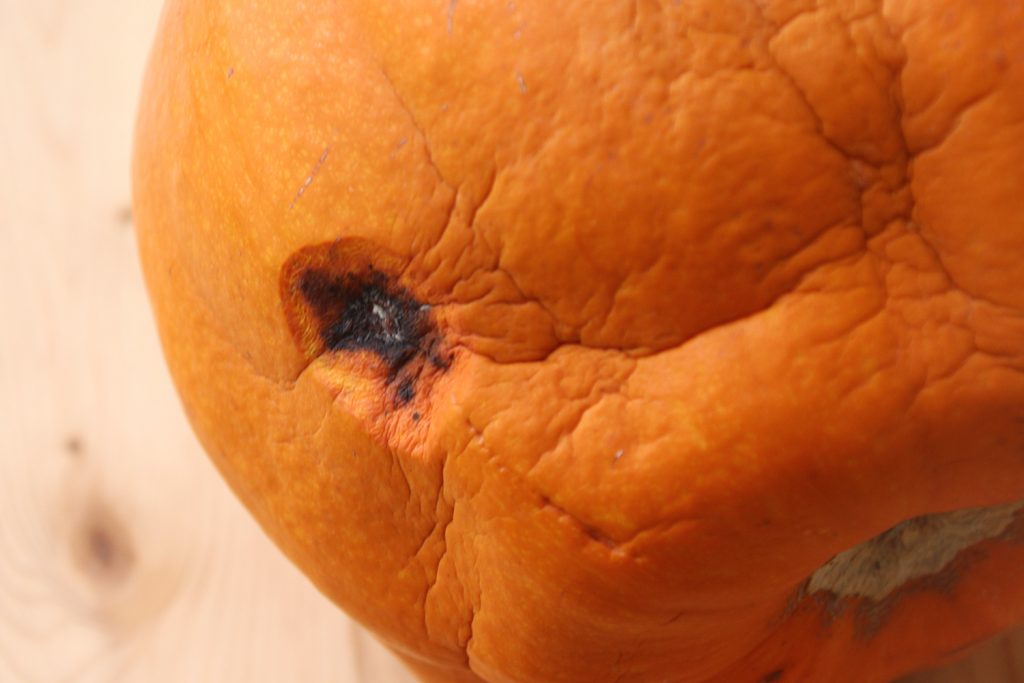
If we don’t catch it at the black and
spotty stage, the squashes tend to collapse into a gooey, smelly,
disgusting mess that is no fun at all to clean up.
This year, we’ve had a couple of squashes go from looking completely sound to being a crumpled, oozing mess with no warning, whatsoever. They don’t smell, and there is little or no mold; it is almost like they froze and the insides liquefied, though I know for a fact that none of these squashes got more than a light frost at any point. Combined with this pumpkins-till-April thing, I’m kind of scratching my head. Maybe we’ve got a new type of mold in our garden, or maybe our growing or storage conditions were subtly different in a way that favors a different kind of rot than we’ve seen in previous years.
Regardless, we’ve moved all of the
still-sound squashes off the floor and onto something a little easier
to clean up. We’re in the big push to use up the last of the c.
maxima squash before they go bad, anyway, since they don’t normally
last past April for us. We only have nine maximas left, which isn’t
many; we’ll often use two of the little ones in a single recipe.
We’ll roast them and freeze the puree, and try to sneak in a couple
more of our favorite maxima dishes before they’re done for the
season.
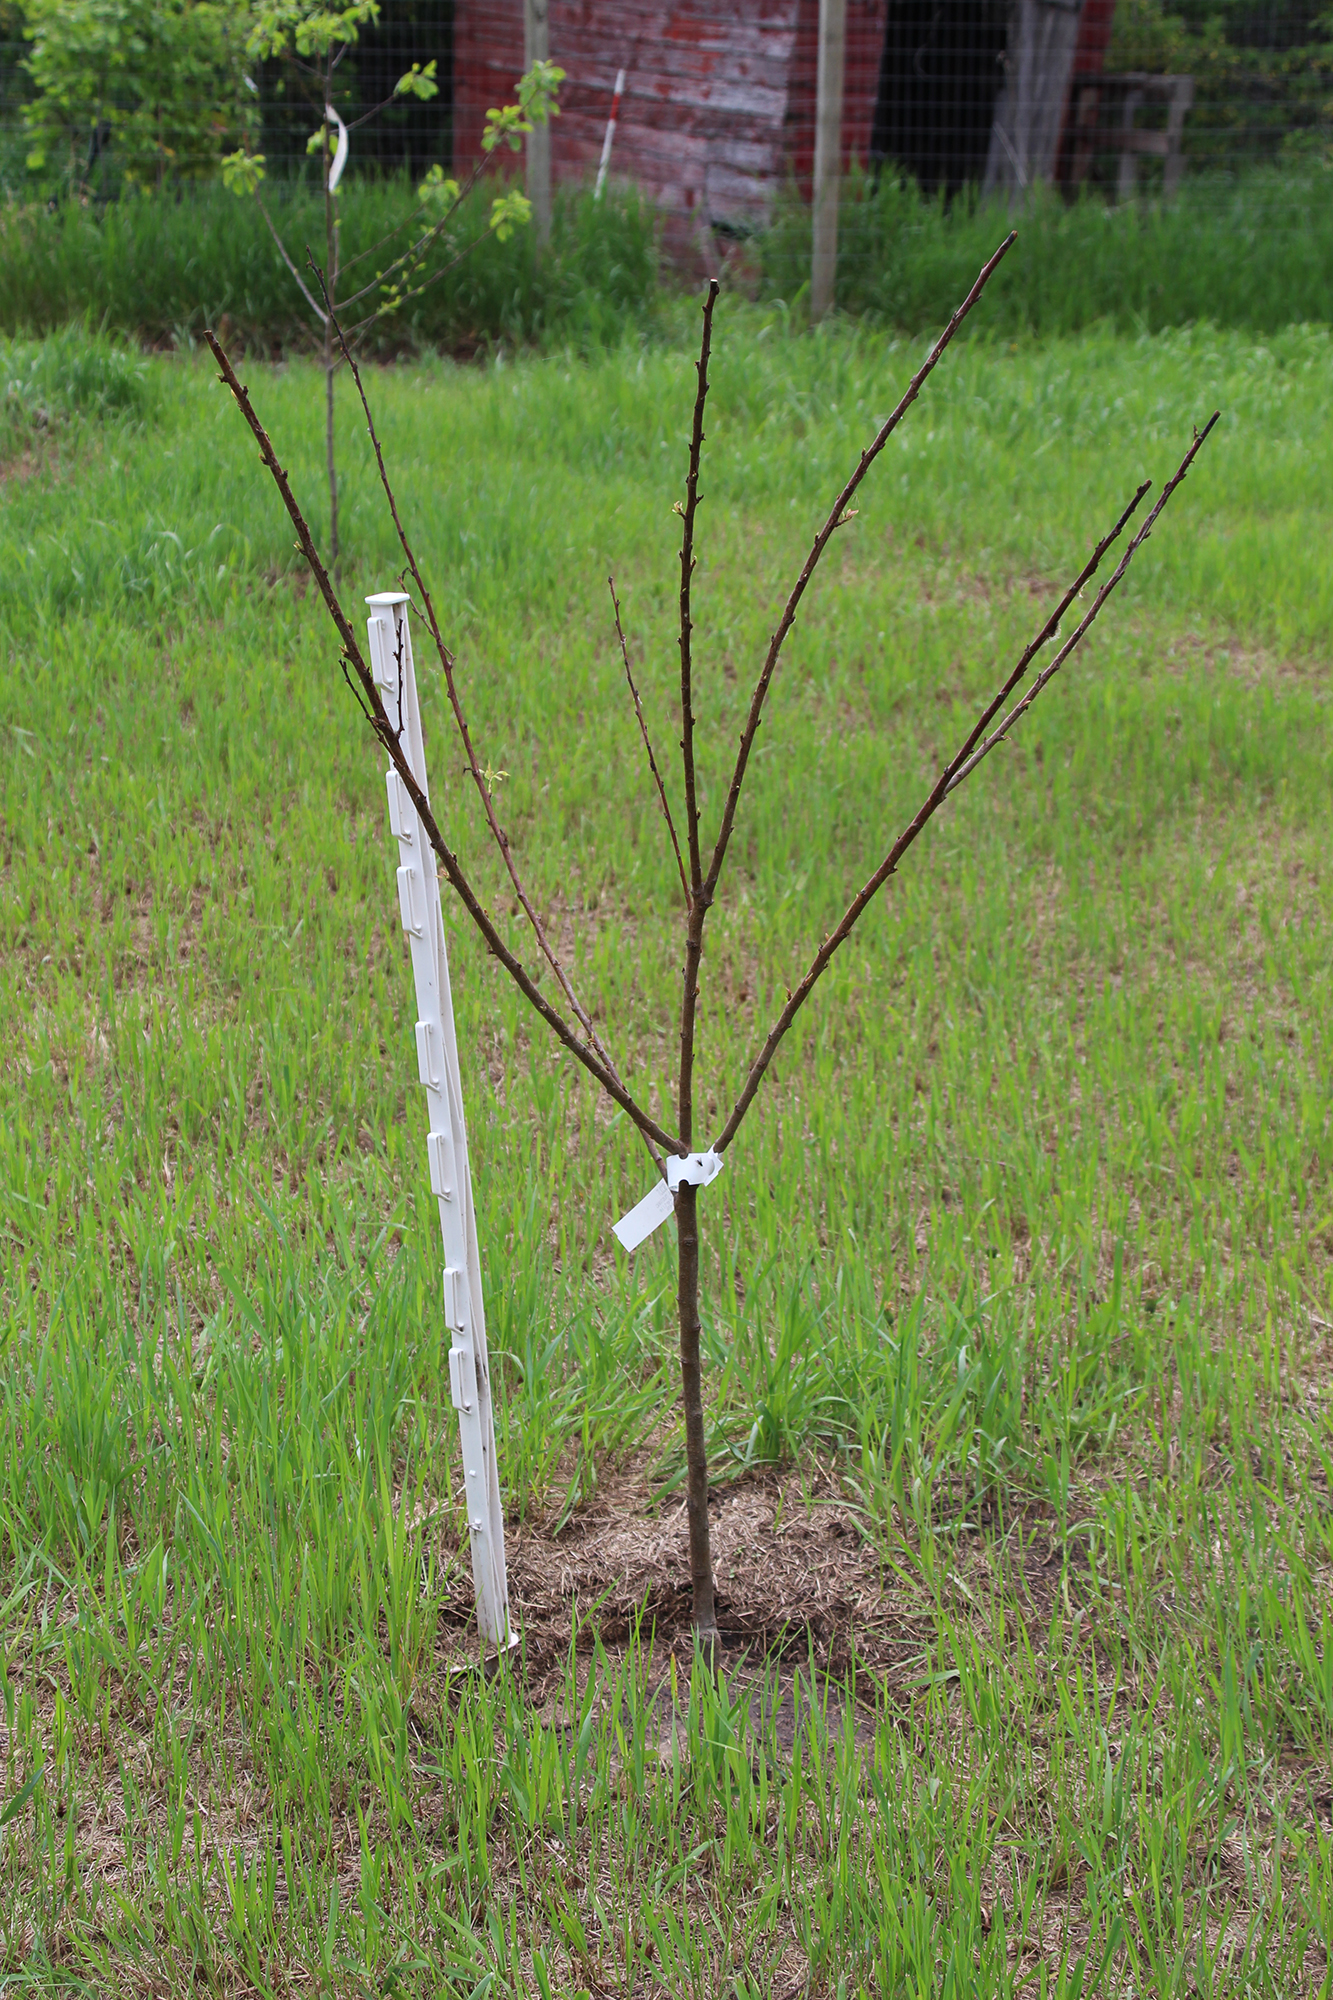
Living in Prairie Canada, with a short
season and low zone (2 or 3, depending on the winter and which zone
map you use), I have a heck of a time finding good places to order
fruit trees. There aren’t all that many places that carry
ultra-hardy trees to begin with, and even fewer nurseries are willing
to ship trees by courier or by mail.
Over the years, I have made a list of Canadian nurseries that have a good reputation, and who will ship fruit trees. I have personally ordered from most of these companies at some point in the last 10 years, and have been happy with the service I have received. Of the ones I have not personally ordered from, most have received good reviews from fellow growers that have ordered from them before.
Here is my big list of Canadian hardy
fruit tree nurseries that will ship by courier or by mail, in
alphabetical order:
Boughen Nurseries
Based in Nipawin, SK, Boughen Nurseries has a good selection of ultra-hardy (zone 2) fruit trees, including apples, pears, plums, and small fruit. I have ordered from them in the past, and was impressed with the size and vigour of the trees I received.
Corn Hill Nursery
Located in New Brunswick, Corn Hill Nursery specializes in roses (many of which are zone 2 hardy), but they also sell fruit trees and small fruits. While they only ship the large fruit trees by special arrangement, they will ship small fruits such as currants, haskaps, and grapes. We’ve gotten roses from Corn Hill, and they’ve done well even in extremely hard winters.
Golden Bough Tree Farm
Based out of Marlbank, ON, Golden Bough Tree Farm primarily specializes in landscaping trees such as birch and maple. However, they do have a small selection of fruit and nut trees, and they will ship bare-root trees within Canada.
Grimo Nut Nursery
Grimo Nut Nursery is based out of Niagara-On-The-Lake, ON. They specialize in nut trees, but also offer some fruit selections. Grimo’s trees are mostly suited to the warmer growing zones in Canada, though there are a couple of selections that are hardy to zone 3.
Hardy Fruit Trees
Specializing in hardy and ultra-hardy (zone 2-4) fruit trees, Hardy Fruit Trees is based in Rawdon, QC. They graft on full-sized rootstock, so if you are looking for dwarf trees, they may not have much for you. They have a good selection of trees, including some of the newer Russian pears that can be hard to find.
Haskap Central
Specializing in haskaps (duh!), Haskap Central is located in Henribourg, SK. They only sell haskaps, but they have a wide selection of cultivars to choose from, and they do not appear to have a minimum order.
Nutcracker Nursery
Based in Maskinongé, QC, Nutcracker Nursery is primarily focused on hardy nut trees (zones 3-5), but they also offer quite a broad selection of fruit trees, including some zone 2 & 3 apples, apricots, plums, and pears. They have really good descriptions of each variety. The website is not as user-friendly as some, but it is worth tolerating the endless scrolling to look through all of their varieties.
Oak Summit Nursery
I have not ordered from Oak Summit; I just discovered them recently, in February, 2024, though their website indicates they opened in 2020. They are located in Brandon, Manitoba, in zone 3, which is great for the Prairie growers, as so many of the fruit tree nurseries are located in much warmer zones in Ontario and Quebec. They have an impressive selection of hardy apple varieties.
Pépinière Ancestrale
Located in St-Julien, QC, Pépinière Ancestrale does not appear to have an English website option (the site is entirely in French), but Google Translate is your friend, here. They have a good selection of zone 2-4 fruit trees, as well as small fruits and grape vines.
Prairie Hardy Nursery
Prairie Hardy Nursery is based out of Two Hills, AB, and their shipping to AB and SK is much cheaper than shipping things in from Ontario or Quebec. They currently have a somewhat limited selection, but there are some interesting options in there, and everything is ultra-hardy, to zone 2. Prairie Hardy offers some more obscure / rare selections that are well suited to truly cold climates, and they are the only nursery I currently know of offering the ‘Arctic’ apricot series, which were bred in Saskatchewan.
Prairie Tech Propegation
Unfortunately, Prairie Tech is no longer in business.
Rhora’s Nut Farm & Nursery
Located in Wainfleet, ON, Rhora’s Nut Farm specializes in nut trees. Their trees are mostly suited for the warmer Canadian growing zones (zones 4-7), though there are a few varieties that are hardy to zone 3 or 2. They also offer some rare / unusual trees and shrubs, as well as small fruit.
Silver Creek Nursery
Silver Creek Nursery is located in Wellesley, ON. They are committed to organic and sustainable practices, and are in the process of becoming certified organic. Silver Creek has a wide selection of fruit tree varieties, including apricots, pears, apples, plums, sweet cherries, and peaches. While they do carry some zone 3 selections, most of their trees are more suited to the warmer Canadian zones (4, 5, and 6). Because of this, you will want to check the rootstock of your selections if you are in a colder zone. That said, I’ve gotten apricots from them that have survived terrible winters that killed off some of my other trees that should have been fully hardy.
T&T Seeds
T&T Seeds is primarily a garden seed seller, but they also carry some fruit trees and berries. They bill themselves as specializing in short-season annuals and perennials, and most of their fruit tree stock is hardy to zone 2 or, at most, zone 3. T&T is based out of Headingly, MB.
Treetime
Treetime is not primarily a fruit tree seller, and they generally offer bulk amounts of their trees. However, there is a good selection of berries, some fruit trees such as plums, and some interesting native fruit. Treetime is based out of Edmonton, AB.
Vignes Chez Soi
Located in Granby, QC, Vignes Chez Soi sells grape vines. They have a wide selection of hardy grapes, including a few that are hardy to zone 2 & 3. Vignes Chez Soi carries blue, red, and green grapes. They also have some seedless selections that will grow in the warmer zones of Canada (4&5). We are trying out a bunch of grapes from Vignes Chez Soi, as grapes are a bit easier to push zones with, given that you can take the vines down, lay them on the ground, and cover them to insulate them for the winter.
Whiffletree Nursery
From Elnora, ON, Whiffletree Nursery has a wide selection of fruit trees, including some unusual things like shipova and improved mountain ash. While most of their trees are geared more toward the warmer Canadian zones, they do have a significant number of zone 3 hardy fruit trees. Much of the rootstock they use is also hardy to colder zones (though you will still want to pay attention to the rootstock if you are in zone 2 or 3).
Do you know of other reputable fruit tree nurseries that will ship trees within Canada? Leave me a comment, and I’ll add it to my list!
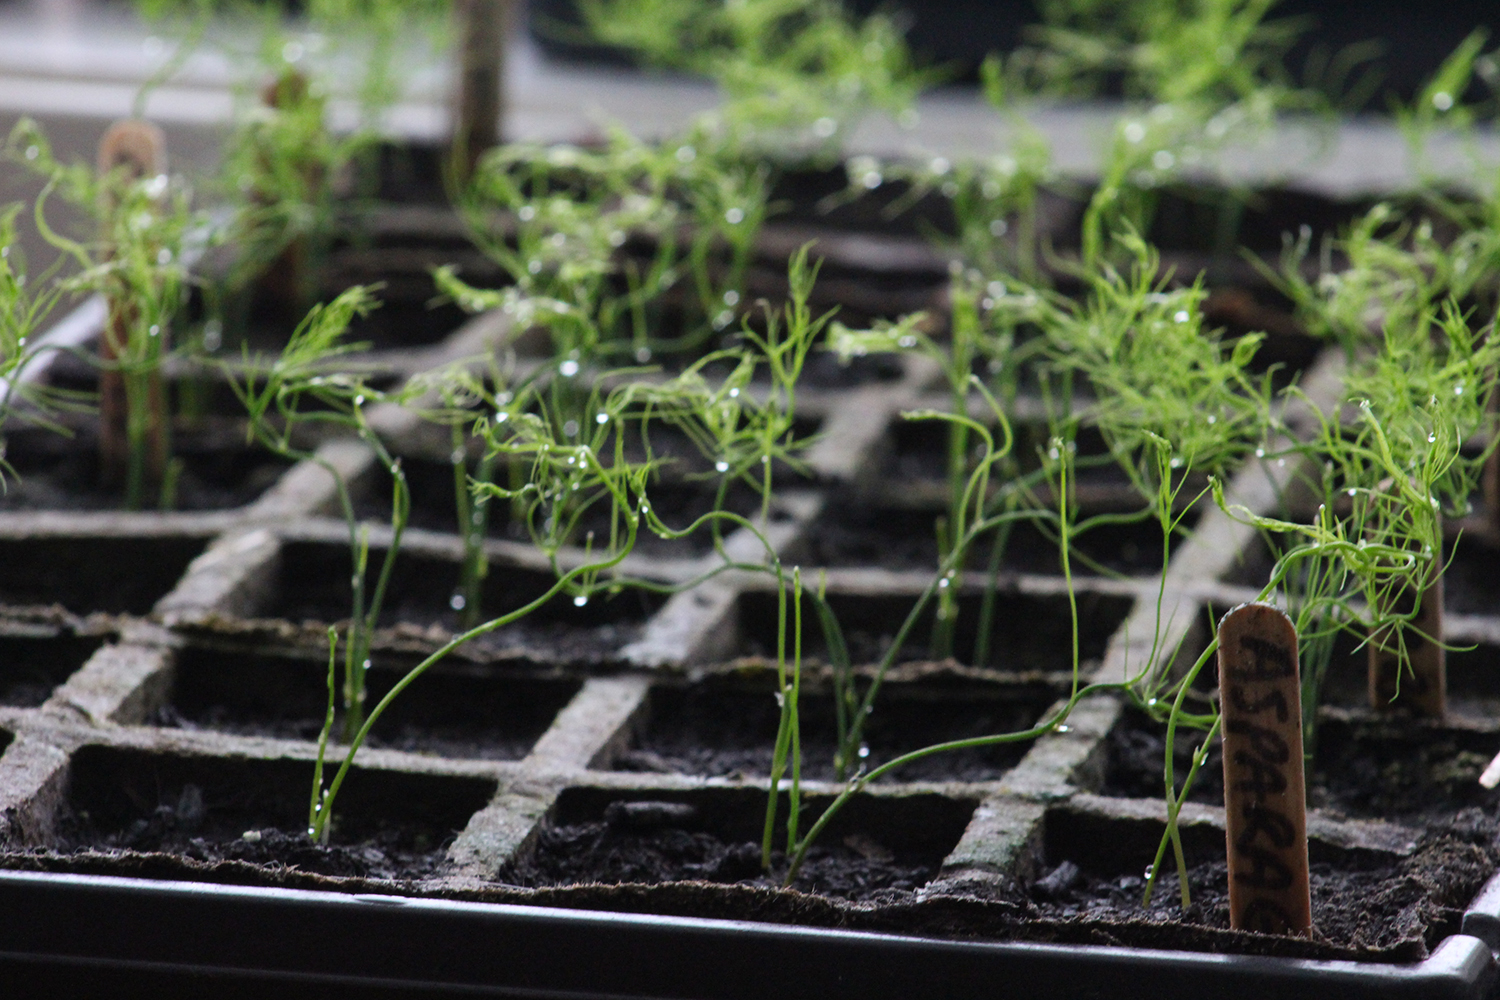
Three weeks ago, I planted a bunch of asparagus seeds. I know it’s waayyyy too early to be starting stuff for my regular garden, but the asparagus seed packets clearly stated that the seeds should be started three months before last frost, in part because the seeds take up to four weeks to germinate.
My asparagus seeds did not take four weeks to germinate.
Neither did the rudbeckia, echanasia, yarrow, or any of the other supposedly slow to germinate things I planted that day. I didn’t do anything special with the seed trays at all. I planted the seeds, watered them, put the covers on, and set them in a south-facing window…then basically forgot all about them, since they weren’t supposed to do much of anything for a long time.
The asparagus plants are so tall now that they are all crumpled up from pushing on the lid of my seed starting tray, but I don’t have anywhere to put the little plants, because it’s still snowing outside…
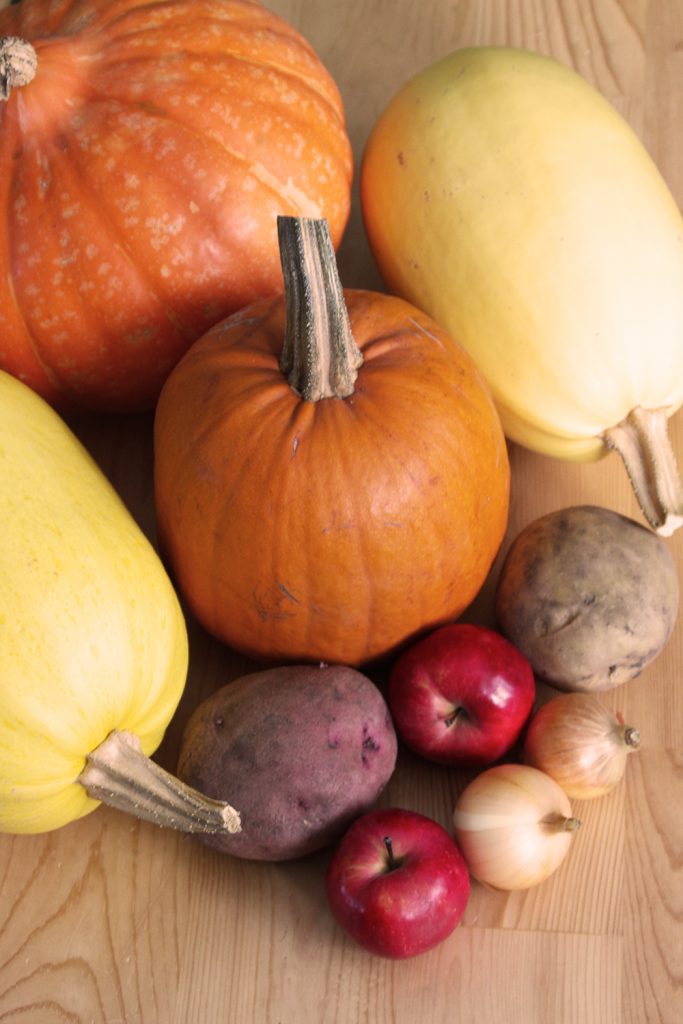
Here we are, the first week of April. Last month, I did a food storage / root cellar report for March; this is hopefully going to be a recurring feature. Here’s what we’ve still got in the root cellar (and other cold storage) in April:
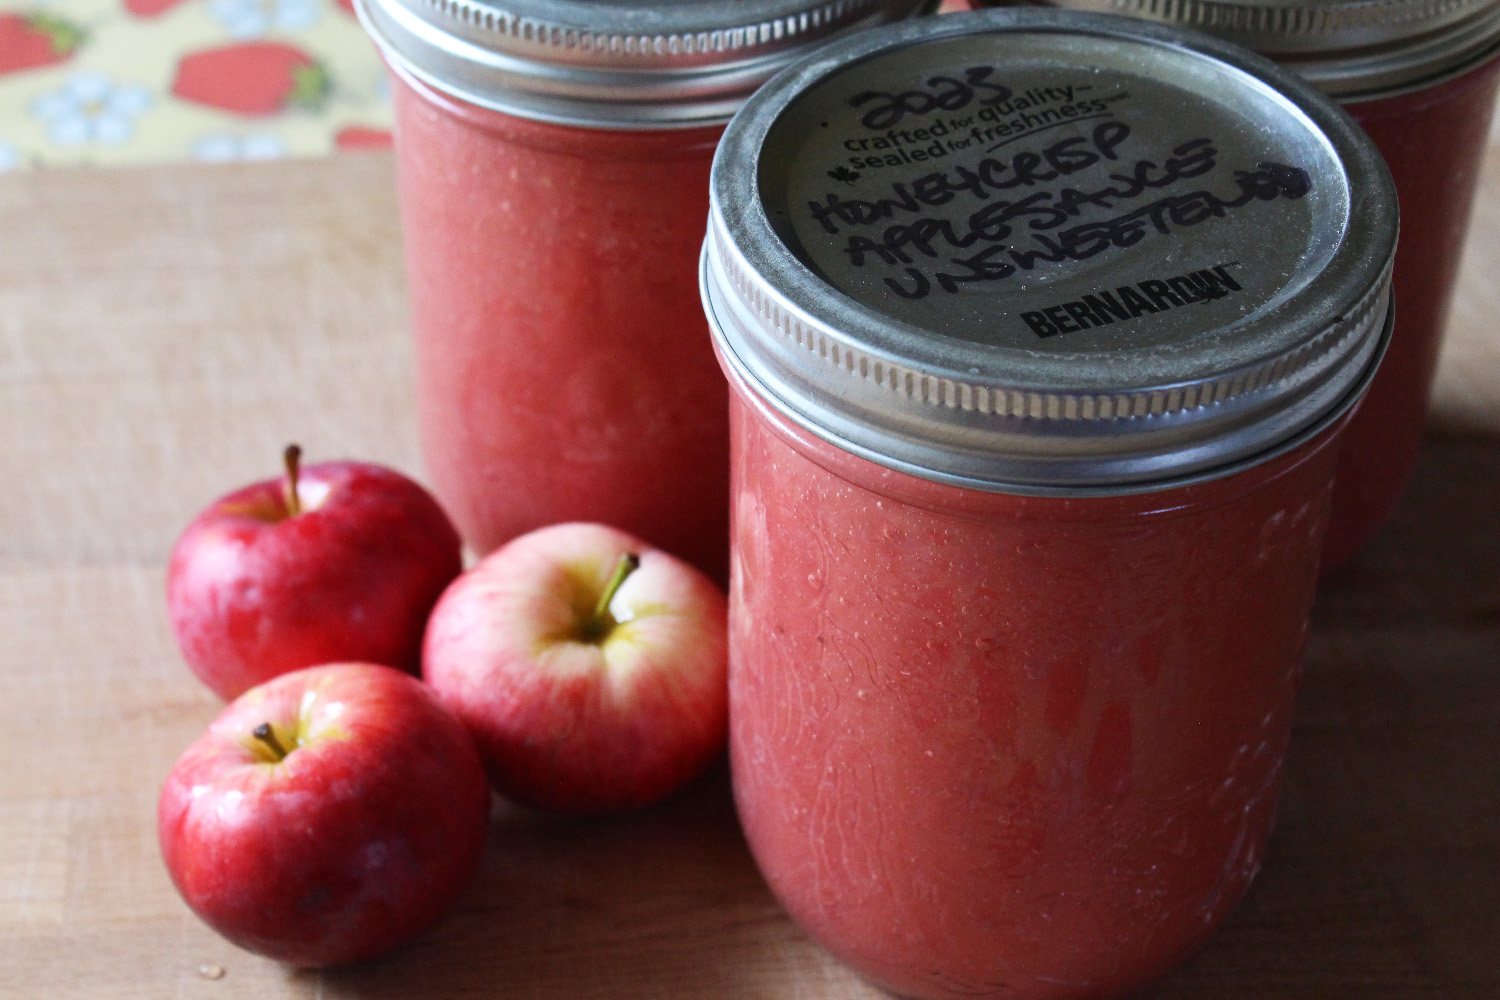
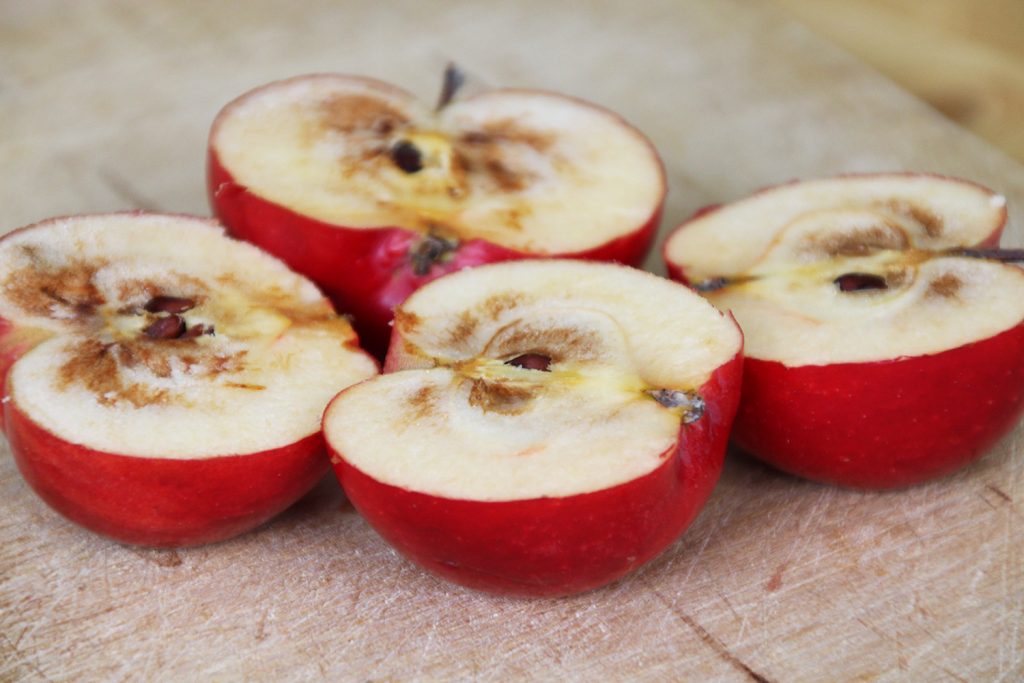
Honeycrisp Apples: The apples were stored in ziploc bags; some in the root cellar, and some in the fridge. They were basically done last month, but we left the firm ones to check again this month. While they looked good on the outside, the insides were pretty brown. You could probably eat these in an emergency, but we chose to feed them to the chickens for a treat, instead.
Maxima Squash: We store our squash in a cool room, though with the sun really hitting the windows on the house now, the temperature in there is starting to fluctuate quite a bit. These squashes look to be some sort of Mandan cross, from our landrace breeding experiment. We still have nine good-sized (ten-ish pounds) orange winter squashes left, and they seem to be going strong, despite a number of our other squashes succumbing to sudden rot. They have a really waxy feel to them, which may have been what allowed them to store so well. We will save the seeds from these for replanting.
Sugar Pie Pumpkins: I am blown away by
these. I have no idea why they are storing so long, but we still
have three sound pie pumpkins (a couple have gone soft since March).
Normally, the pie pumpkins don’t last much past Christmas. At this
rate, we’ll have pumpkin pie for Easter!
Spaghetti Squash: No surprise here. These often last until the next harvest. We even store them on shelves in the (much warmer) pantry and kitchen, and they don’t seem to care. We have more than a dozen left, and are really just starting to use them now, as we run low on the other types of squash. I do notice that the spaghetti squash that were stored in the cool room are denser and heavier than the ones stored in warmer locations, which is an interesting thing that I will try to keep paying attention to.
Potatoes: Our potatoes are still firm, and not yet sprouting. They are starting to get slightly bitter, though. I don’t know if it’s light exposure (from the little window in our root cellar) or just age, but it does seem to happen to us every year in the spring.
Onions: Again, the only surprise with the onions was that we have basically run out. Onions store well for us, just loose in a basket in the cool room.
Our carrots are done, now, and I think
we can call the apples done, though we’ll keep a few kicking around
just to see what happens with them. Pretty soon, we will have spring
eggs and early chives to add to our local food diet, and not too long
after that, we’ll be enjoying asparagus and rhubarb. I’m excited
about that, as we’ve tried to eat mostly seasonal vegetables through
the winter, and I’m just a bit tired of root veggies, cabbage, and
squash. The snow is just starting to melt off the garden, and in a
couple of weeks, we’ll be able to dig up the parsnips and carrots we
left in the ground last fall. We didn’t leave a lot for eating –
we’re going to try to save seeds from these – but I might just try
one or two to see how they taste!